We have a special offer available of 50% off your first two months of PocketSmith Foundation or Flourish for all new customers! Head to this page to claim the exclusive offer — the guide below can be followed once you’ve claimed this offer.
We’re delighted to welcome Mint.com users! Navigating the shift to PocketSmith is designed to be as smooth as possible and we’re here to ensure you have all the support you need. This guide will help you transfer your financial data effortlessly, set up insightful budgets based on your historical spending, and establish connections with your banks for ongoing automatic transaction and account updates.
A bit about our roots: Since launching in 2008, PocketSmith has been an independent and self-funded entity. In a domain where personal finance tools have appeared and disappeared, our commitment has been unwavering — to develop exceptional financial tools that we use ourselves. Our vision is long-term, and we’re not going anywhere.
We’d like to make one thing clear: At its heart, PocketSmith is a premium service. Our business model is straightforward — we are sustained by users who appreciate and choose to pay for finely-crafted software. Transparency and integrity are our bedrocks; you won’t find any hidden commissions or sale of personal data in PocketSmith. Our commitment to these principles is embedded in our Terms of Service.
While PocketSmith does offer a free plan suitable for basic use, it’s important to know that access to bank feeds is a feature of our paid subscriptions. Should you be in search of a free solution with bank feeds included, you may wish to look elsewhere. But it’s worth bearing in mind the adage “if you’re not paying for the product, you are the product”.
We’re eager for you to dive in and start your PocketSmith journey, so let’s get going!
For those of you who are seasoned in using personal finance applications and prefer to hit the ground running, we’ve compiled the essential steps right here at the beginning. This list might be enough to get you started on PocketSmith without any delay. If you need more in-depth guidance, we’ve got you covered with detailed explanations further down.
Now that you’ve got the gist of what’s to come, let’s delve deeper into each step!
Mint.com allows you to download CSV files of your transaction history which is stored with them. This file includes all transaction details, including account names, categories, labels and notes as well. All of this data will be imported into PocketSmith as part of the process — so all of your account names, transactions, categories, labels and transaction notes will be intact.
Important note: Mint only allows exporting of 10,000 transaction at a time, which might be inconvenient to say the least. If you have a lot of history in Mint, you’ll need to use the filters on their transactions page to download multiple files; more on this below. Mint also has these instructions on their own help site.
These are the steps to follow:
Log into Mint.com.
Head over to the Transactions page.
If necessary, select Filters from the top left, to reduce the number of transactions in the export, keeping in mind that only 10,000 transactions can be exported at once. If you have significantly more than this, exporting entire calendar years at once might be the easiest way to achieve a full export.
Scroll down to the bottom of the page.
Click the link to Export transactions.
With your Mint data file downloaded to your computer, you’re good to move onto the next stage!
Once you’ve signed up for PocketSmith, you’re all set to bring in your financial history from Mint.com. Our user-friendly import tool helps you transfer your categories, transactions, labels, notes and accounts to mirror what you had set up previously in Mint.
1. Navigate to the Express Import page
Upon creating your PocketSmith account, you’ll be greeted with the Welcome screen. Select the Bring your own data button on the right, followed by the Move from another app button. A selection of app logos will appear — you’ll be looking for the Mint.com option displayed.
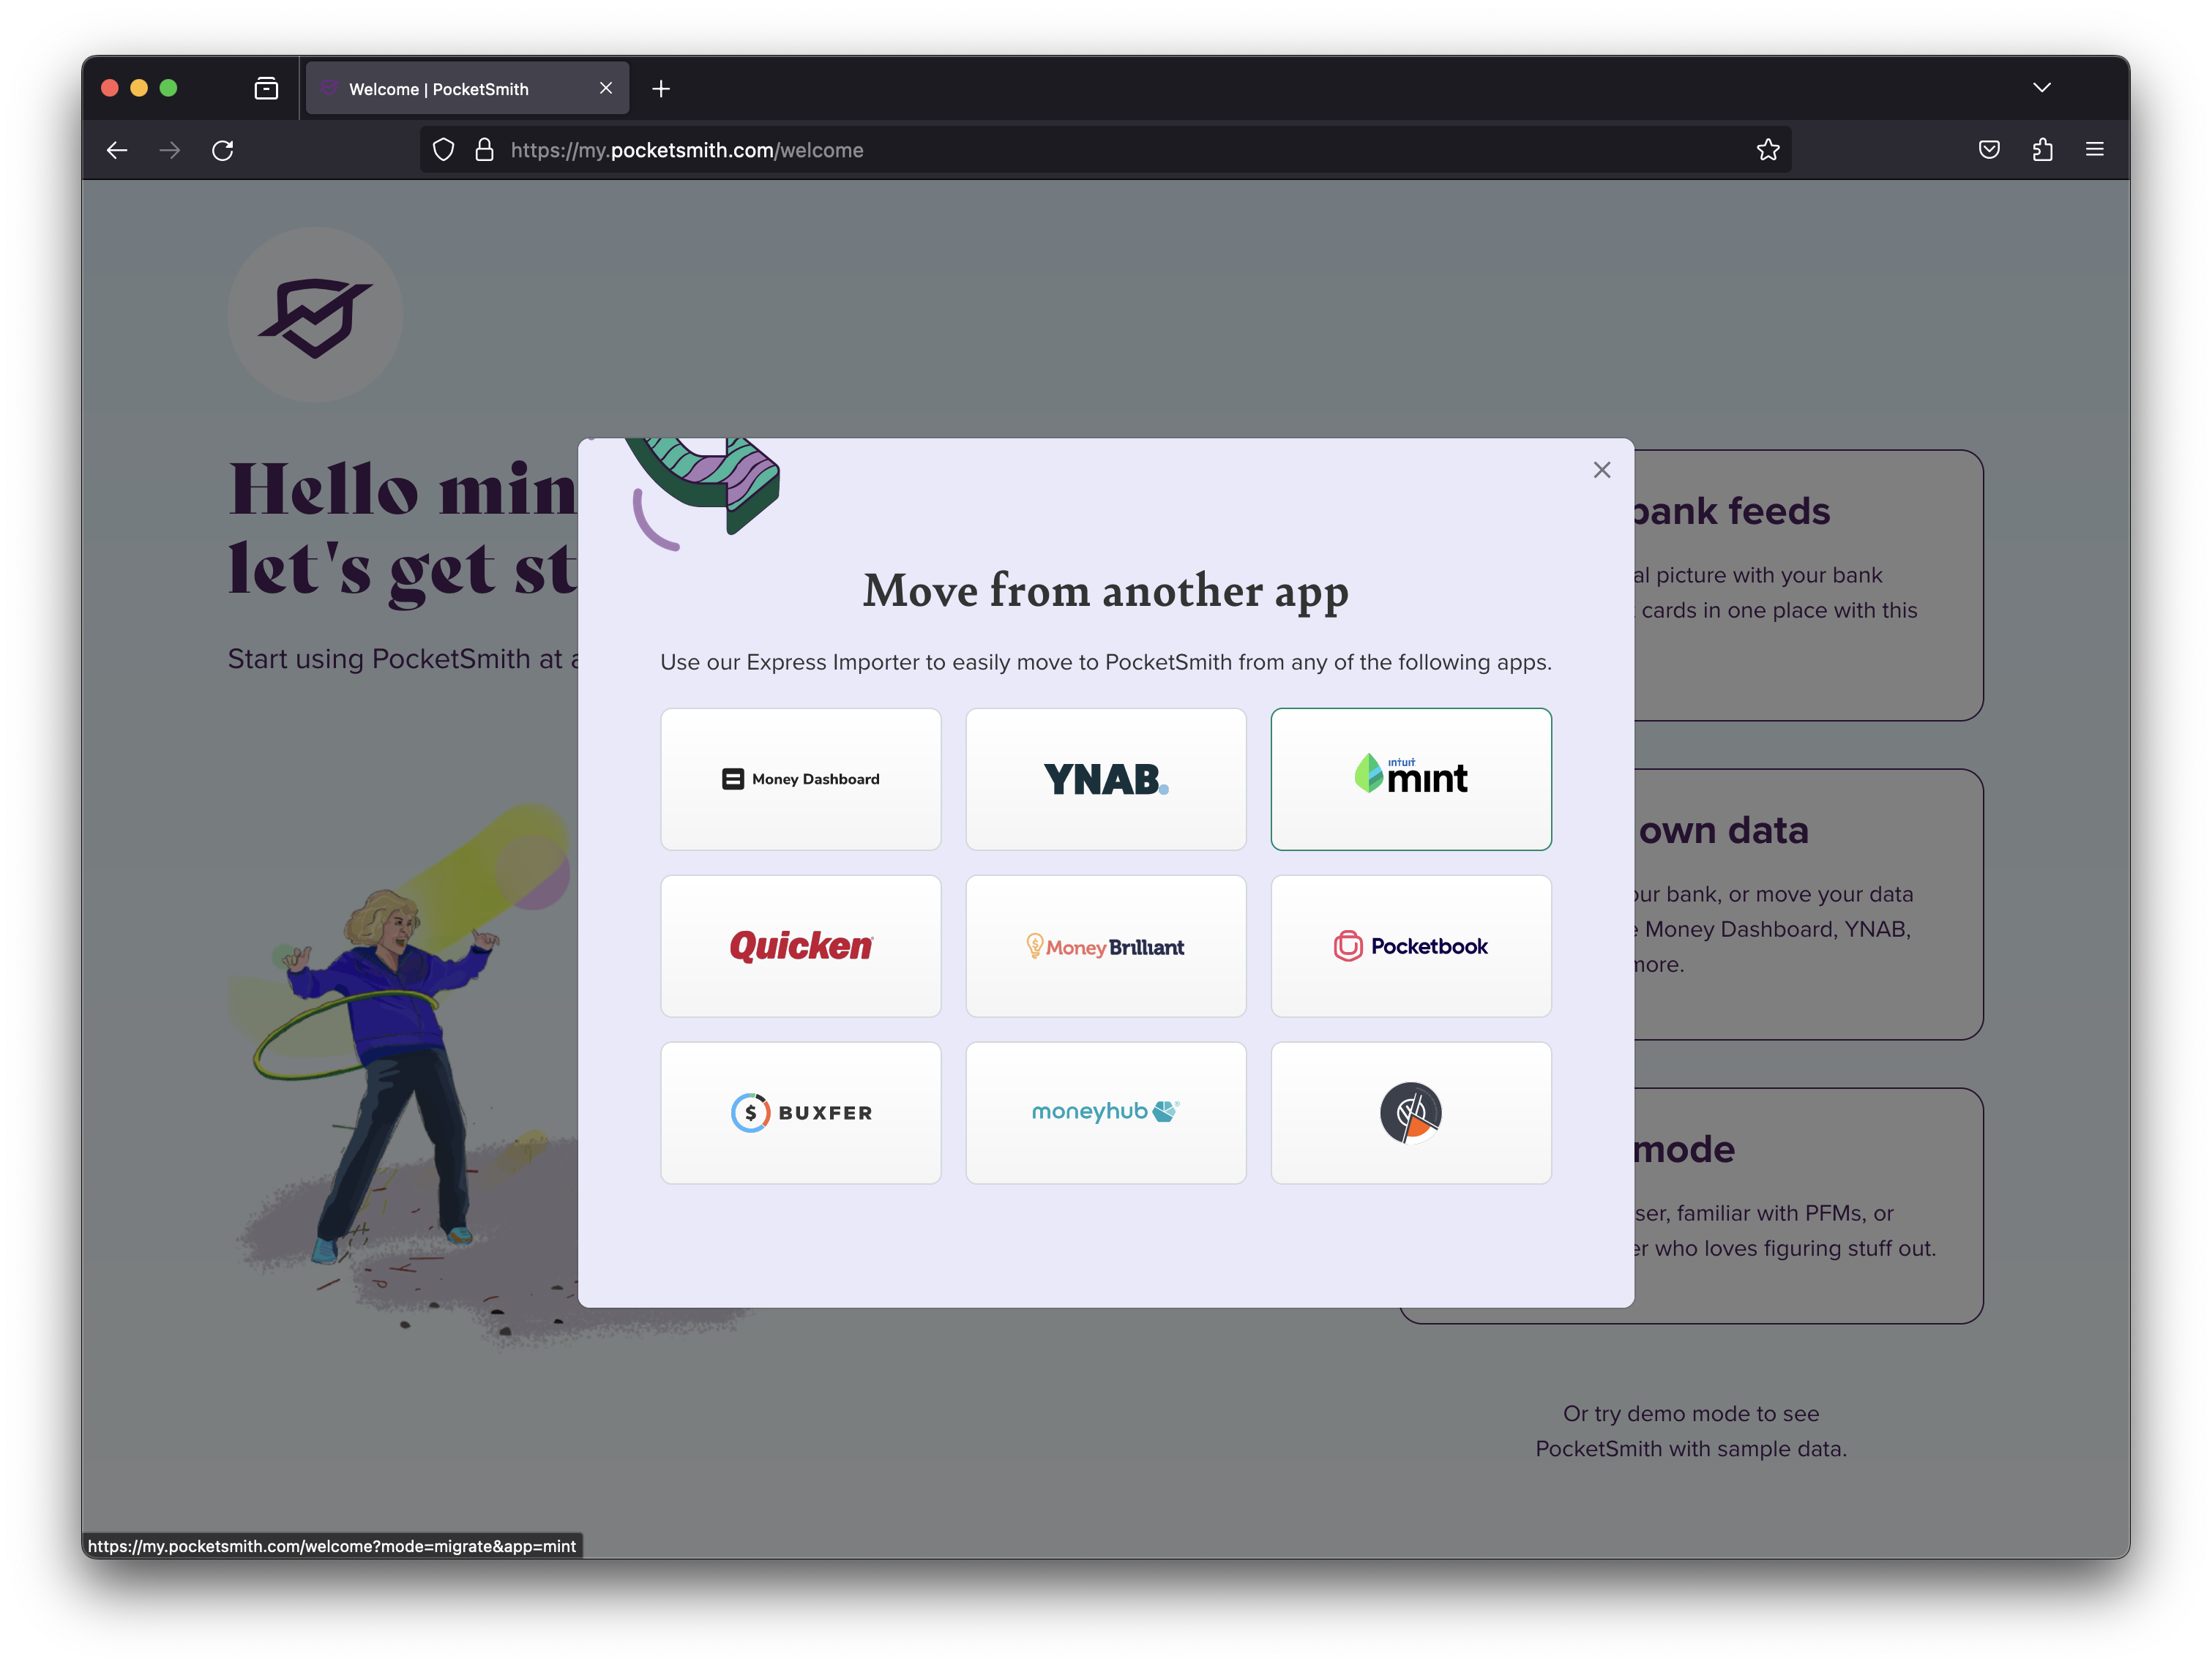
Import from Mint.com button from the Welcome page
If you’re already in the setup process and aren’t shown the Welcome page, you can directly access the import tool designed for Mint.com. During the upload, you’ll have the chance to clear any existing data — but be sure to not choose this option if you’re uploading an additional file that you needed to export due to Mint’s transaction export limitations.
2. Upload your Mint.com CSV files
Select the import button on the page and select the CSV files you exported from Mint.com.
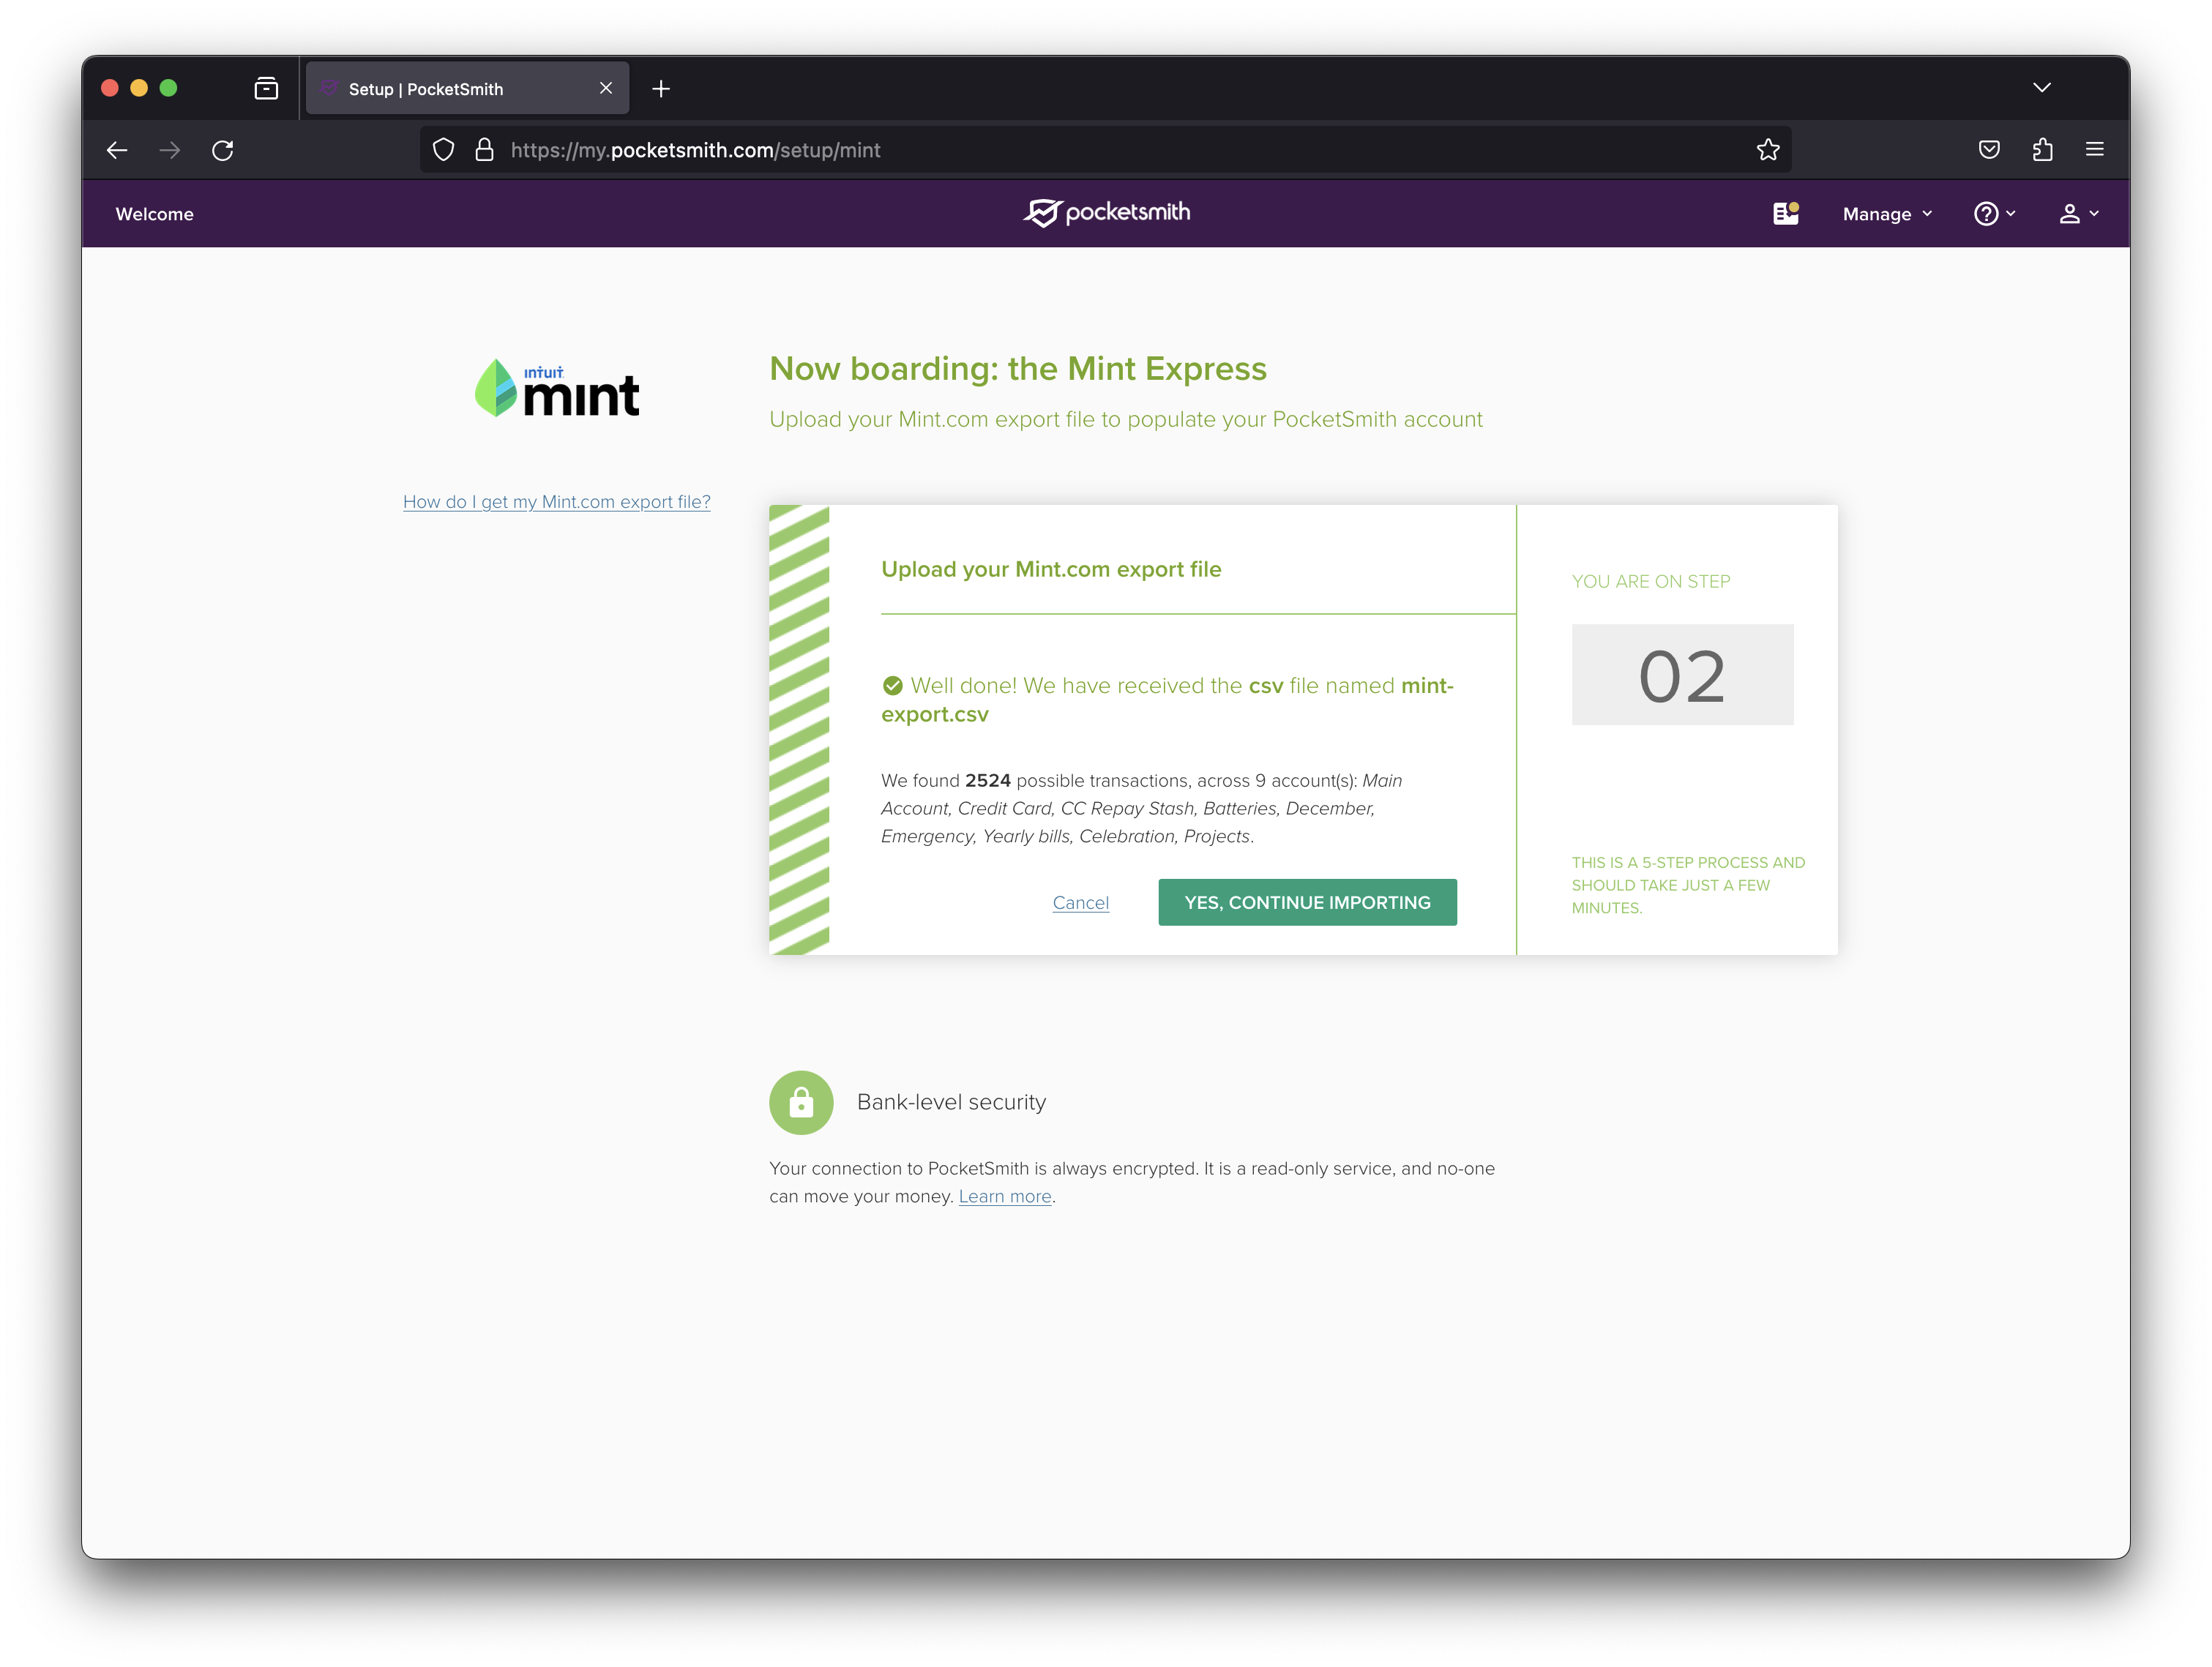
Import from Mint.com confirmation
Should your account already contain data, you’ll encounter an option to “Delete all data before importing.” This is useful if you’ve experimented with bank feeds already or have previously imported some data; checking this box will prevent any duplication. Even though your feed accounts will be detached, the feeds themselves will remain active and can be easily relinked to the accounts you’re bringing in from Mint.com.
After you confirm your choices and click “continue importing,” a progress bar will display, initiating the import of your accounts, transactions, labels, notes, and categories.

In progress import from Mint.com
If you have a very large number transactions in the import, the process might take a while, especially during the “Processing imported transactions” phase for each account. You don’t need to keep the browser window open for this to proceed - if you choose to take a break and come back later, you’ll be taken to the final step to complete the import process.
3. Assign banks and set account balances
Mint’s CSV exports do not include bank names associated with each account, nor any current account balances. This means you’ll need to manually assign each account that was newly imported to the correct bank and update the balances. This will only need to happen for the first time that a particular account is found however.
If you’re planning to set up bank feeds later in the process, don’t worry so much about entering absolutely perfect balances at this stage — these will be updated when you connect up your bank feeds. However, if you want to get right into an accurate Net Worth calculation straight away, it’d be wise to have fairly accurate balances entered out of the gate.
Entering the correct bank names is also highly recommended, as this’ll help you along with a smooth process of linking your bank feed accounts to your imported accounts later down the road.
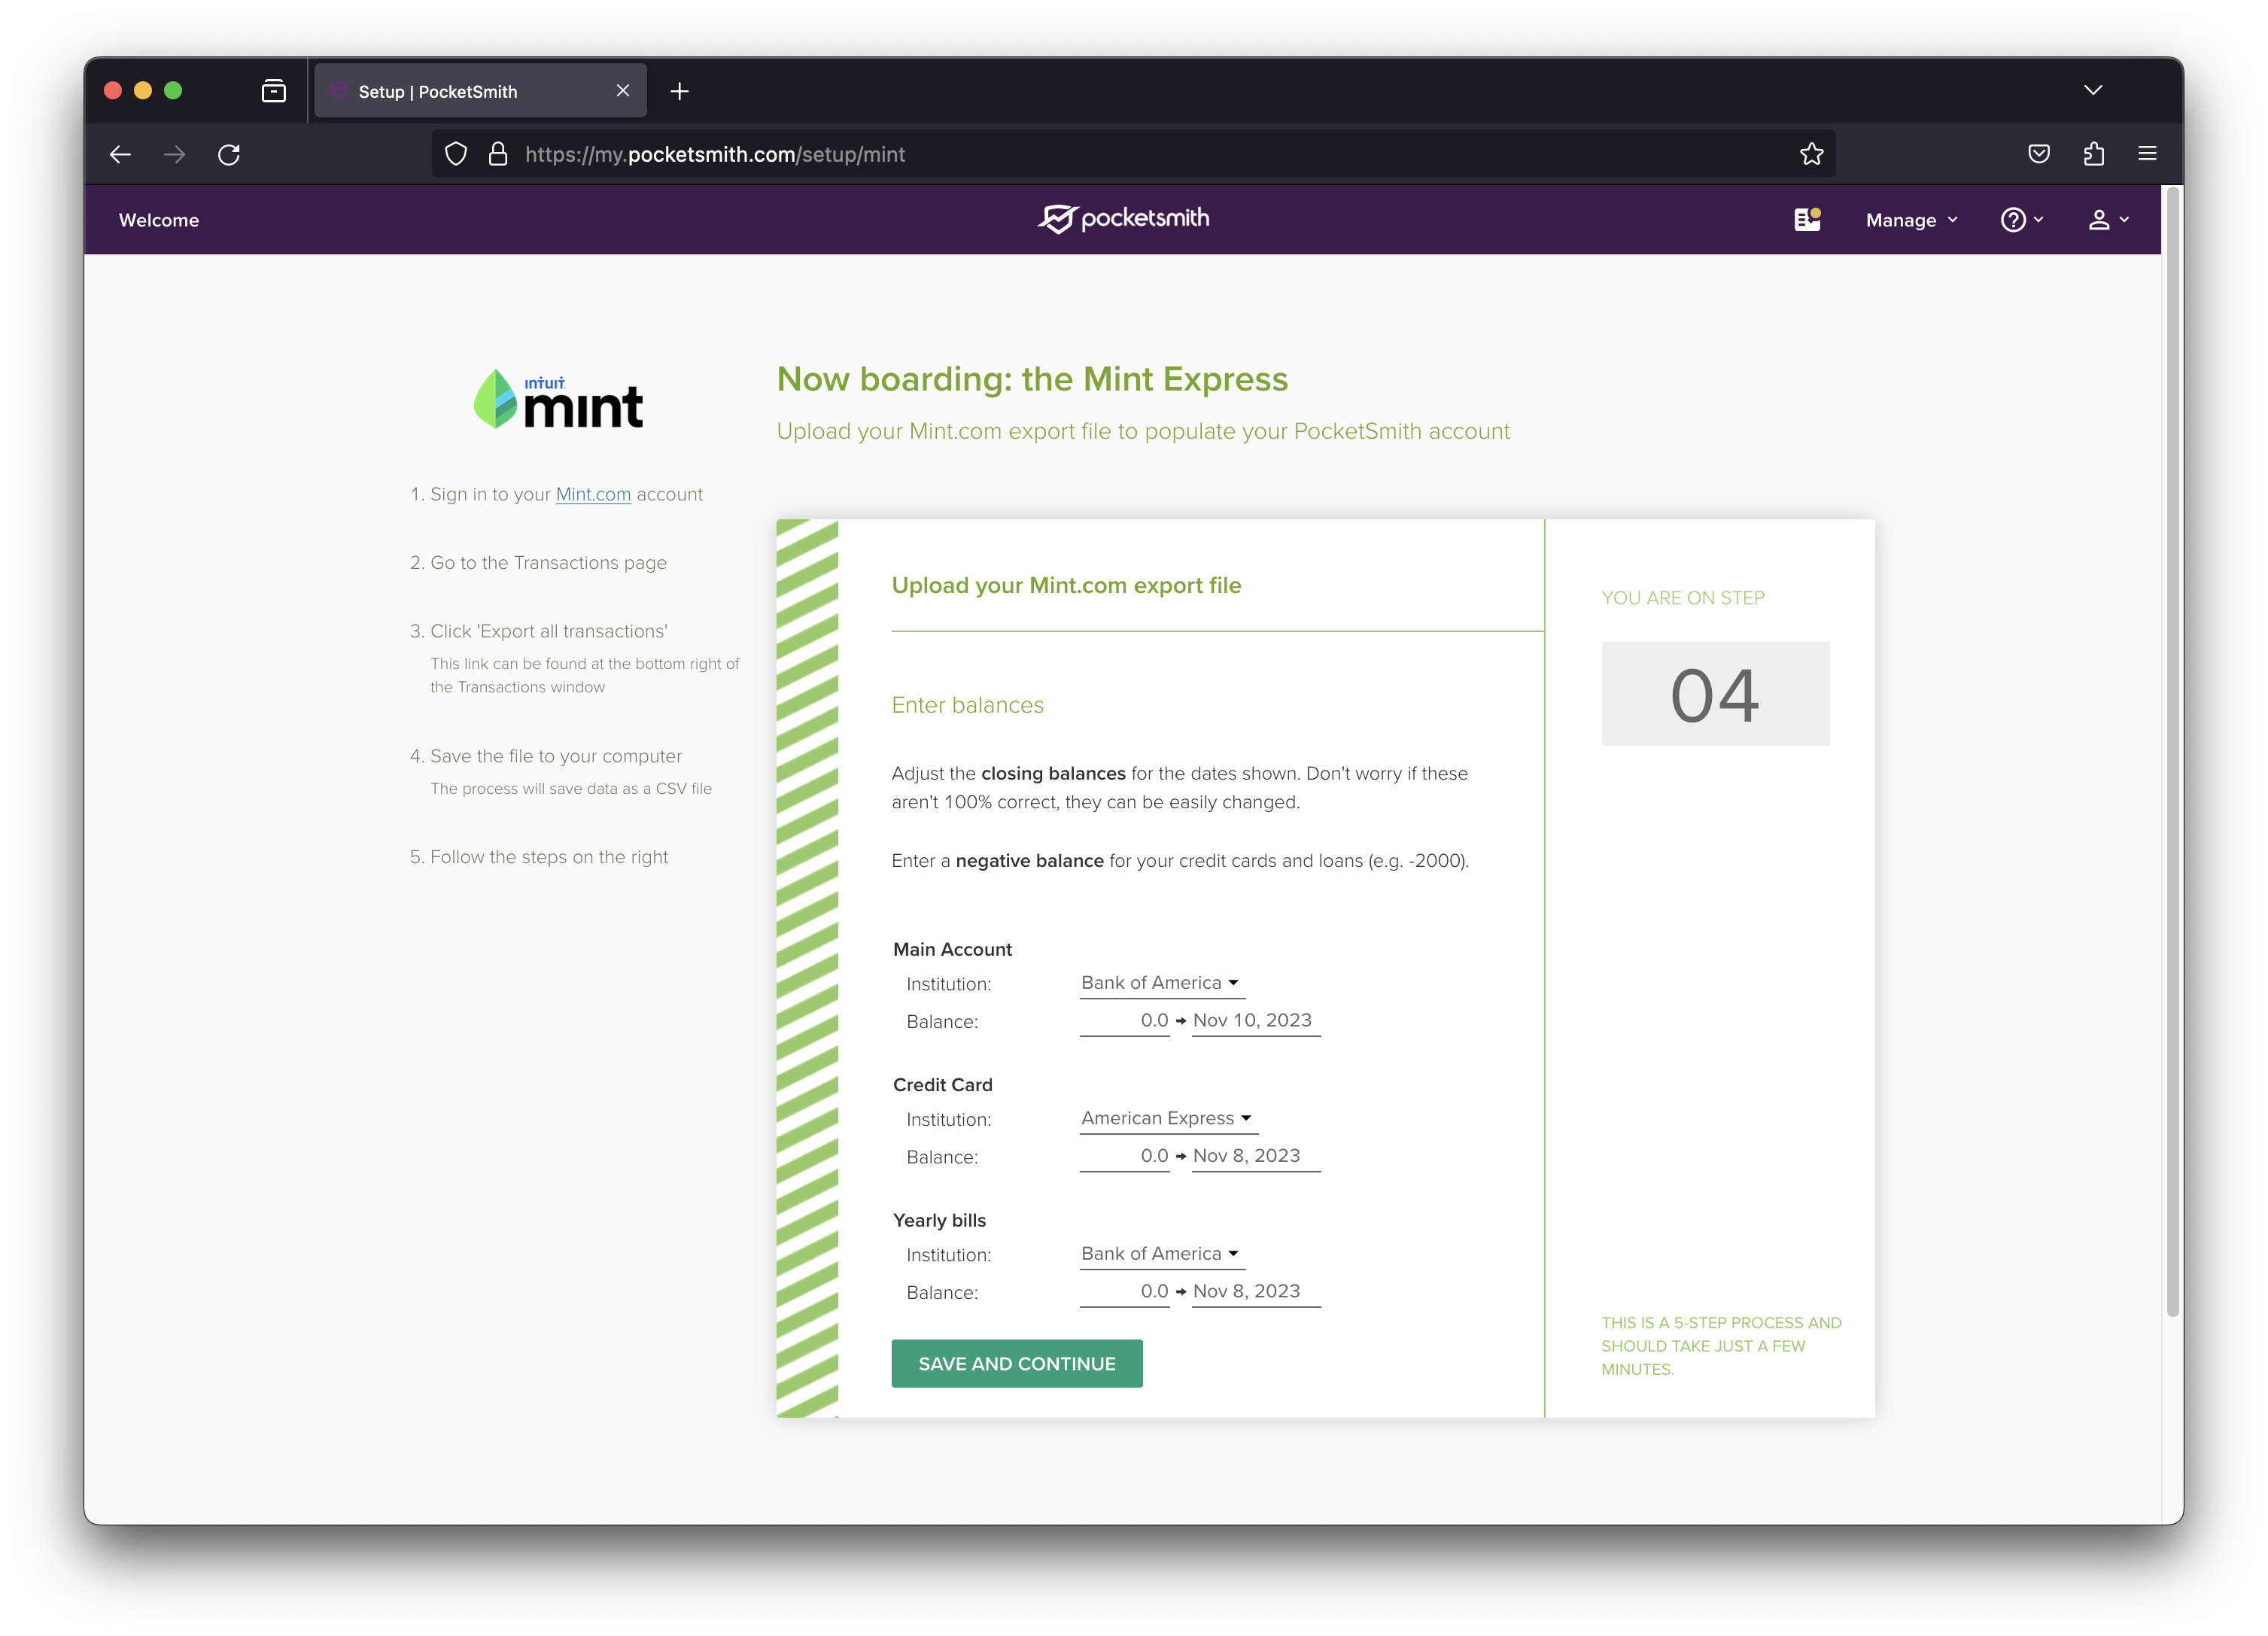
Setting your bank name and balances
4. Celebrate and discover PocketSmith’s capabilities
Brilliant! Your Mint.com data has now been fully brought into PocketSmith. Take this moment to explore your new Dashboard, or delve into the array of features available under Reports. With your financial history in place, you’re now all set to really get into PocketSmith.
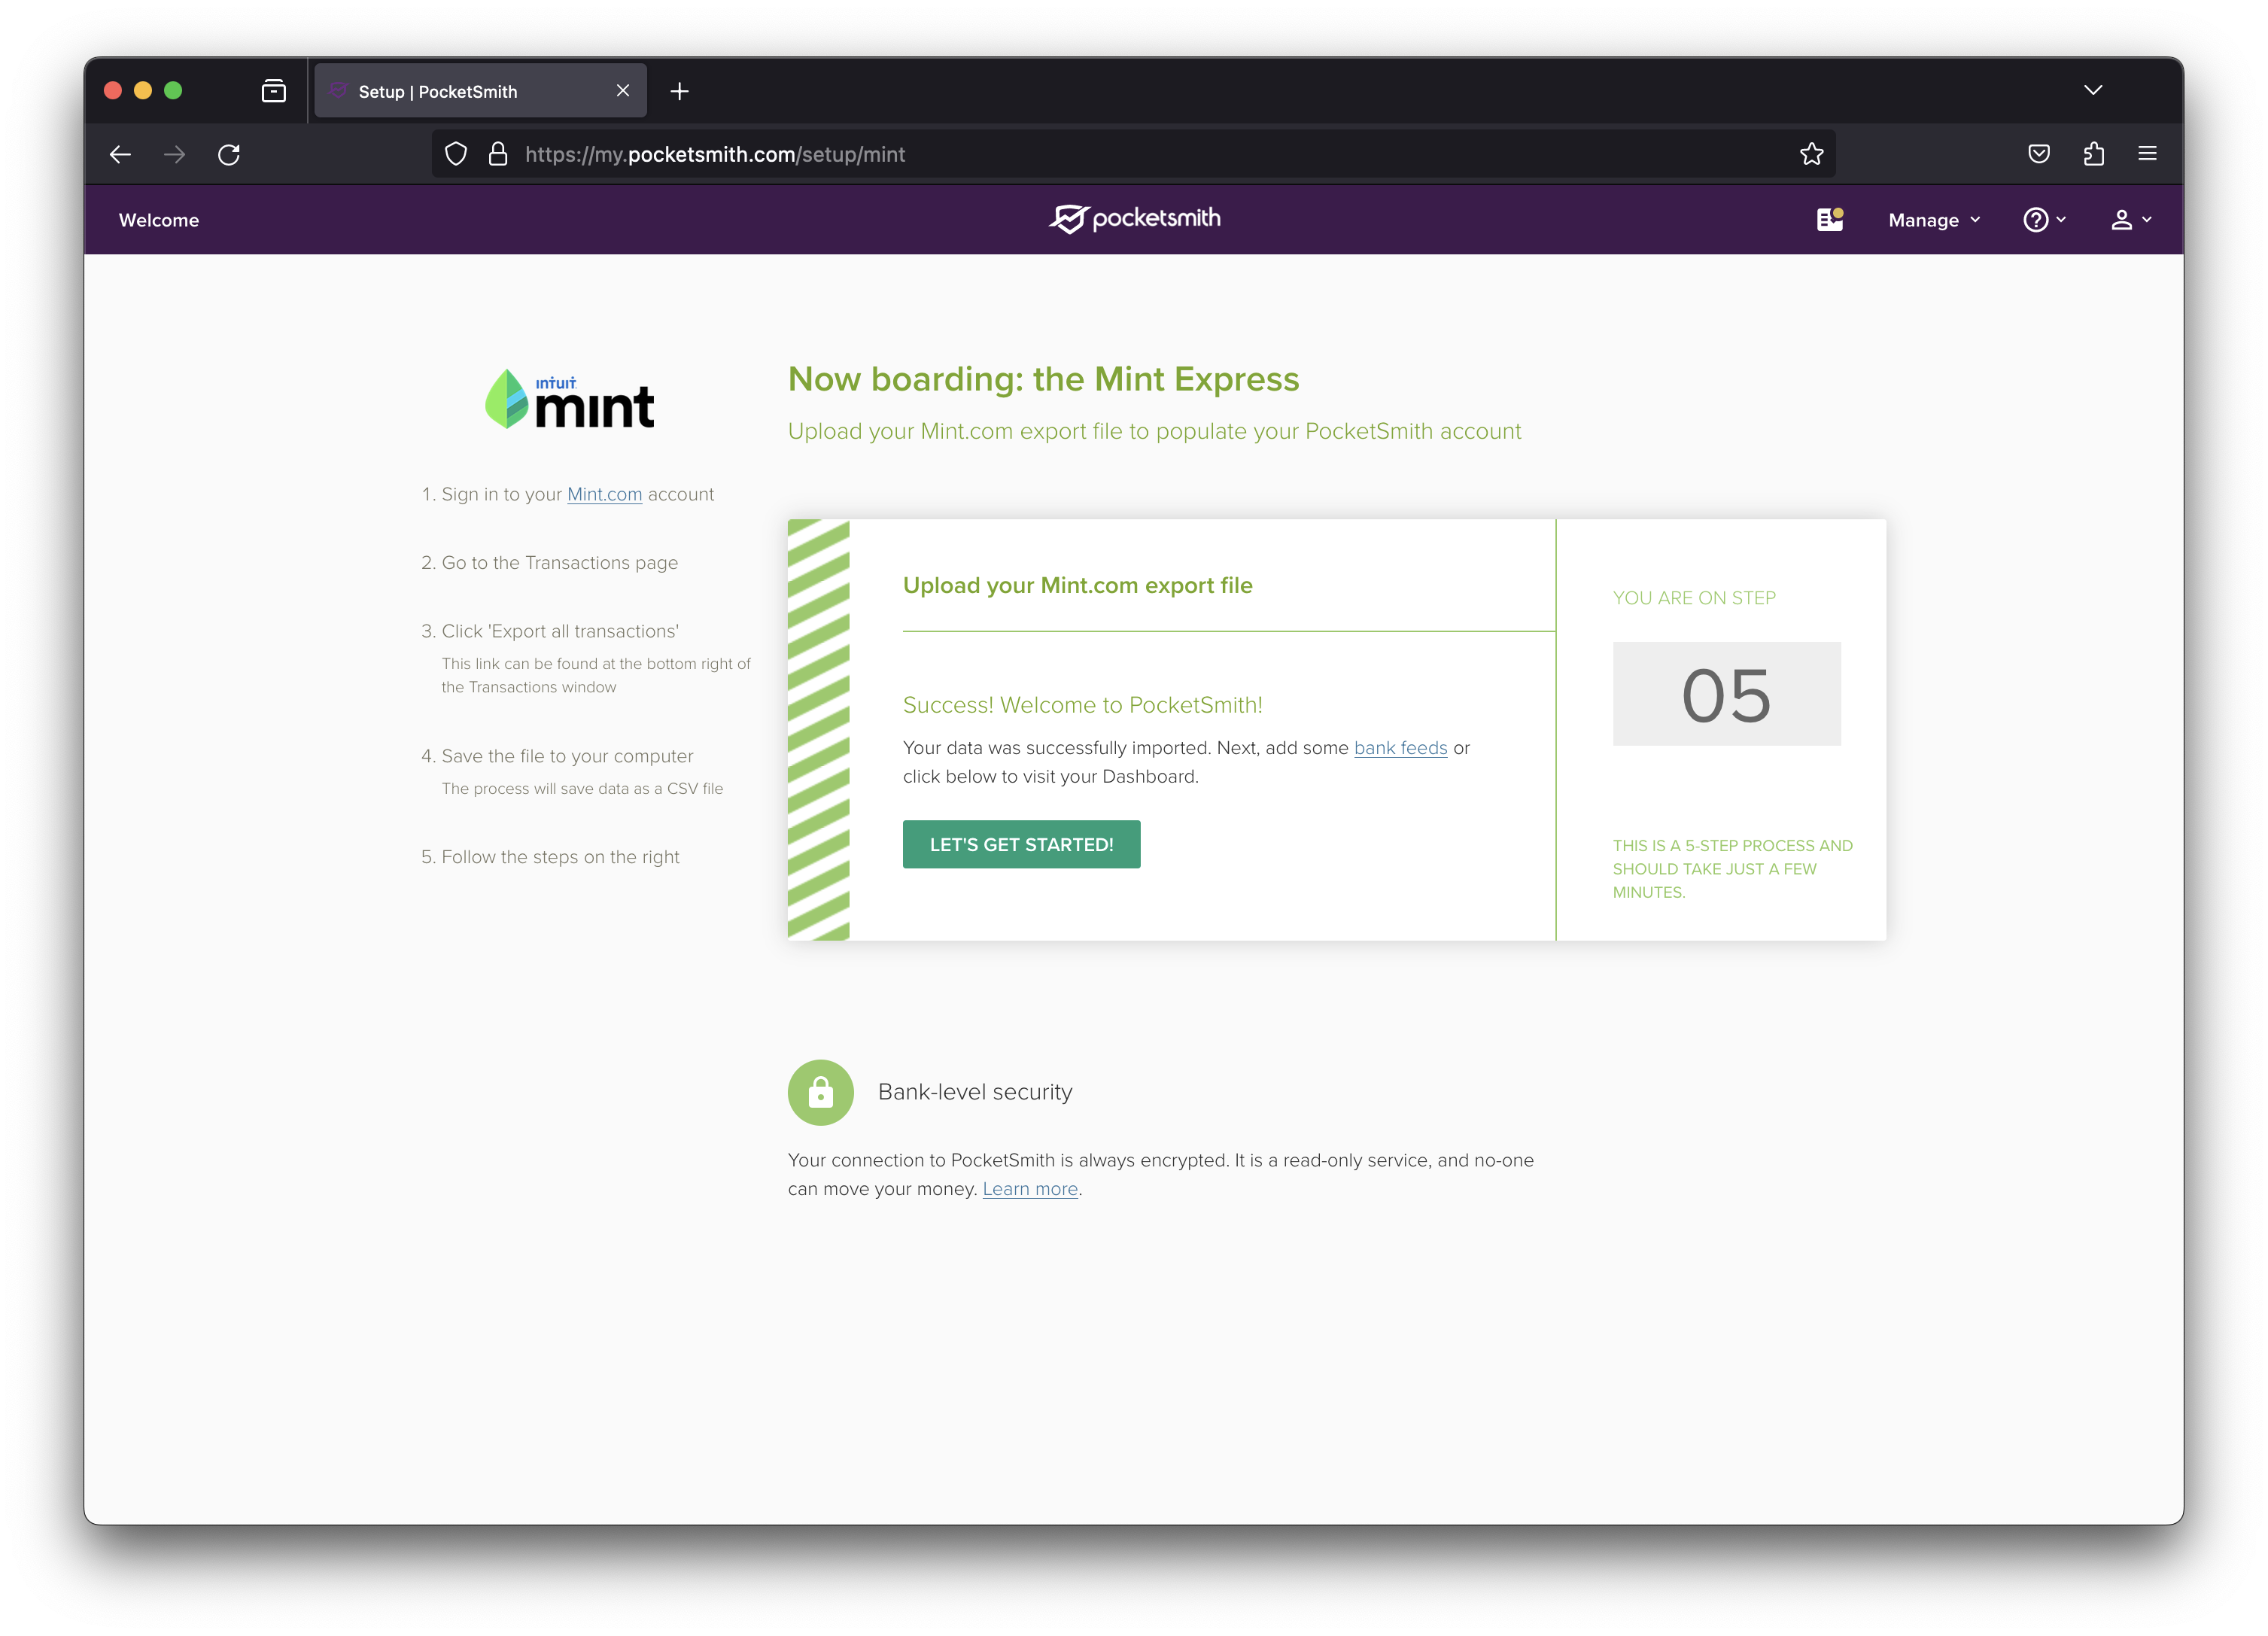
Mint.com data import complete
With all your historical data now preloaded in PocketSmith, it’s the perfect time to establish bank feeds for your accounts and connect them to the accounts you’ve imported. More on setting up bank feeds in Step 4 below.
One of the standout features of PocketSmith is the ability to generate a cash flow forecast for your accounts by scheduling your regular budgets and bills in the calendar. This means that budgeting in PocketSmith isn’t just about tracking; it’s about projecting your future bank balances for future dates. This is invaluable for financial planning.
Within PocketSmith, you have the freedom to assign a unique budget for every category for any given budget frequency — weekly, monthly, annually — or anything in between. Each budget can be tailored to align with your financial goals, whether income or expenditure focussed. Keen to learn more right away? Take a look at our budget tips and tricks on our extensive Learn Center.
For a swift start, our auto-budget tool is an excellent way to jump right in — particularly if your imported historical transaction data is accurate. This feature analyzes your categorized transactions to suggest appropriate budget amounts and frequencies based on your historical spending. Once these are ready, you can tweak any auto-budgets to fine-tune things.
1. Head to the Budget page from the main menu.
2. Select the auto-budget tool link, from the toolbar of the page, or within the introductory section.
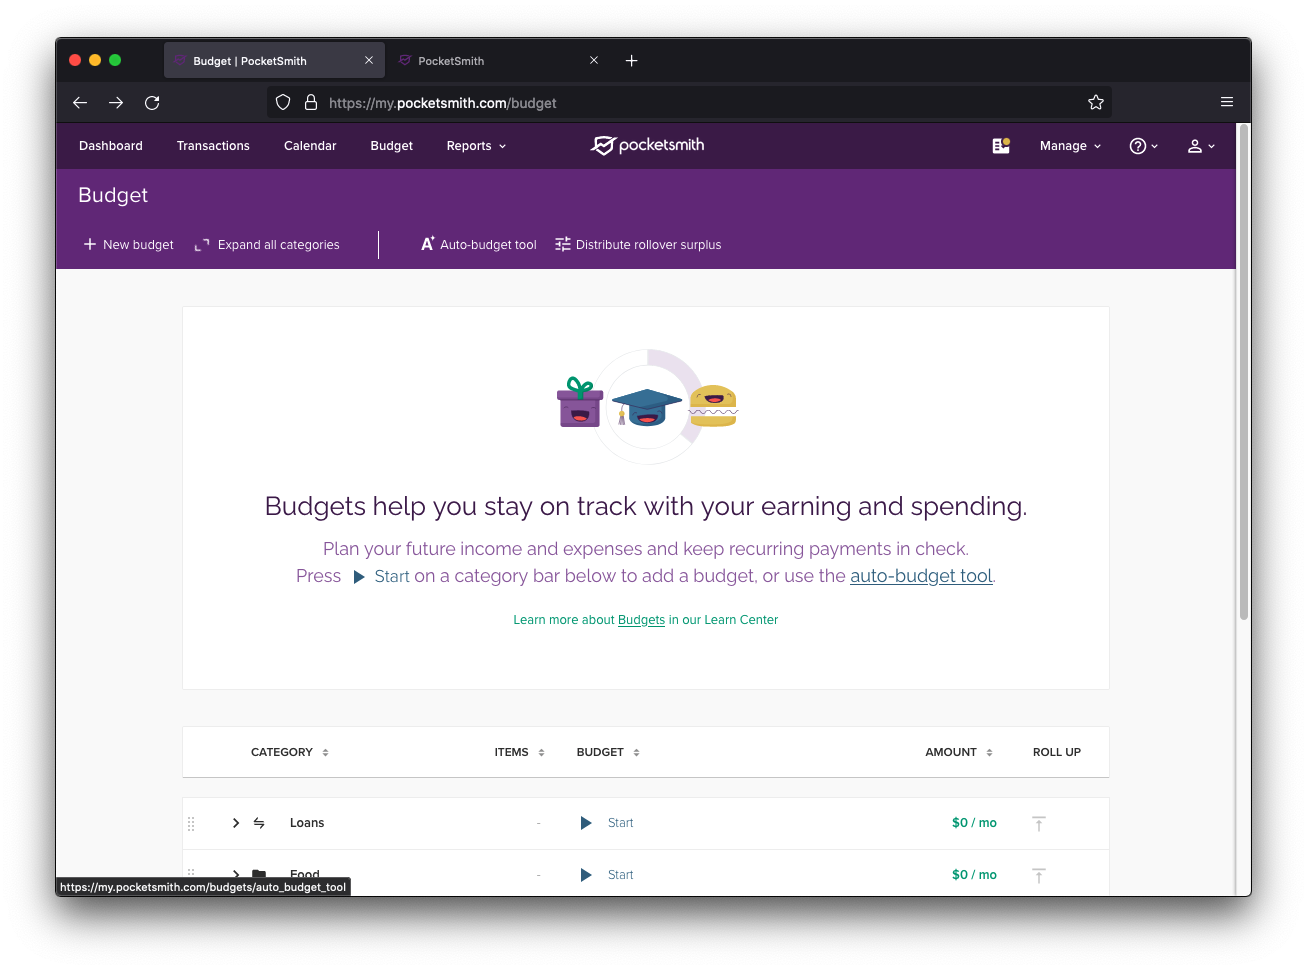
The budget page immediately after import
1. The auto-budget popup
Selecting this option above will open the auto-budget tool dialog. Simply click the bold green Start auto-budget tool button to begin the calculation process. The duration of this process will depend on how extensive your transaction history is.
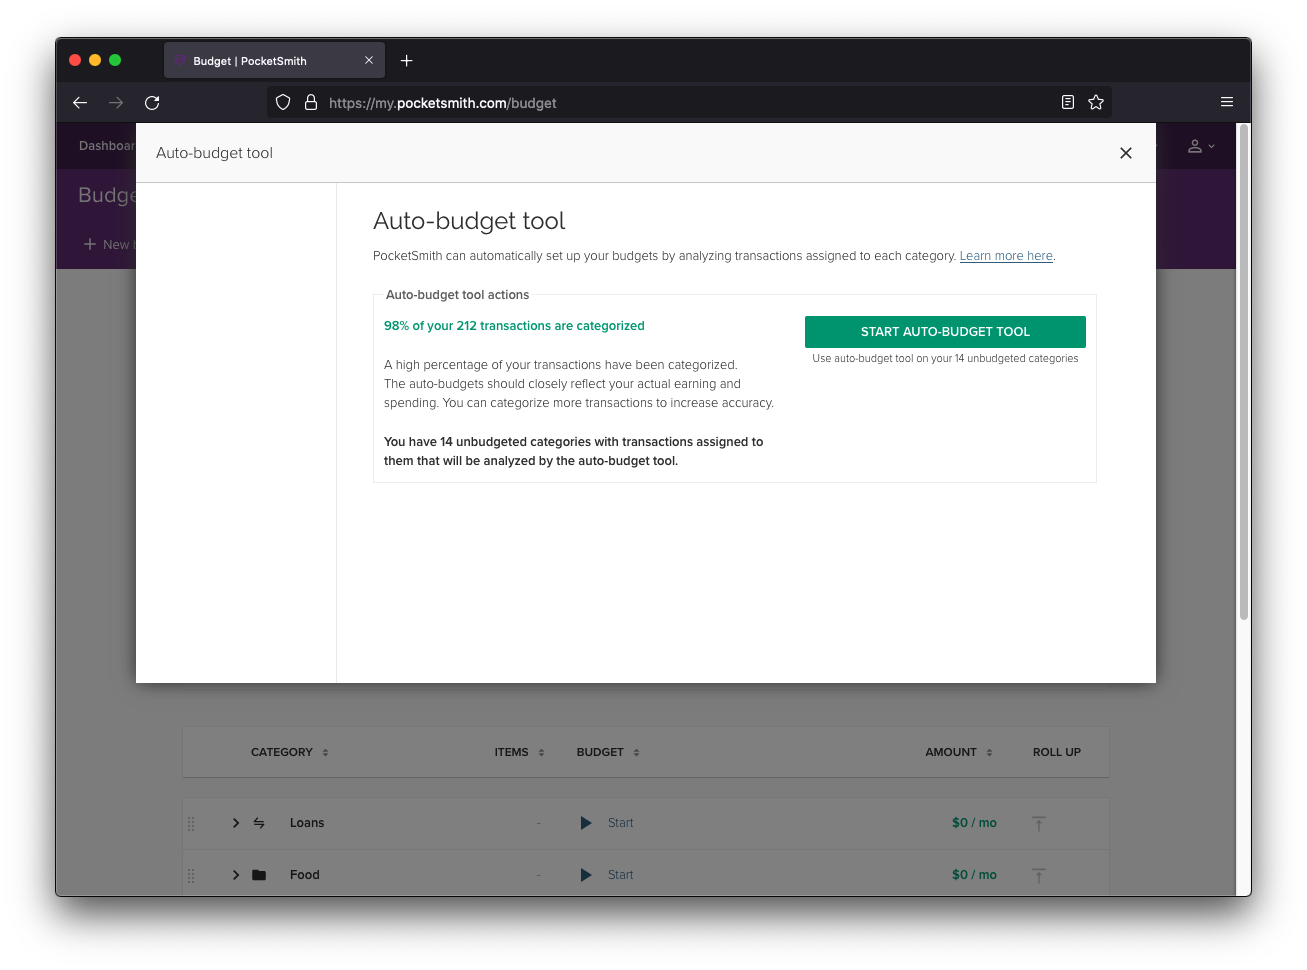
The auto-budget popup showing the confirmation button
2. Your automatically-created budgets
Once the auto-budget tool completes its calculations, you’ll be shown a series of suggested budgets in a new window. Should you see a budget for a category that it doesn’t make sense to have a set budget for — such as a regular allocated amount for Transfers — you can remove it by clicking on the minus symbol that shows next to the budget when you hover over it. This will remove the auto-generated budget for that particular category. An example is illustrated below, where the “Household” budget is being removed.
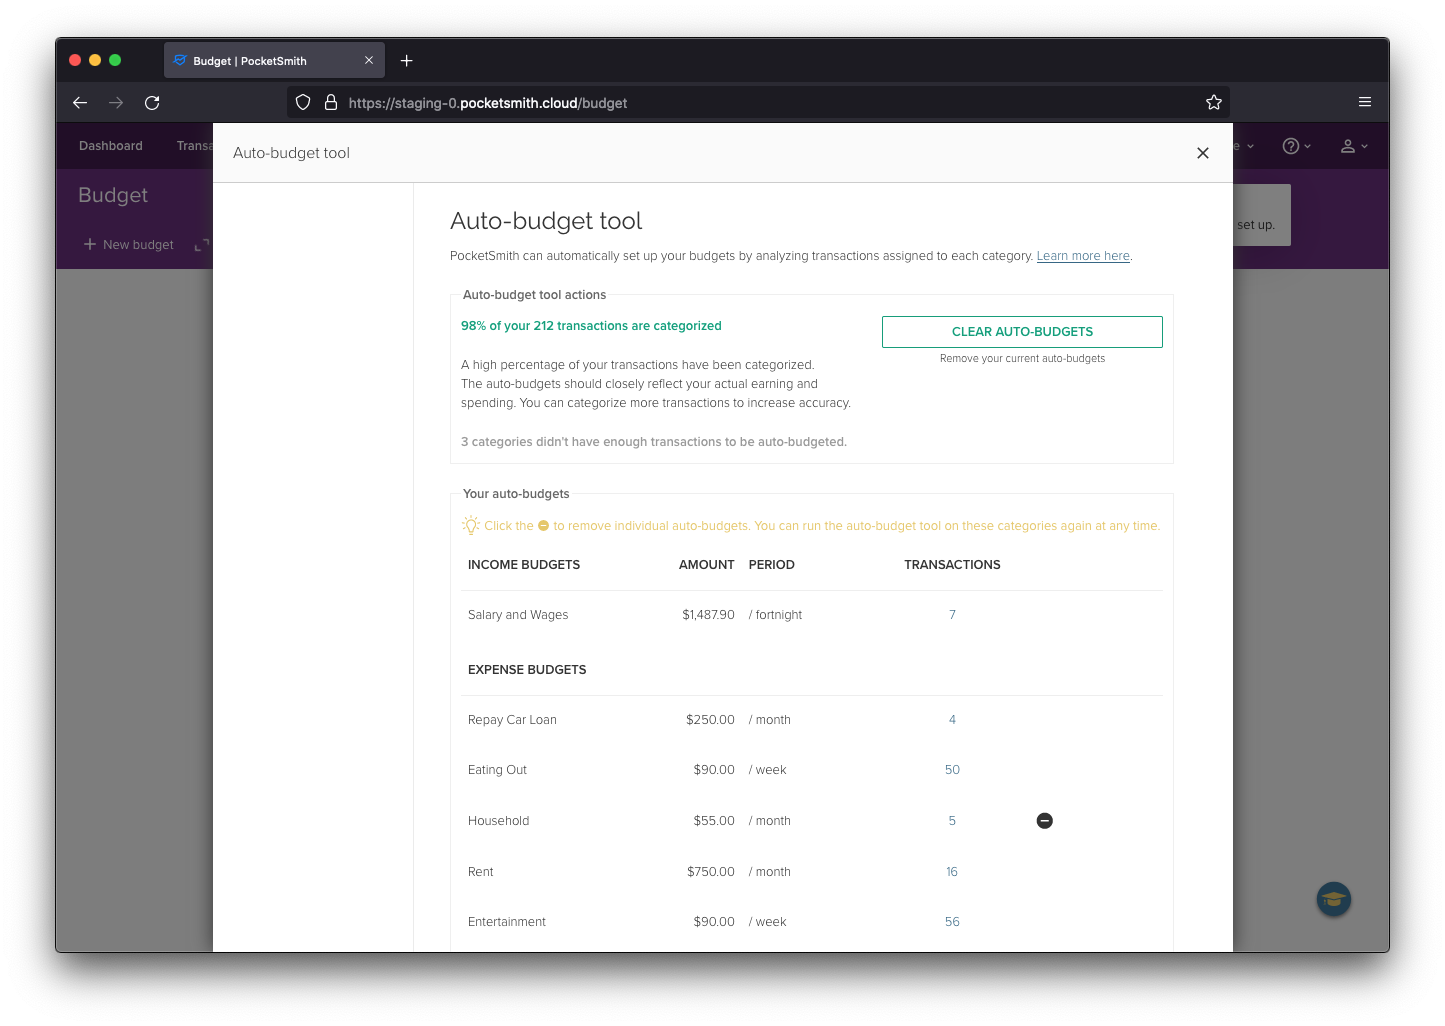
Display of auto-generated budgets with an option to remove the "Household" budget by clicking on the icon next to it
3. Your budget analysis
After closing the auto-budget tool, you’ll be brought to the main Budget analysis and summary screen that displays your newly established budgets. To alter any budget details, click the three-dot icon next to the budget and choose “Edit/Delete budget”. If you’re curious about how your spending in a category has changed over time, a click on the category name will complete a historical spending analysis via our Trends feature.

The main Budget page showcasing the budgets that have been set up
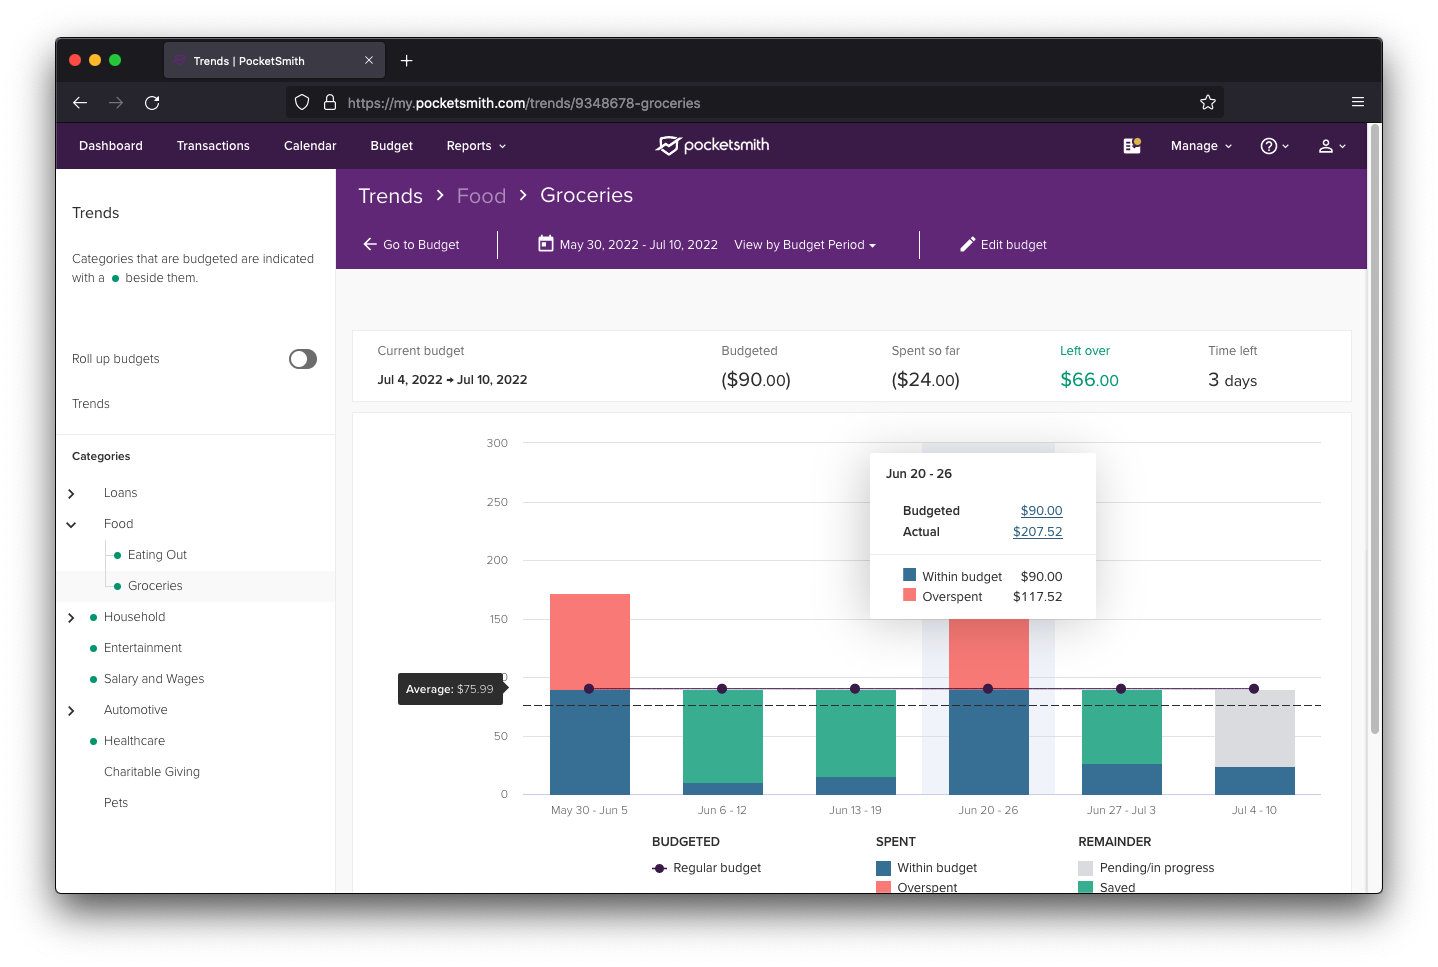
Diving into the historical trends analysis for the Groceries budget
4. Visualize your budget in the Calendar
With your budgets in place, head over to the Calendar page for a different perspective on things — including your newly generated cashflow forecast. The Calendar offers a visual understanding of when exactly in a given month your money is coming in and going out — and merges your budget information with your actual account balance, providing a dynamic forecast of your finances.
You have the flexibility to adjust individual or recurring budget entries as needed. To make edits, select a budget entry on the calendar and use the form that appears to refine your budget.
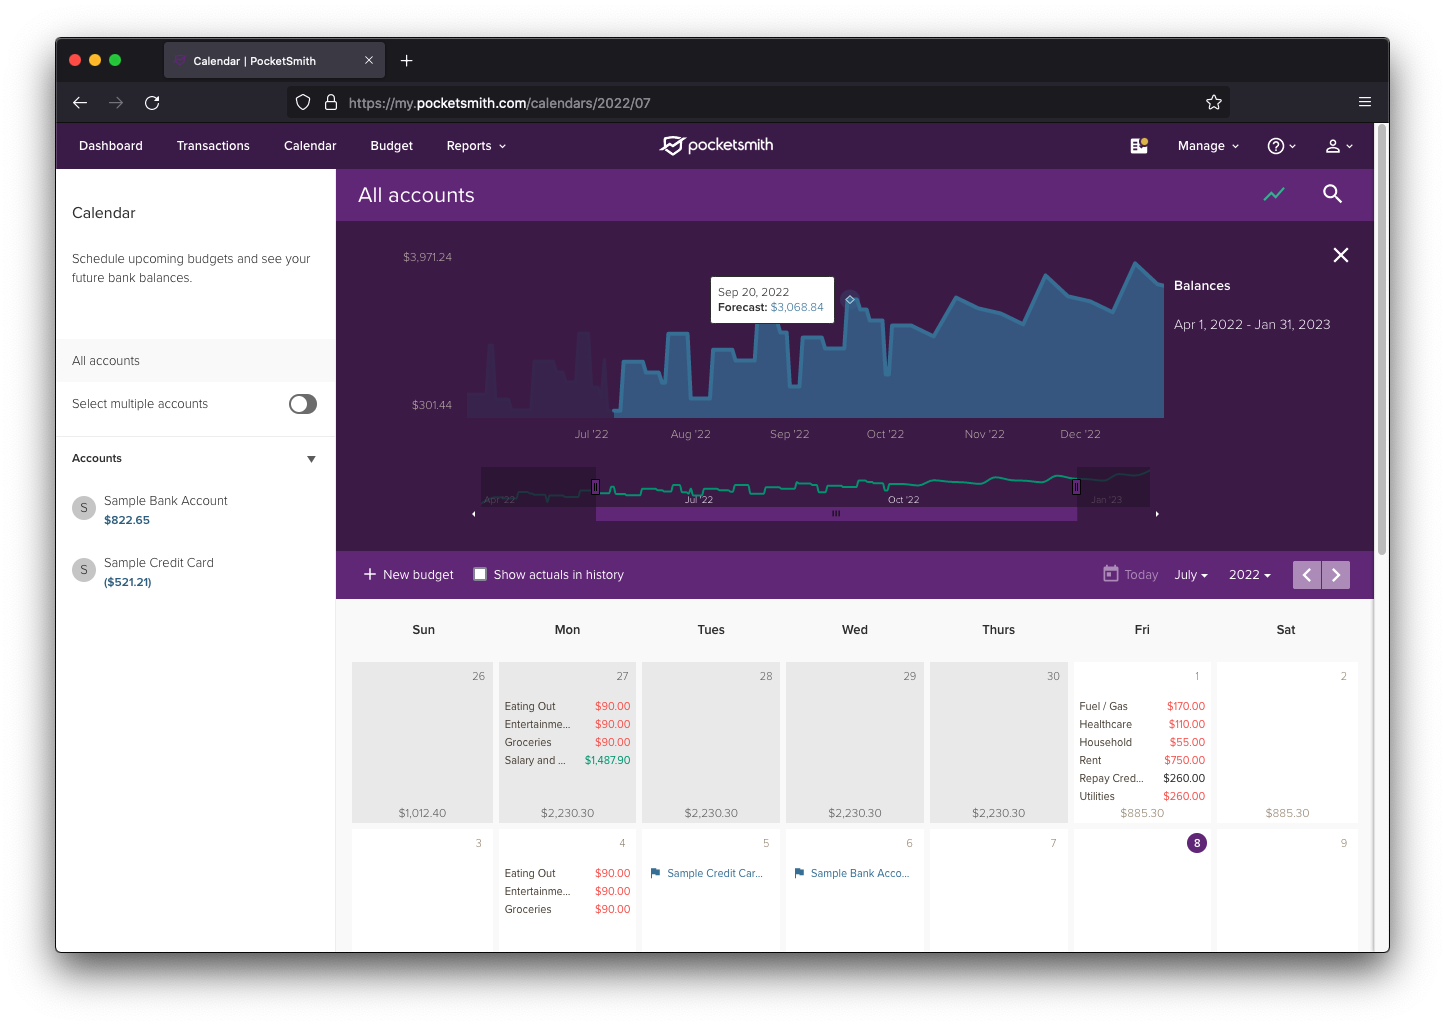
The PocketSmith calendar displaying the budget entries and financial forecast graph
These steps offer just a glimpse into what you can achieve with PocketSmith’s budgeting tools. As you become more accustomed to the platform, trust your instincts and utilize our Learn Center for additional support and insights.
Next, we’ll guide you through linking your imported accounts with automatic bank feeds to keep your data up-to-date.
In PocketSmith, access to bank feeds is a feature reserved for our paid subscribers. Once you’ve moved to a paid plan from the Free tier, you can begin by navigating to the Manage Feeds page.
We offer bank feeds via both Yodlee and Plaid, in order to offer the latest open banking feeds where available, and alternative feeds if things aren’t that reliable with a particular data provider.
For step-by-step instructions on establishing your bank feeds, please refer to our comprehensive guide in the Learn Center. The setup process is straightforward, particularly if you have experience with bank feeds from your time with Mint.
After your bank feed is active, the next step is to link your new bank feed accounts to the ones you previously imported. Matching up your feed accounts with your imported accounts is important to prevent any duplicate transactions or accounts. For detailed guidance, our Learn Center provides a dedicated tutorial to walk you through the process.
Congratulations, you’ve crossed the finish line! We’re confident that you’ll enjoy exploring PocketSmith and making the most of its flexible tools that allow you to really flex your financial muscles. We’re dedicated to perfecting our craft, and your insights are invaluable to us. Our exceptional support team is ready to assist you whenever you need it, so please don’t hesitate to get in touch.
We’re continually motivated by stories of how PocketSmith has transformed the way our users manage their finances. We’re looking forward to hearing your own story of financial empowerment with PocketSmith!

James is the CTO and co-founder at PocketSmith. He loves tech from software to hardware to music, and is passionate about technology being a net-positive in people’s lives. He lives off-grid with three humans, one axolotls, one rabbits, one dog, and too many possums.