We’re thrilled to have you here, exploring this guide! Transitioning to PocketSmith is a breeze, and we’re here to assist every step of the way. This post will guide you on importing your transaction data swiftly, setting up budgets with insights from your past spending, and reconnecting your accounts to bank feeds.
A little about us: Since our inception in 2008, we’ve stood fully independent and self-funded. While the landscape of personal finance tools has seen many players come and go, our dedication lies in crafting top-notch tools we’re proud to use ourselves. We’re here for the long haul.
Let’s clear the air: PocketSmith stands as a premium tool at its core. Our revenue comes from patrons like you who value quality software and willingly invest in it. Rest assured, we believe in transparency and fair play; there’s no tricks, kickbacks, or selling of user data here. This isn’t just a claim either – it’s baked right into our Terms of Service.
While we do offer a free plan catering to basic needs, we want to note that bank feeds come exclusively with our paid subscriptions. If a wholly free tool with bank feeds is what you seek, you might want to explore further. But always remember, if you’re not paying for it, you are the product.
We’re excited for you to get kicked off, so let’s begin!
To get you up and running as quickly as possible, we want to list out all the steps in this guide right up front. If you’re confident with personal finance tools in general, this might be all the information you need! More detail is provided in the article below too, but let’s whip through all the steps first up.
So with that overview presented, let’s dive into a bit more detail!
With both Neon and Classic versions of Money Dashboard, you can download a CSV file of your transaction data. Our understanding is that this doesn’t contain a heap of different data, however it is sufficient to get the key parts of your transaction history in place in PocketSmith – account names, transactions and categories should all be included. Follow the steps below to get started:
Sign in to your Money Dashboard account, getting into either the newer Neon or the Classic version of the app. If you’re not sure, check here to work out which version you use.
Navigate to the Transactions page within the app once you’re logged in.
For Money Dashboard Neon, click the Export CSV link located on the top right-hand corner of the page to download your CSV file.
For Money Dashboard Classic, click the Download button that appears towards the top of the Transactions page, next to the page title.
Once your CSV file has been saved to your computer, you’re ready to move on to the next step!
After you’ve created your PocketSmith account, you’re ready to easily import your Money Dashboard CSV file. The handy import tool will set up your categories, transactions and accounts, just as they were in Money Dashboard.
1. Head over to the Express Import page
If you’ve just created your PocketSmith account, you’ll be shown the Welcome screen. Click the large Bring your own data button on the right of the page, then Move from another app button. This will show a popup with a number of logos of other apps – click the Money Dashboard logo.
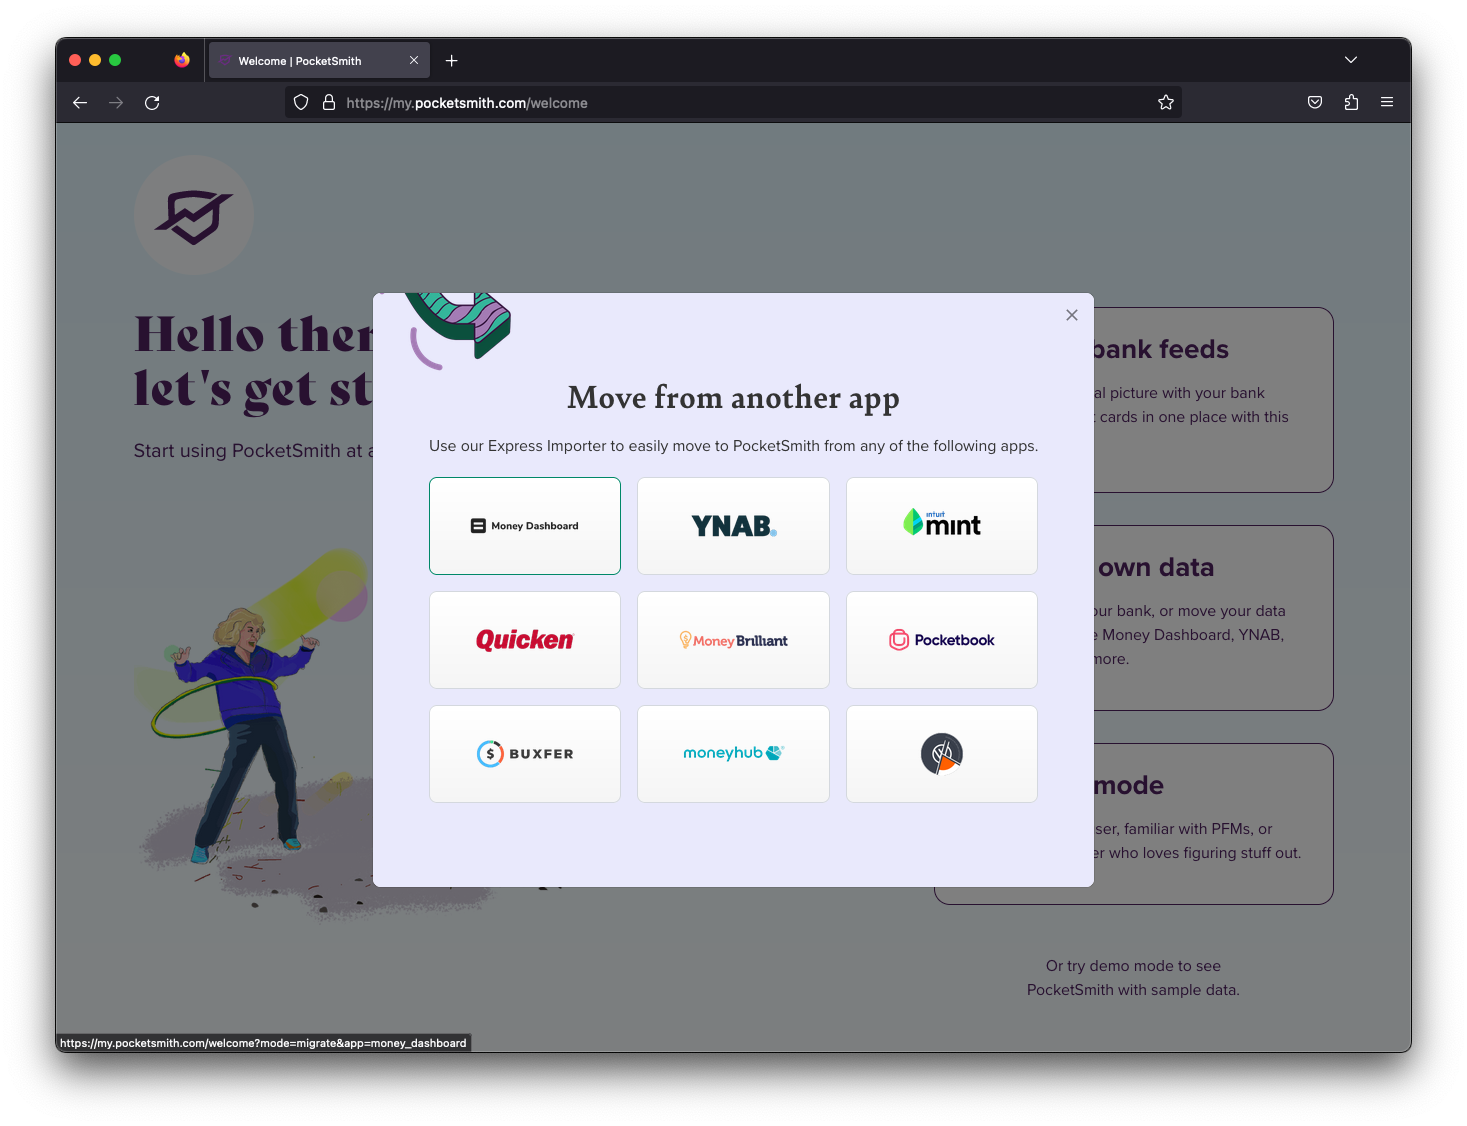
Import from Money Dashboard button from the Welcome page
If you don’t get shown the Welcome page because you’re already in the process of setting up, you can directly access the Money Dashboard express import tool. Once your file is uploaded, you’ll be given an option to remove any existing data before finalizing the import.
2. Upload the downloaded CSV file to the page
Click the button on the import page and then choose the file you downloaded from Money Dashboard.
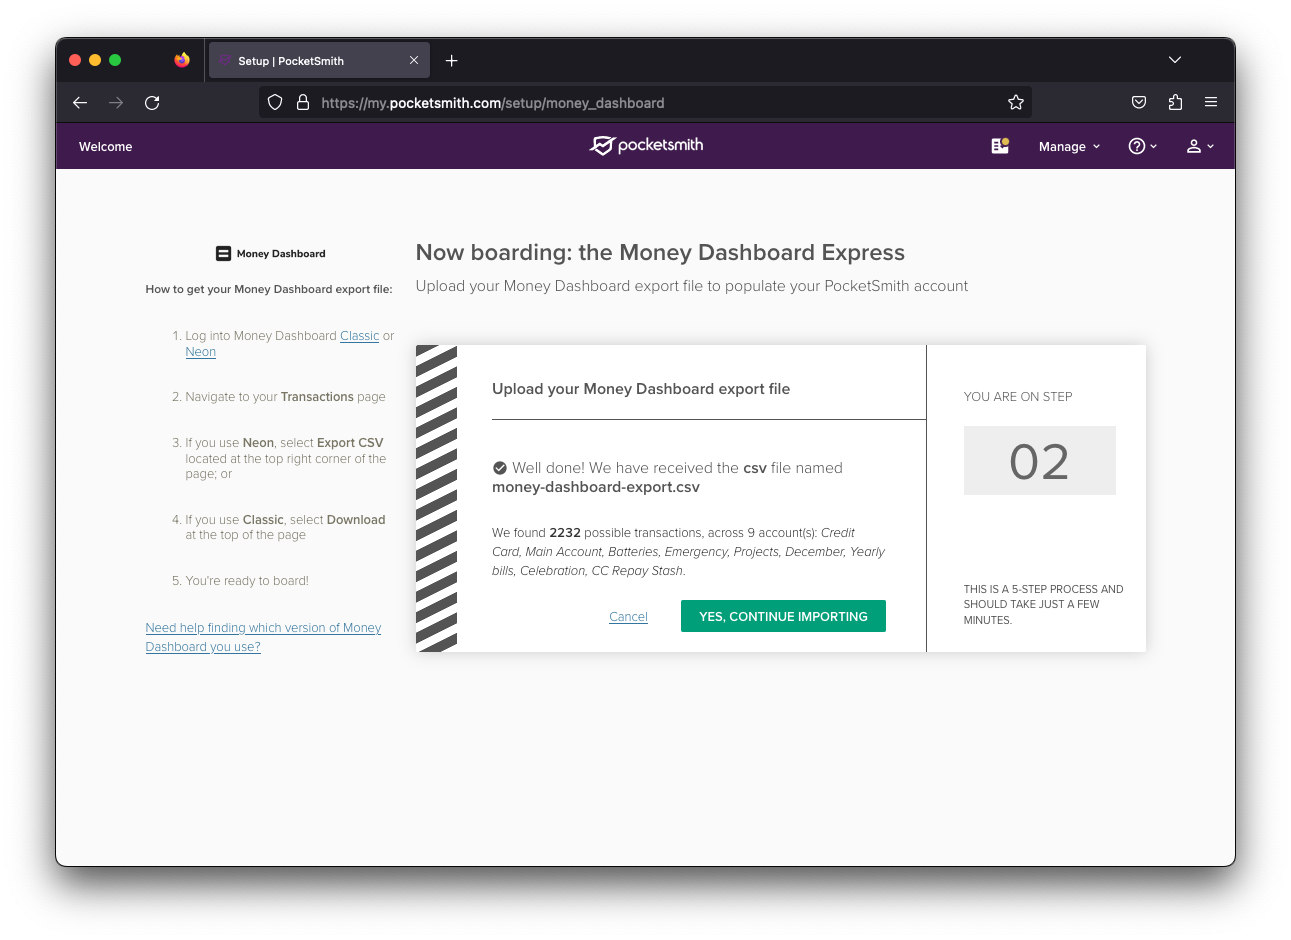
Import from Money Dashboard confirmation
If there’s already data in your account, you’ll see an additional checkbox that says “Delete all data before importing.” If you’ve previously connected bank feeds but now aim to import your Money Dashboard history, it’s wise to choose this option. This prevents any data duplication. While your linked feed accounts will be removed, the feeds will stay active and can be relinked to the accounts you’re bringing in from Money Dashboard.

The delete data option shows if you have data in your PocketSmith account
After confirming your options and pressing the “continue importing” button, you’ll see a progress bar similar to the one depicted below. This will then begin importing your accounts, transactions and the categories associated with each transaction.
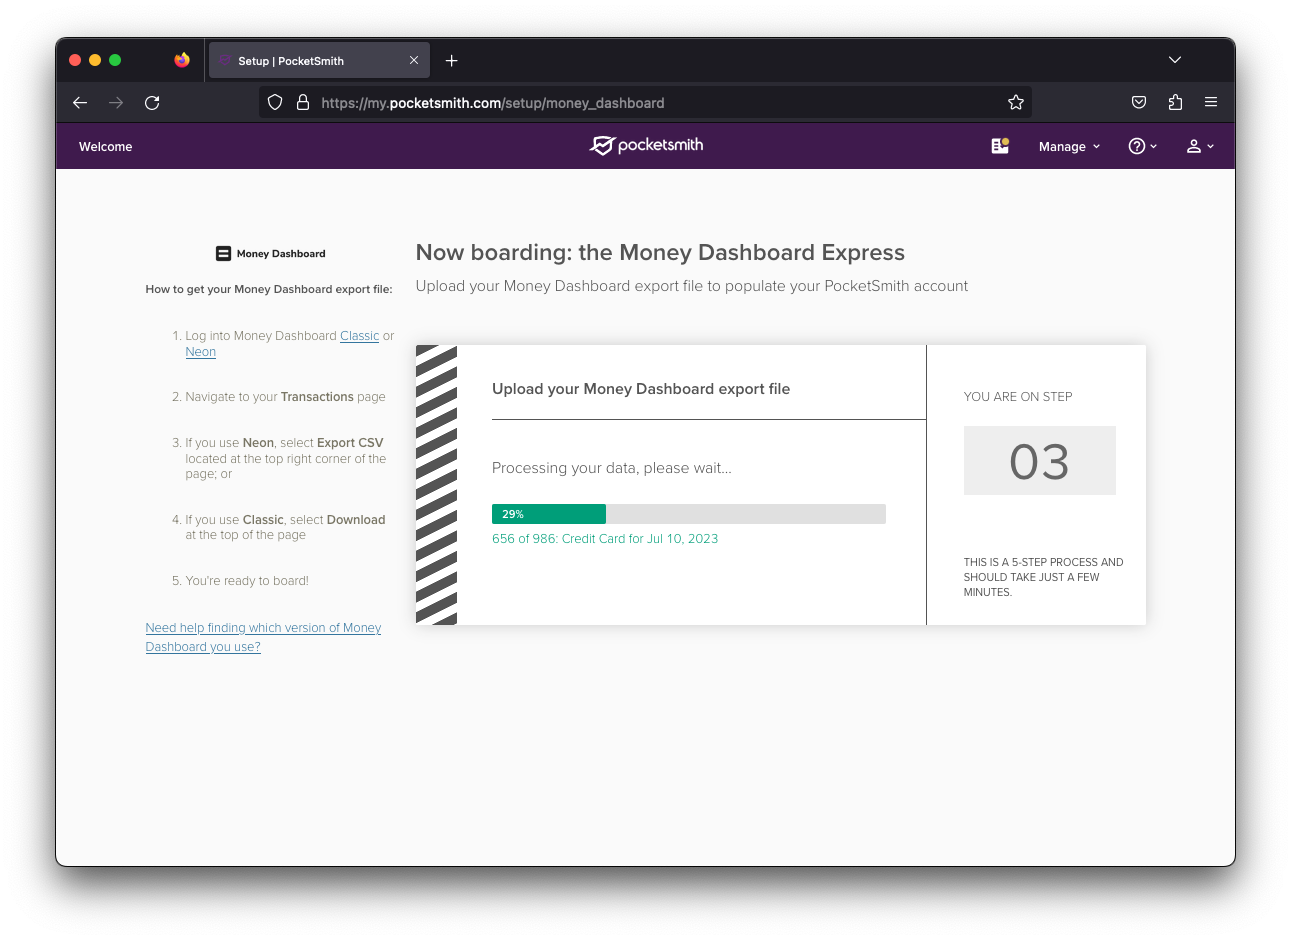
In progress import from Money Dashboard
Be aware that if you have a large number of transactions, the import might take a bit of time. Don’t worry if it seems to stall, particularly during the “Calculating running balances” phase at the end of the import for each account. Just keep your browser window active and maybe it’s a good time for a coffee break!
3. Set your banks and balances
Because Money Dashboard doesn’t contain bank/institution names nor account balances within their exported CSV files, you’ll need to enter what bank each account belongs to, and enter the current balance for each of the accounts.
The account balances will be brought up to date later when you connect bank feeds to these accounts. So if you intend on connecting bank feeds straight away, it won’t be essential to get this completely correct, unless you want to see your correct Net Worth right away.
It’s a good idea to enter the correct bank/institution names for each of the accounts imported however, as this’ll help with linking up the correct bank feed account with the correct imported account when you get your bank feeds connected up next.
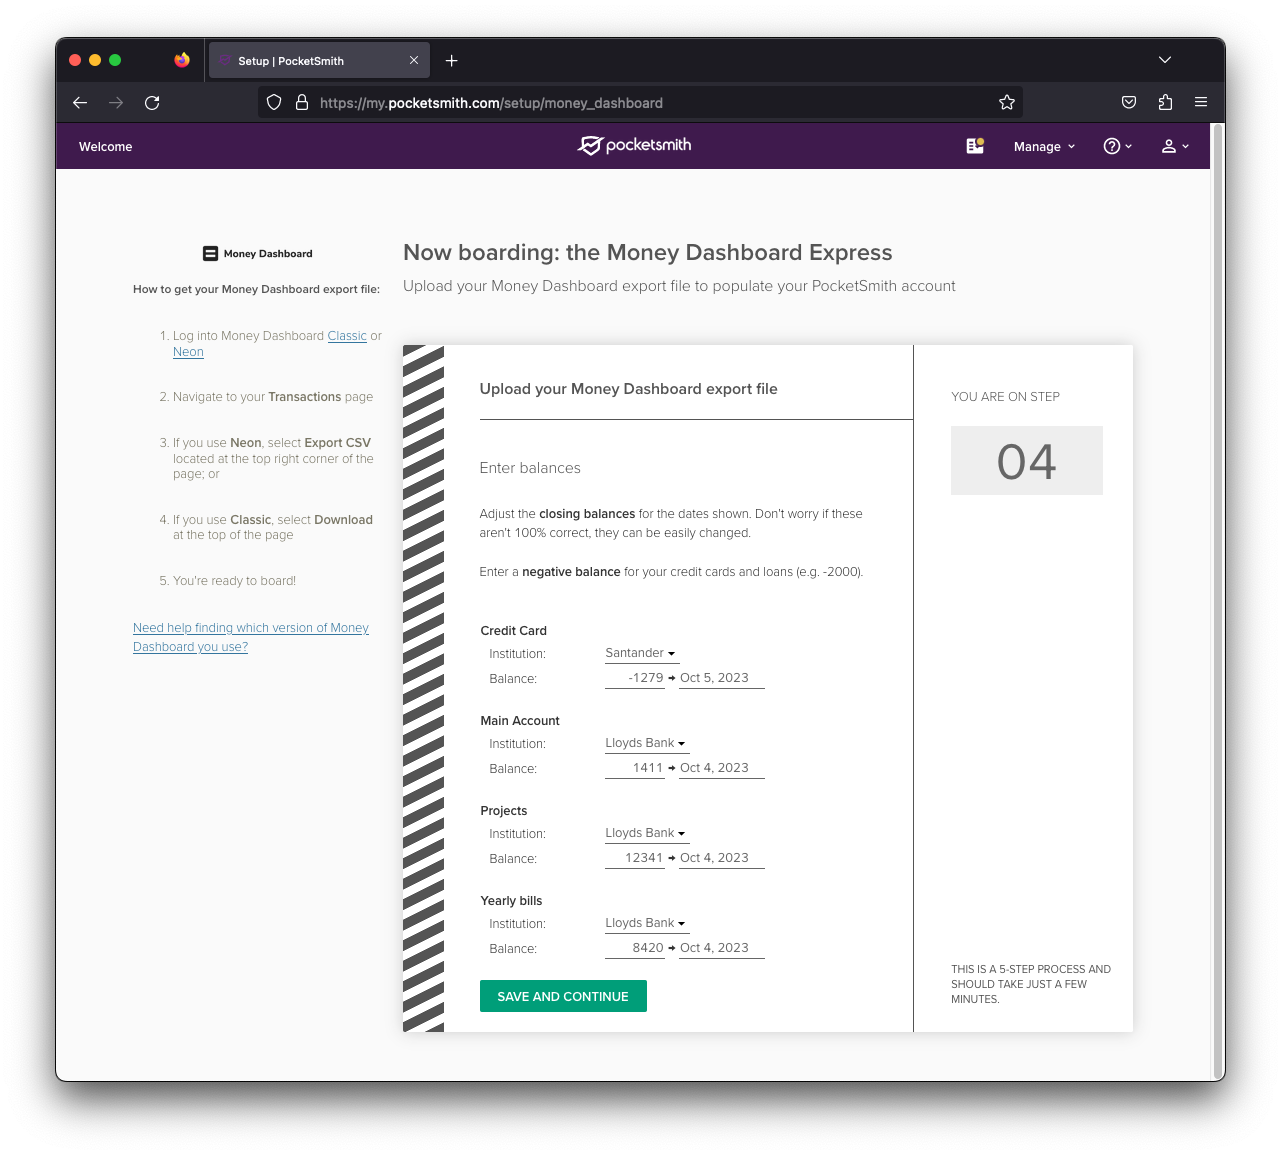
Setting your bank name and balances
4. Rejoice and check out PocketSmith’s features
Great! Your Money Dashboard data has been successfully transferred to PocketSmith. Feel free to dive into your new Dashboard or explore some of the other functionalities under Reports.
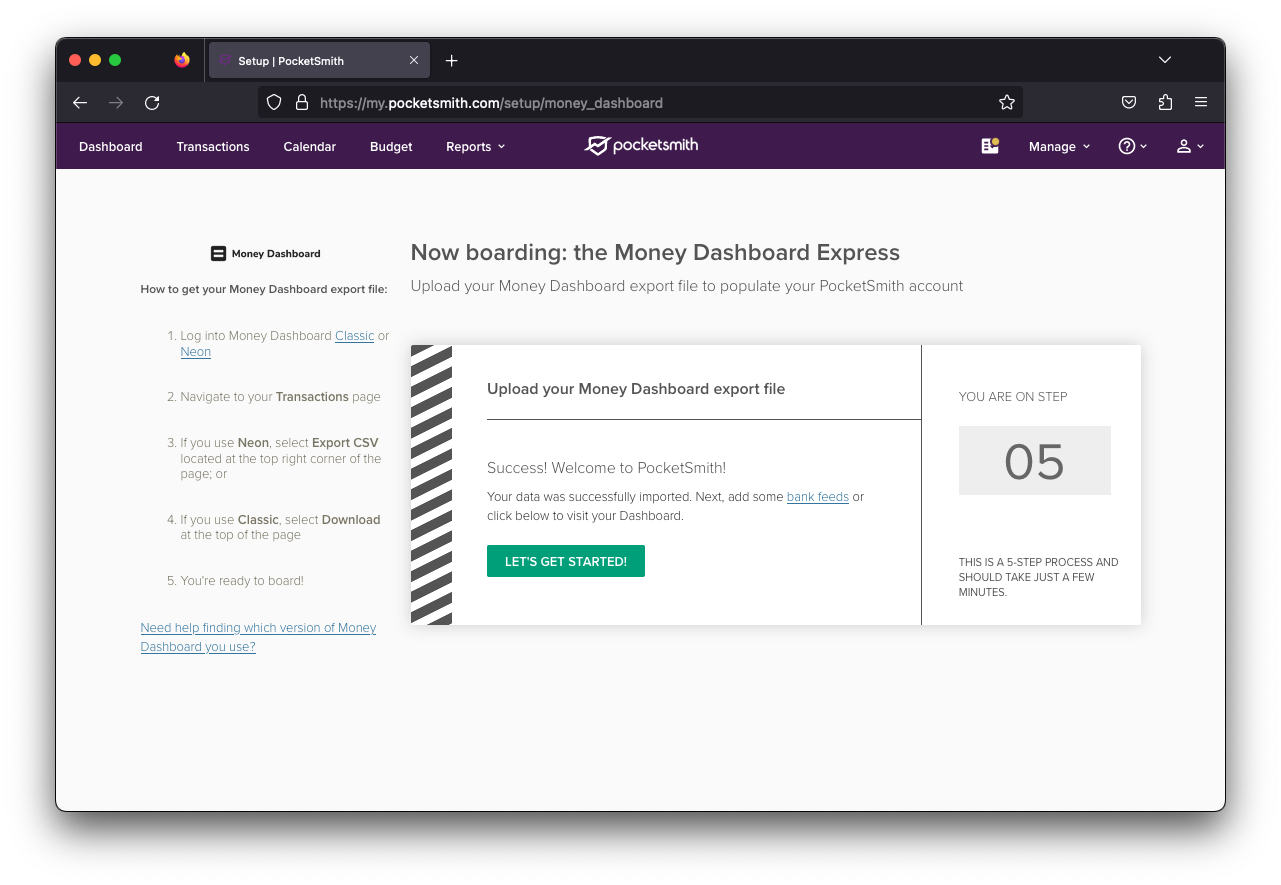
Money Dashboard data import complete
Now’s a great opportunity to set up feeds for your account and connect them to the accounts you’ve just imported. PocketSmith is open banking-ready, and you can connect to your banks via our PSD2-compliant data provider Salt Edge for most accounts in the UK, with Yodlee filling in the gaps that the PSD2 legislation doesn’t cover. You’ll find more details on this in step 4 below.
What’s ace about budgeting in PocketSmith is that when you input your regular budgets and bills, you’re creating a cash flow forecast for your accounts. This allows you to preview anticipated bank balances at any future date, which is fantastic for planning.
In PocketSmith, every category can possess its own budget — be it an income or expenditure goal for a specific category, set for a designated budgeting period. Budgeting within PocketSmith is supremely adaptable, allowing you to adjust each budget to perfectly match your circumstances. Fancy a deeper dive? Have a gander at our budget tips and tricks over on our Learn Centre.
For a quick kick-off, the auto-budget tool is a brilliant choice, especially if your transaction data is spot on. It examines your entire categorized transaction history, sets a fitting budget frequency, and establishes a benchmark based on your past expenditures. Once you’ve got your auto-budgets in place, you can further fine-tune them as you see fit. Let’s dive in!
1. Go to the Budget page from PocketSmith’s main menu.
2. Click the auto-budget tool link, from the toolbar above or the section at the beginning of the Budget page.
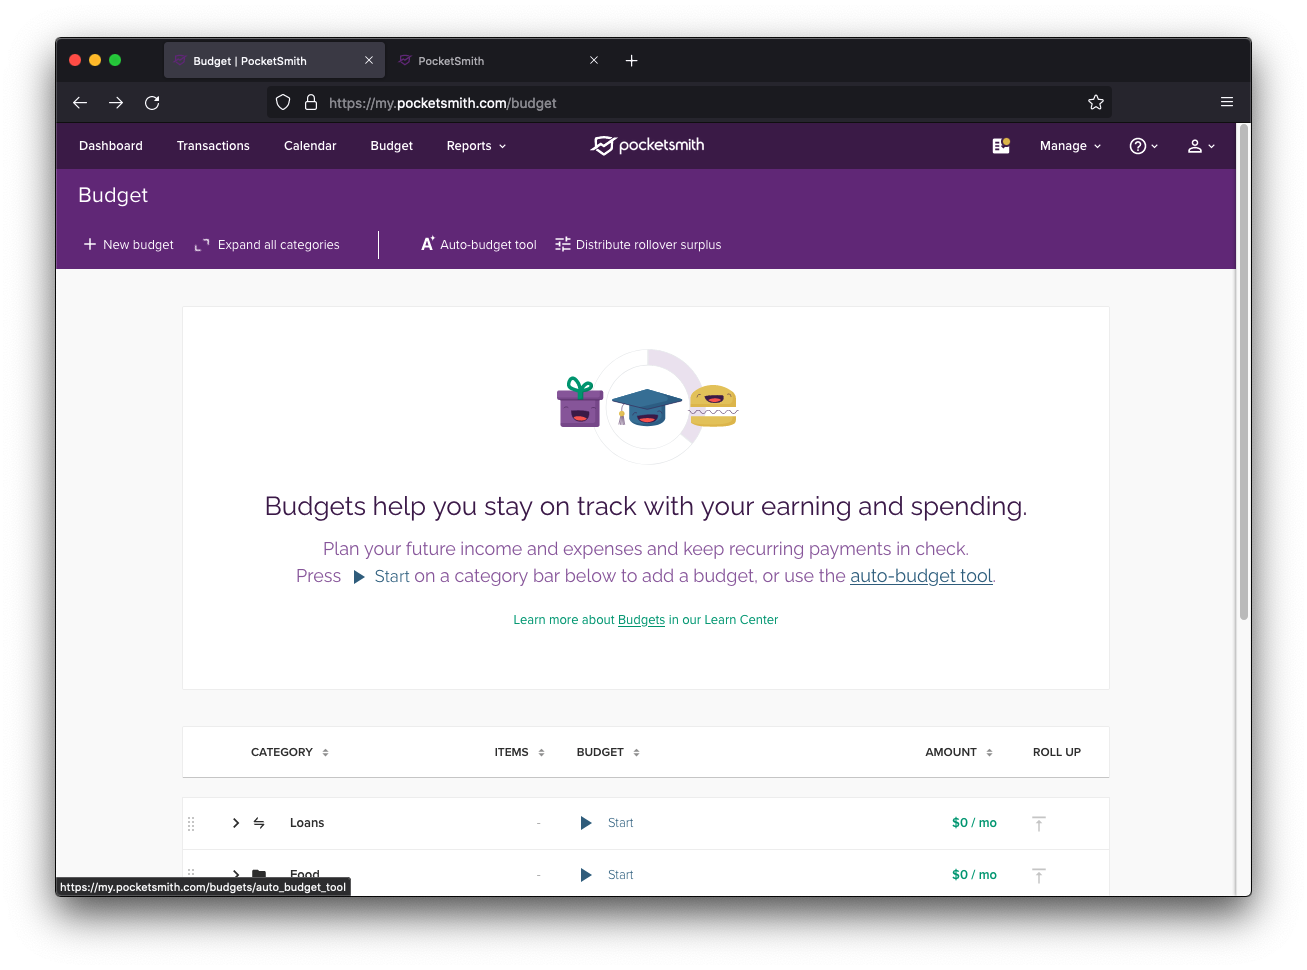
The budget page immediately after import
1. The auto-budget popup
This action will bring up the auto-budget tool prompt. Just click the prominent green Start auto-budget tool button to initiate the budget computation. How long this takes will vary based on the number of transactions you have.

The auto-budget popup showing the confirmation button
2. Your automatically created budgets
PocketSmith will display your auto-generated budgets in the pop-up. If there are any budgets under a category you’d rather not allocate funds to – like a hefty budget for Transfers – just hit the cancel dash symbol visible beside the budget when you hover. This action will delete the auto-budget for that specific category, like the “Household” budget showcased in the image below.
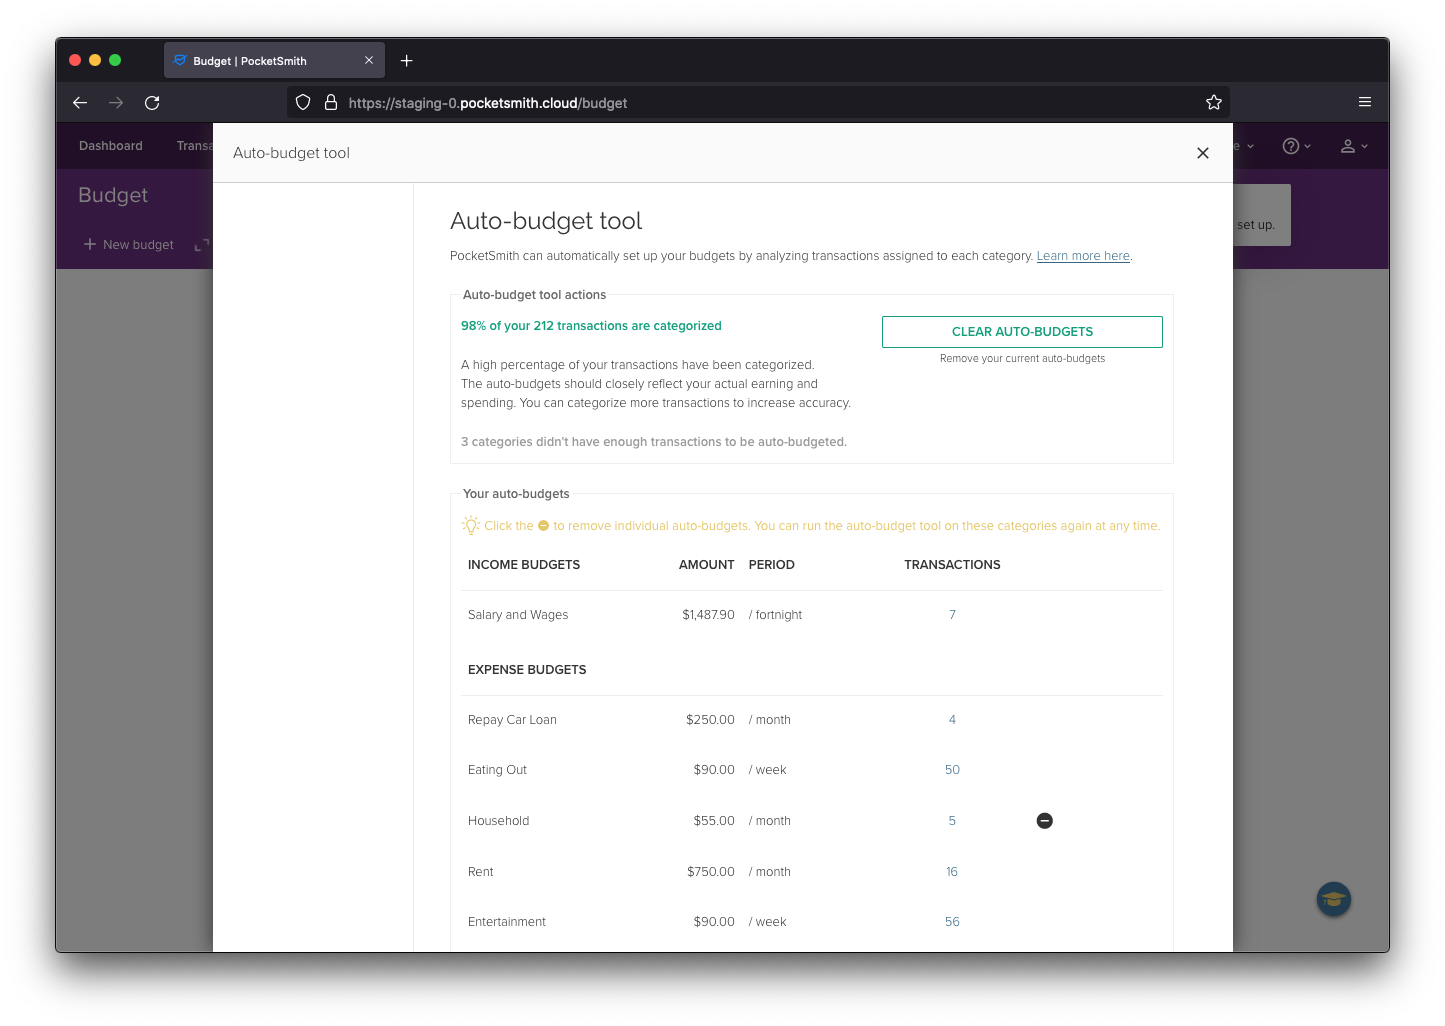
Automatically created budgets, showing the removal icon for "Household" budget
3. Your budget analysis
Once you exit the pop-up, an analysis reflecting your freshly crafted budgets will be presented. To modify a budget, tap the three-dot menu adjacent to each budget and select “Edit/Delete budget”. For an in-depth historical overview of a particular category’s budget, just click on the category name.
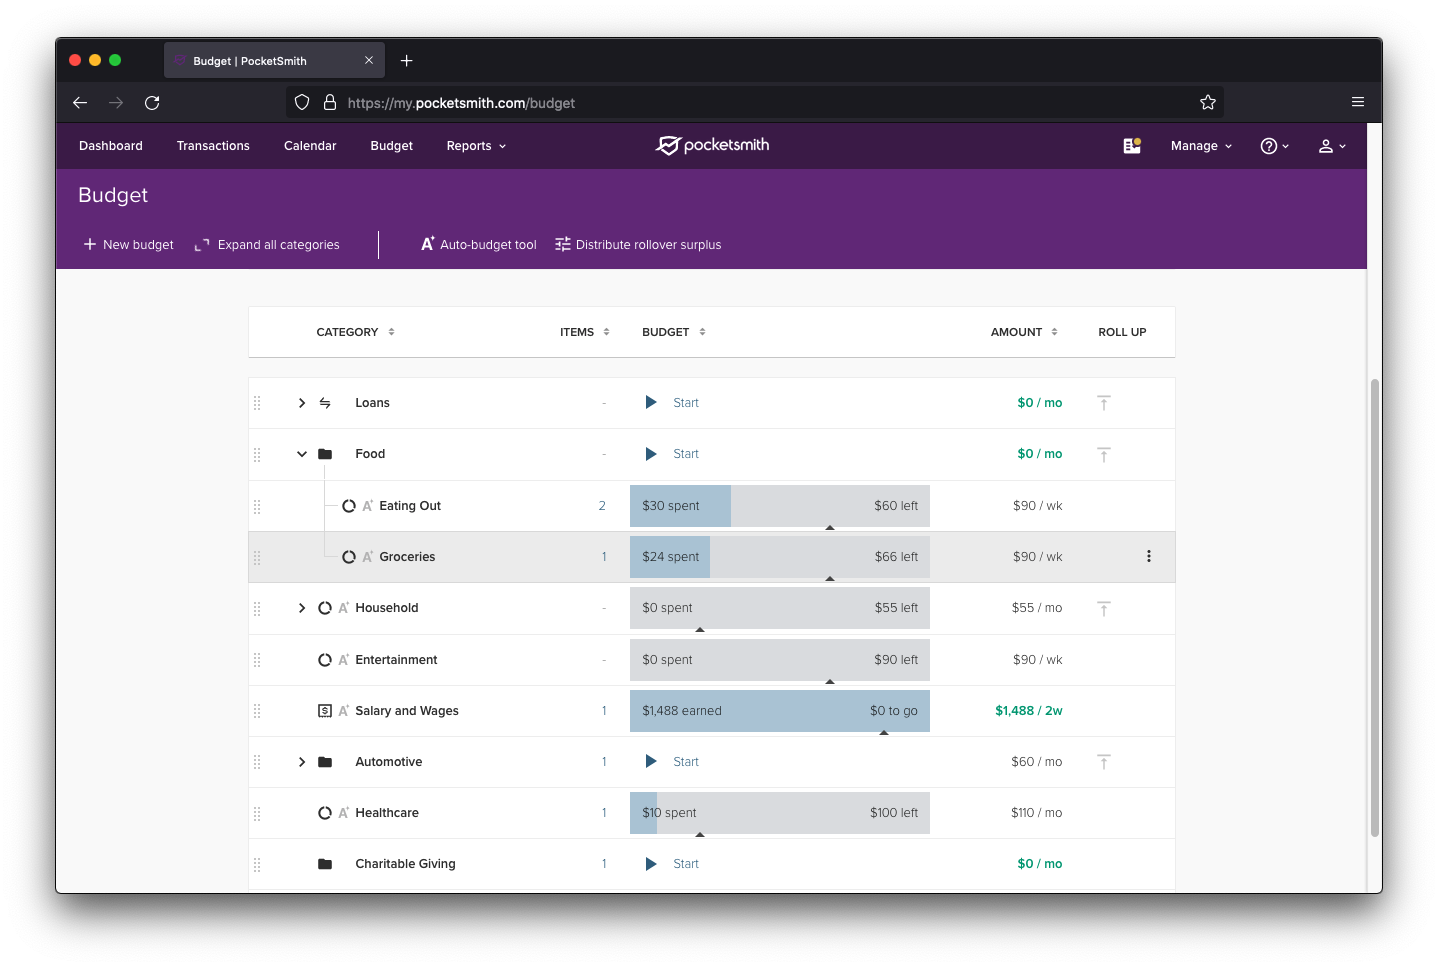
Created budgets shown in the main Budget page
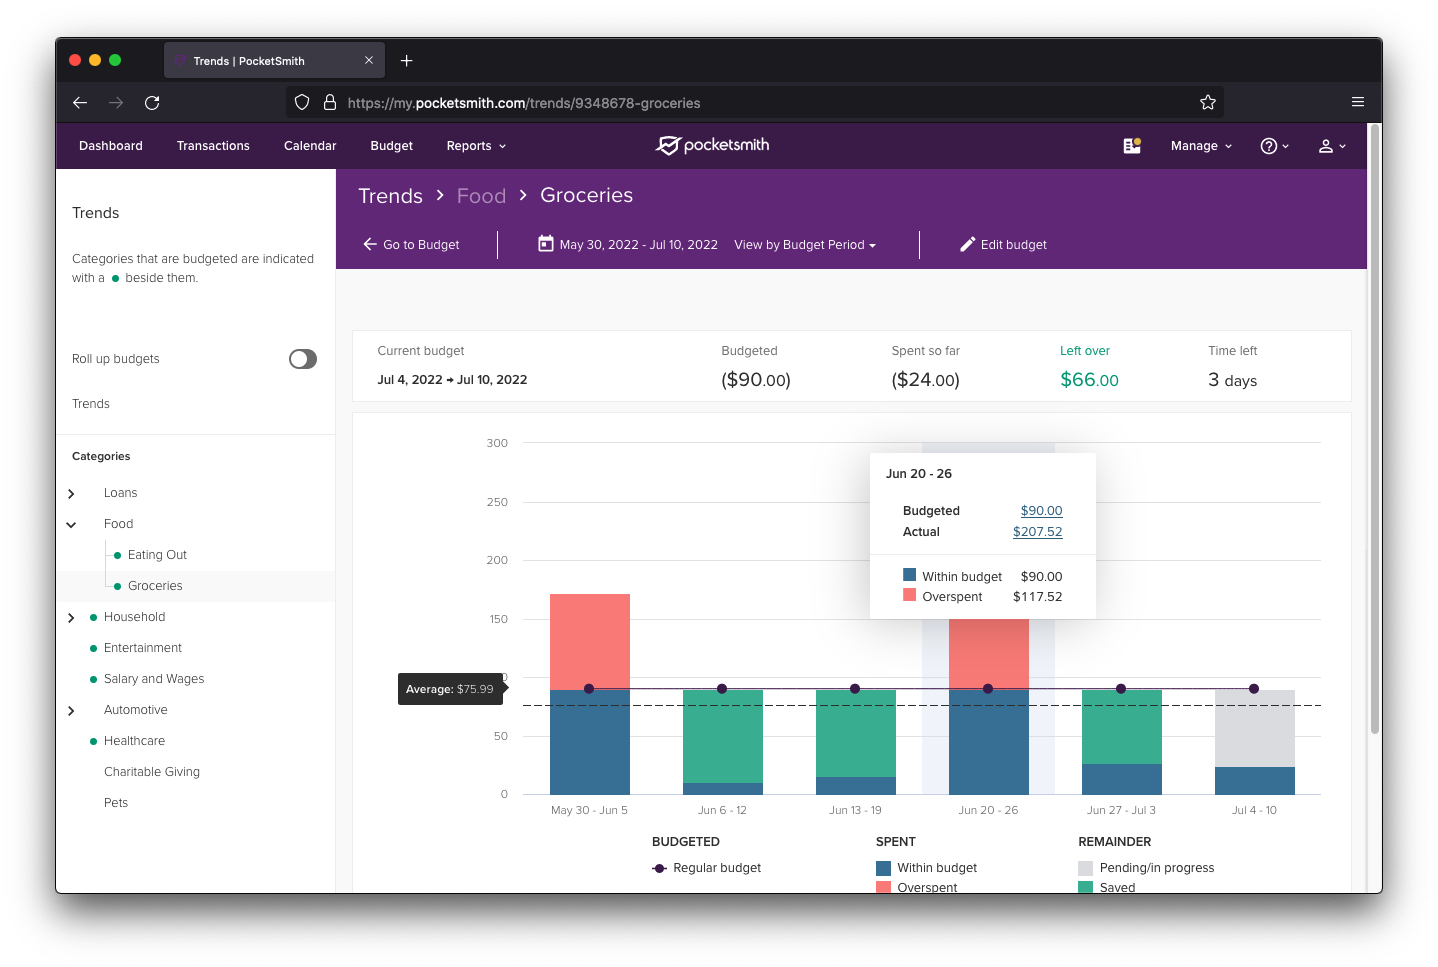
Drilling down into the historical analysis for the Groceries budget
4. Your budget in the Calendar
After reviewing your budget analysis, navigate to the Calendar page to visualize your budgets in an alternative layout. If you wish to tweak some budgets post auto-budgeting, you can adjust either every occurrence of a budget or just a specific one. Simply click a budget in the calendar to edit it, and follow the provided guidance. This page also highlights one of PocketSmith’s standout features — the seamless blend of your budgets and current balance to project your financial future!
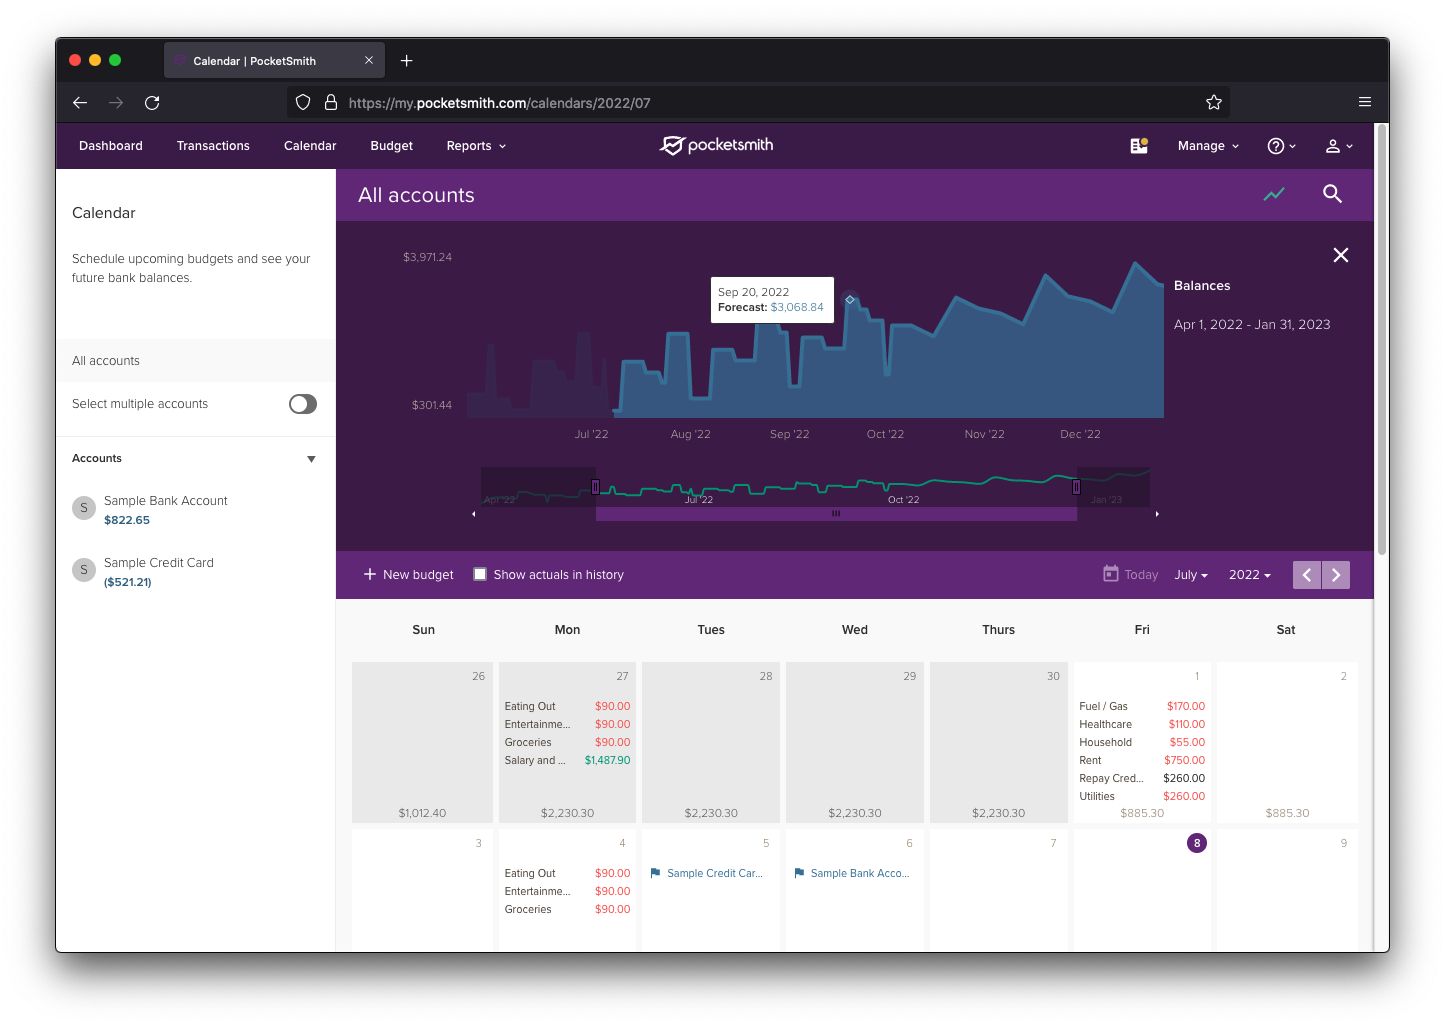
The PocketSmith calendar, showing budgets and the forecast graph
We’ve just touched upon the vast capabilities of PocketSmith in terms of budgets. Moving forward, trust your instincts and turn to our Learn Center whenever you require guidance.
Now, let’s connect the accounts you’ve imported to a bank feed to begin fetching new data.
Within PocketSmith, bank feeds are an exclusive premium feature available only with paid subscriptions. After you’ve upgraded from the Free plan, start by visiting the Manage Feeds page.
If you’re adding UK-based bank feeds, you’ll be able to use our PSD2-compliant data provider, Salt Edge to add open banking feeds. To add these feeds, just keep an eye out for the “via Salt Edge” tag next to your bank in the feed results.
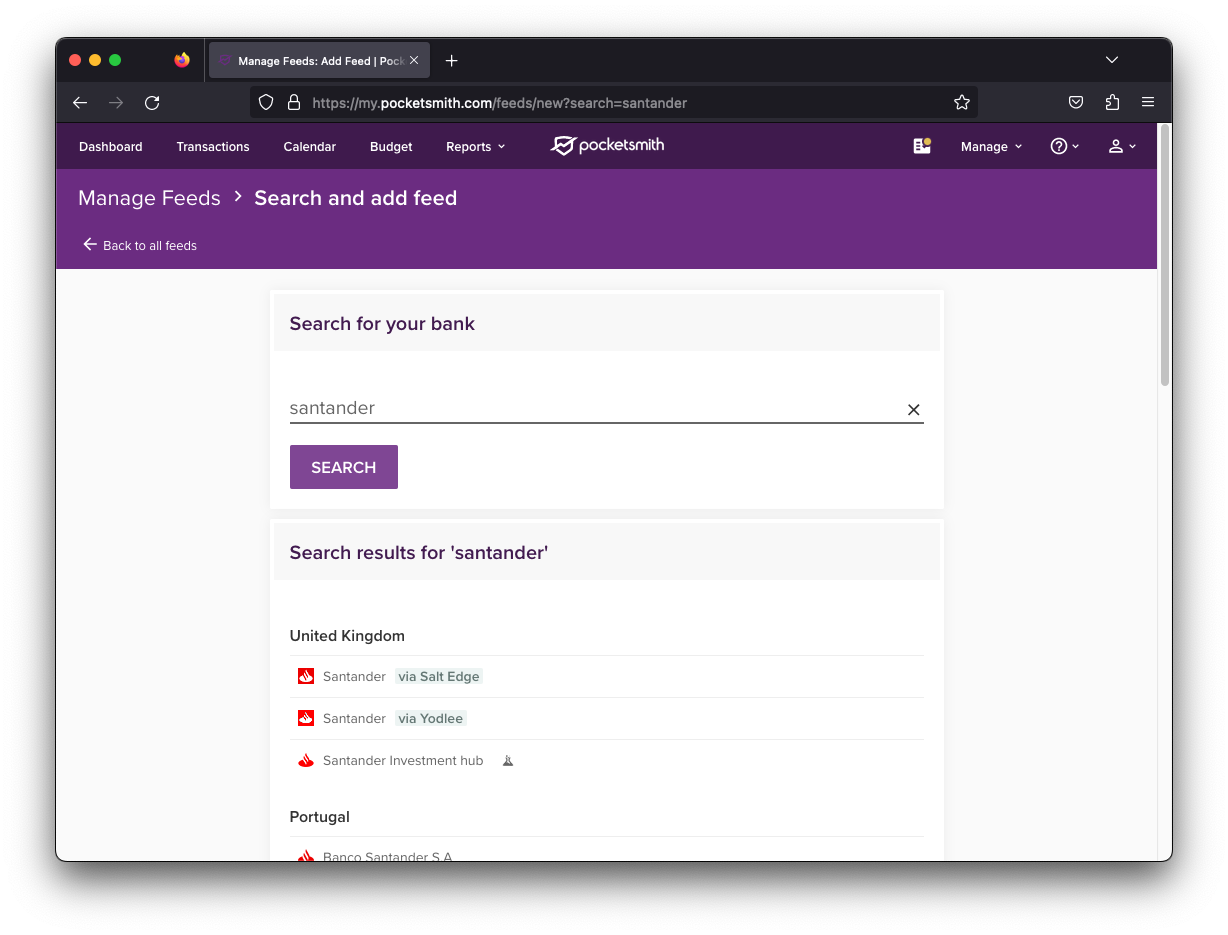
Look for the via Salt Edge tag to identify open banking feeds
For guidance on setting up your feeds, you can refer to our Learn Center’s guide. The process is designed for simplicity, especially if you’re familiar with bank feeds from Money Dashboard.
Once you’ve connected your feed, the subsequent move is to associate your feed accounts with the ones you transferred from Money Dashboard. This ensures you won’t encounter any duplicate transactions or accounts. For a step-by-step, check out this tutorial on our Learn Center.
Kudos, you’ve made it! We wholeheartedly believe you’ll relish navigating through PocketSmith and harnessing its adaptable features. Our passion lies in refining this craft, and your feedback means the world to us. Don’t hesitate to reach out — our stellar support team is always at your service.
Tales of how PocketSmith has revolutionized personal finance management inspire us daily. We’re eager to soon hear your unique story and success!

James is the CTO and co-founder at PocketSmith. He loves tech from software to hardware to music, and is passionate about technology being a net-positive in people’s lives. He lives off-grid with three humans, one axolotls, one rabbits, one dog, and too many possums.