Looking into your financial future

- local_offerPlan PocketSmith Free
- buildTask type Easy
- listSteps 3
- timelapseTime required 10-15 minutes
- favoriteGrab a... Cup of tea
Do you know how much cash you will have in your bank account in three weeks? What about in three months? It can be hard enough trying to remember how much you spend in a single day, let alone predicting your future cash flow.
It’s actually quite straightforward. First, you'll need to set up a budget. If that sounds a bit scary, don't worry, because we'll be here to help you along the way. The good thing is you can start with what you already know - you won't need to go into too much detail right now.
All you need is to make a few assumptions based on how much you earn and spend. Specifically, how much you get paid (and when) and what you think your average expenses are for food, bills and housing. Estimates are good for now - we'll get a more accurate picture in the next guide.
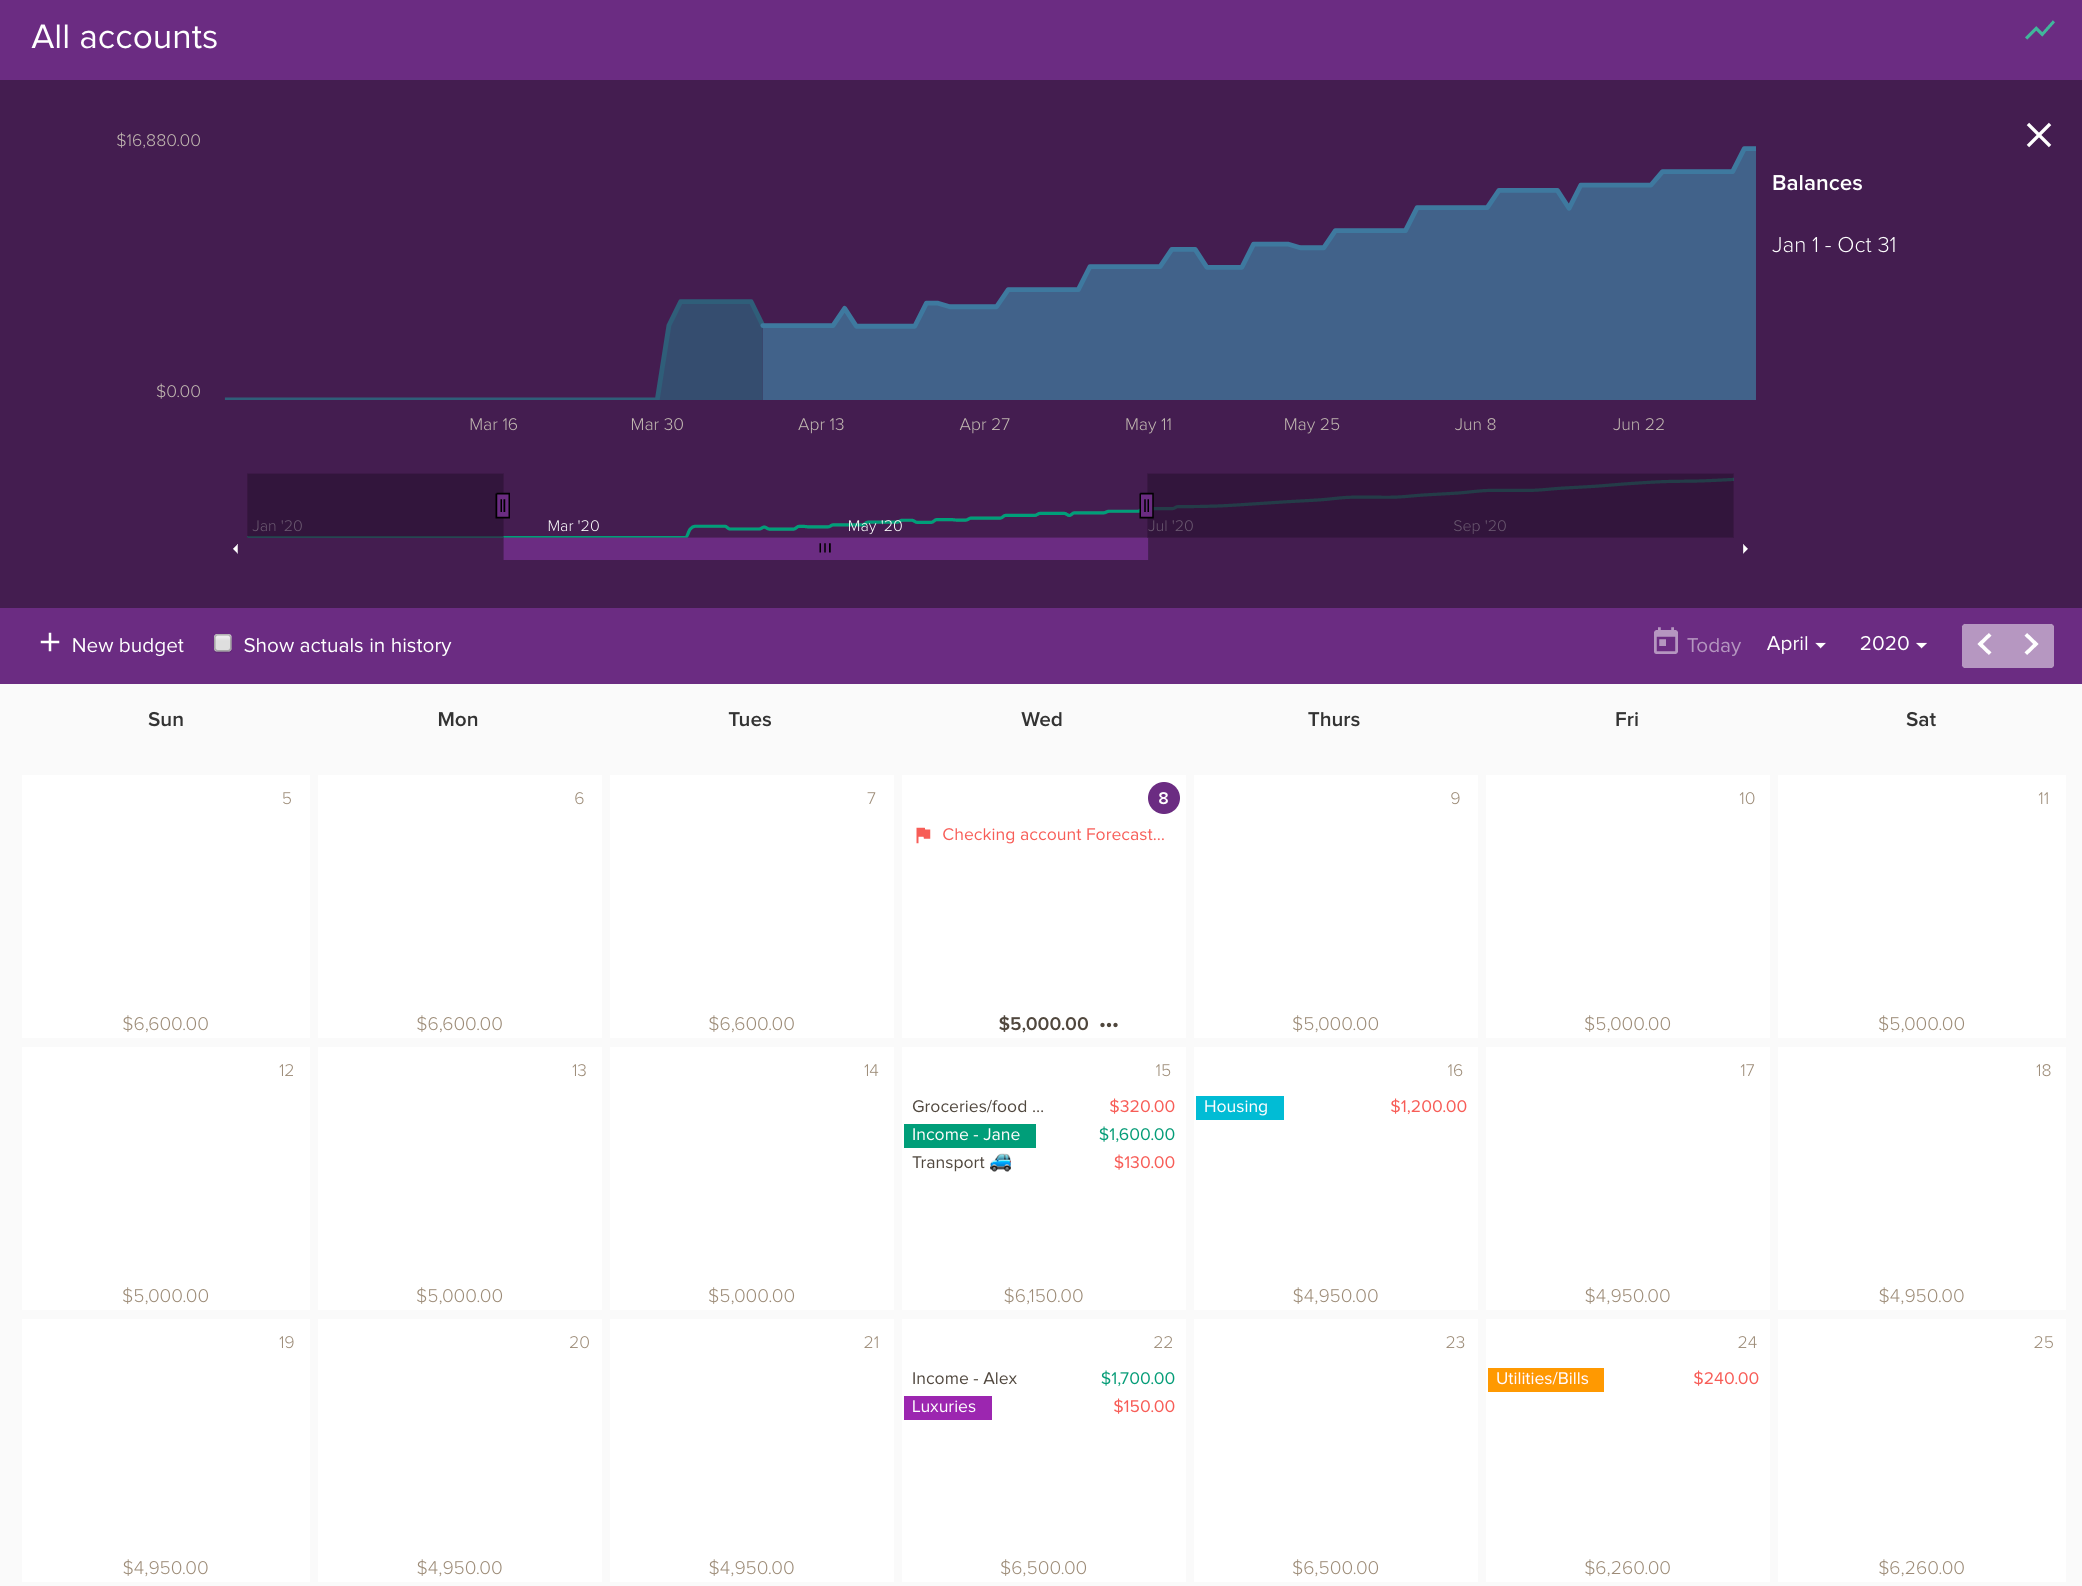
To add your budgets to PocketSmith, simply use the calendar to enter your various ins and outs. As you add these, you’ll see your calendar adjust to calculate how your money will flow in the future. Click on any day in the next six months to see what your bank balance will look like.
Step 1. Add your bank balance to your calendar
Your first step is to start where you are right now by adding your current bank balance to the PocketSmith calendar. We recommend you focus on the account that handles the bulk of your cash flow.
 Click on the instructions to change the picture.
- In your new PocketSmith account, you’ll be greeted with a welcome screen. Click ‘Okay’ to continue. Next, click ‘Skip the checklist for now’ at the bottom of the list to head straight to your Account Summary page (don’t worry you can come back to this later).
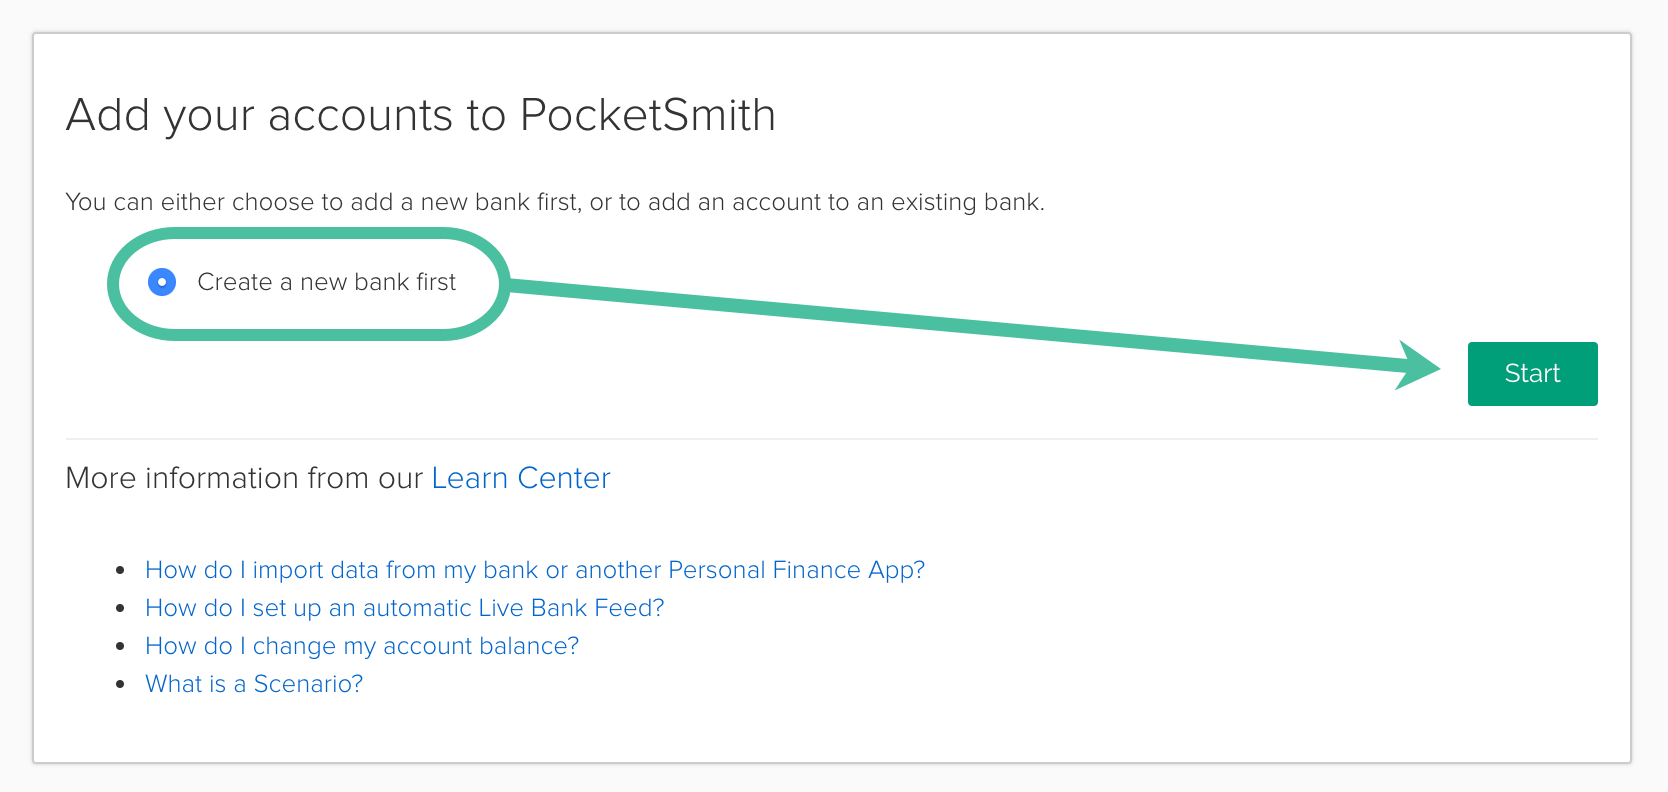
- To add your bank balance to PocketSmith we need to set up your bank. Select ‘Create a new bank first’ then click ‘Start’.
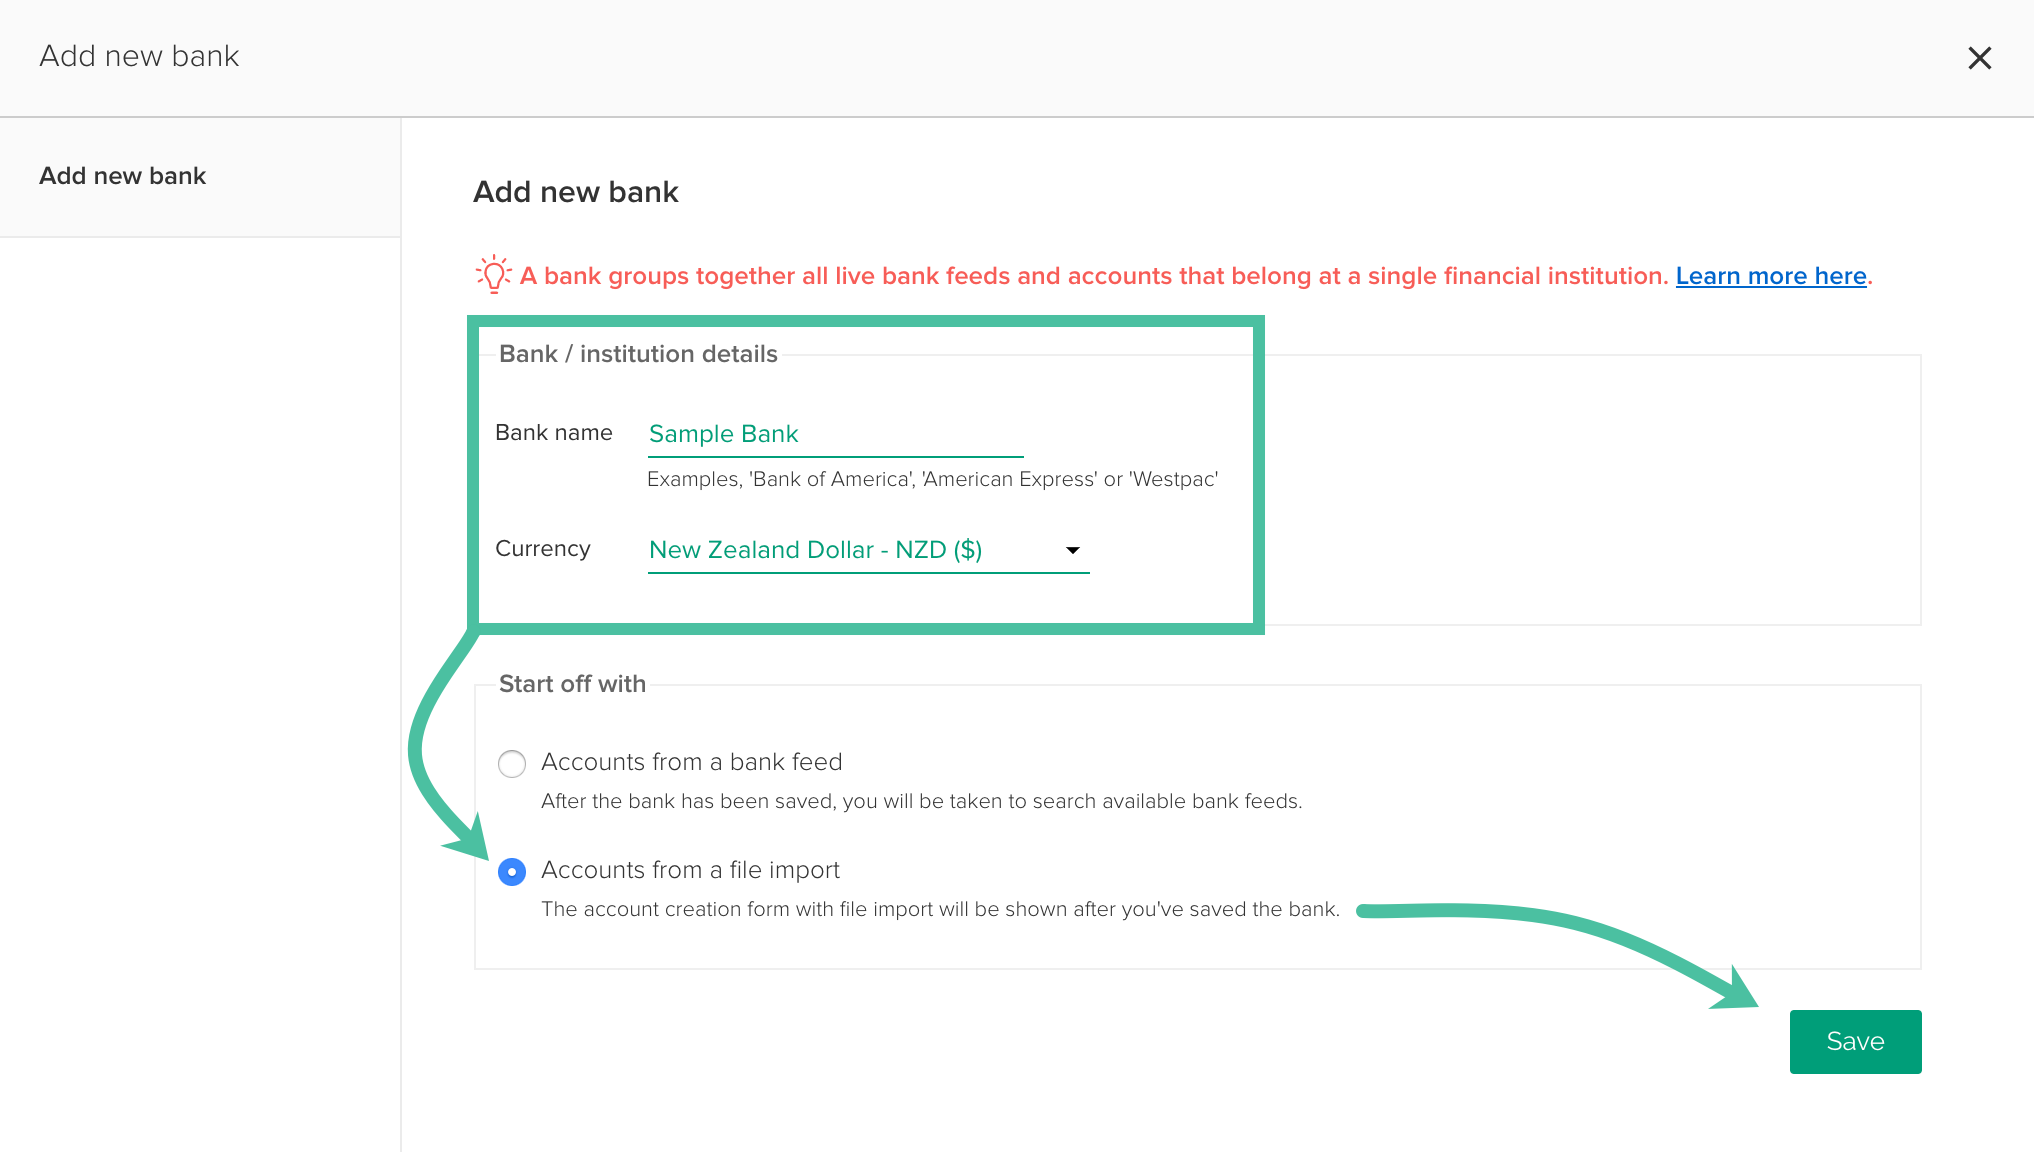
- Add your bank name under ‘Add new bank’. Be sure to have the last option, ‘Accounts from a file import’ selected and click ‘Save’ to continue.
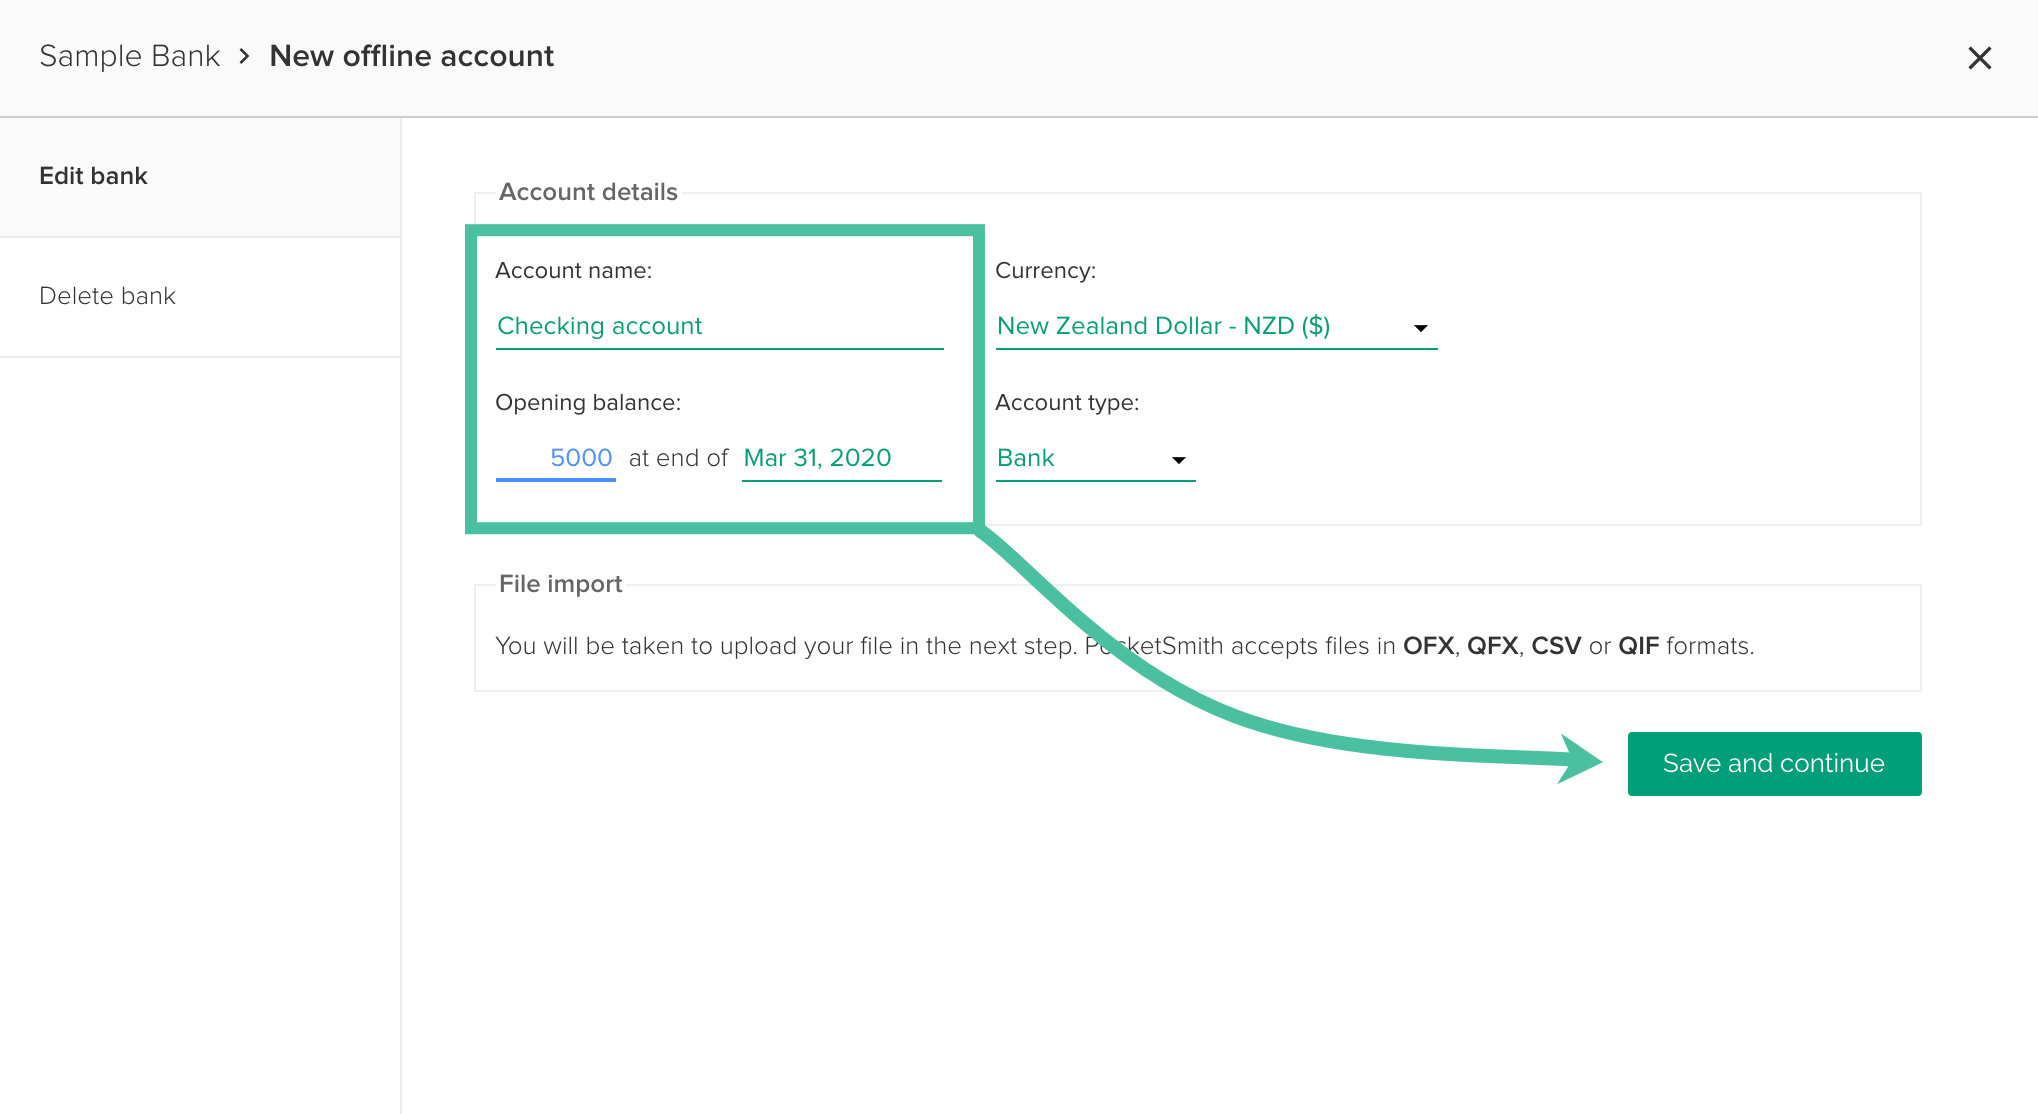
- Enter your account details. Give it a name that is simple and easy to find such as “My personal account”. For your opening balance, add the total amount you had in your bank account at the end of the day, yesterday. Click ‘Save and continue’.
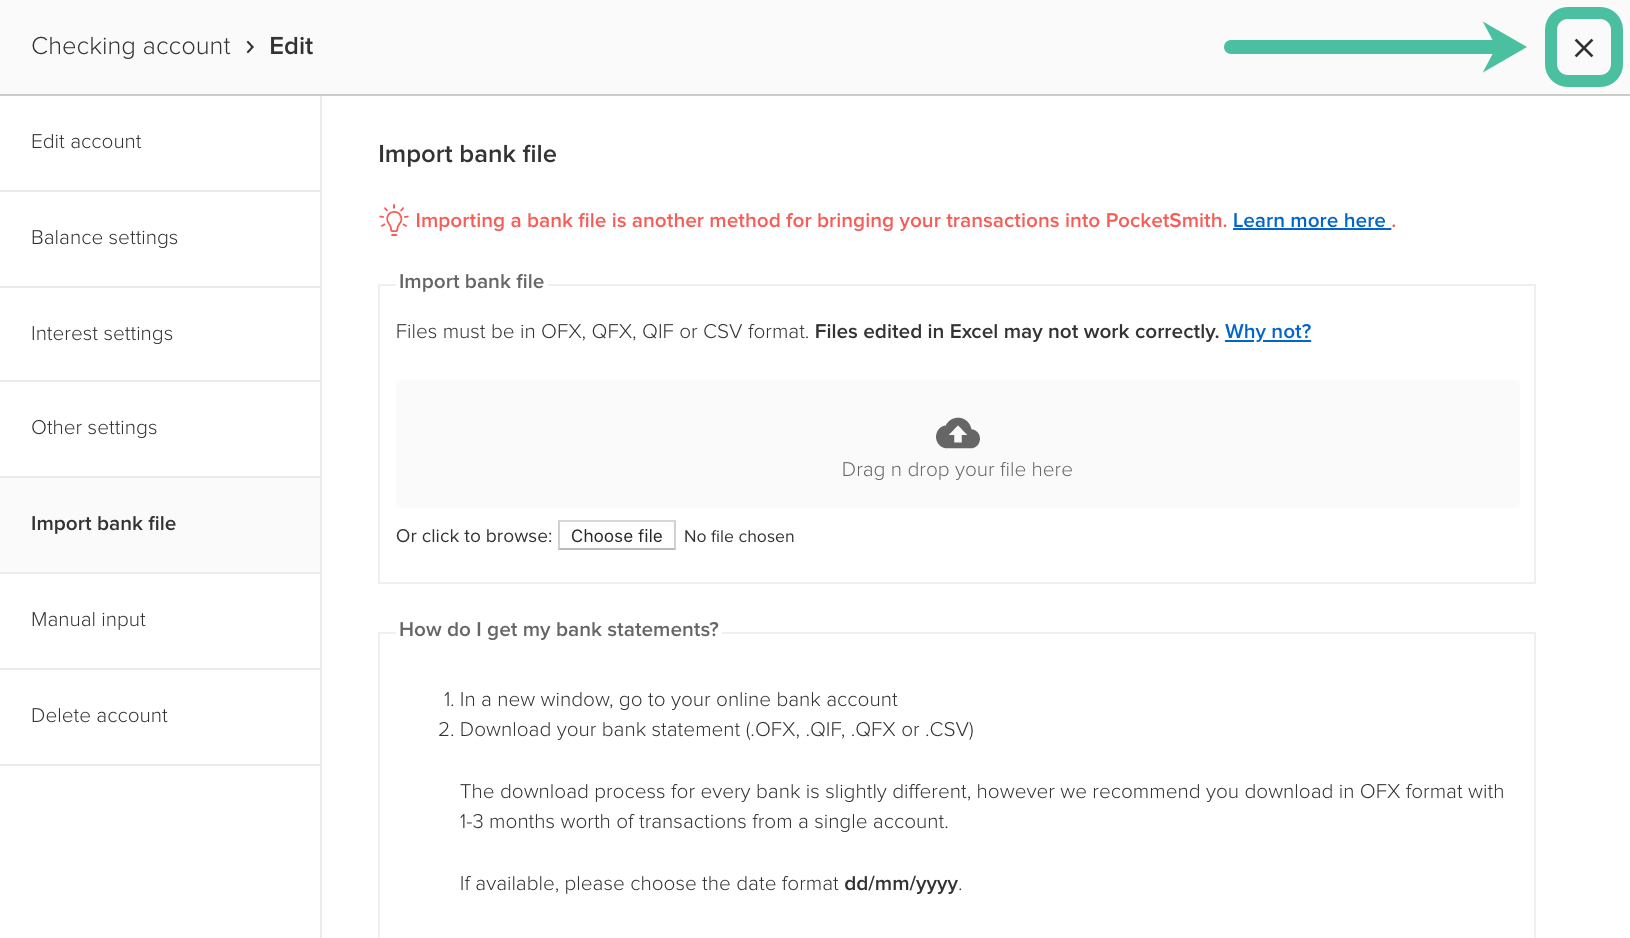
- Here you can import a file with your transactions from your bank account. We will take care of that in the next guide, so we can skip it for now. Close this page and your account will now appear on the Account Summary page.
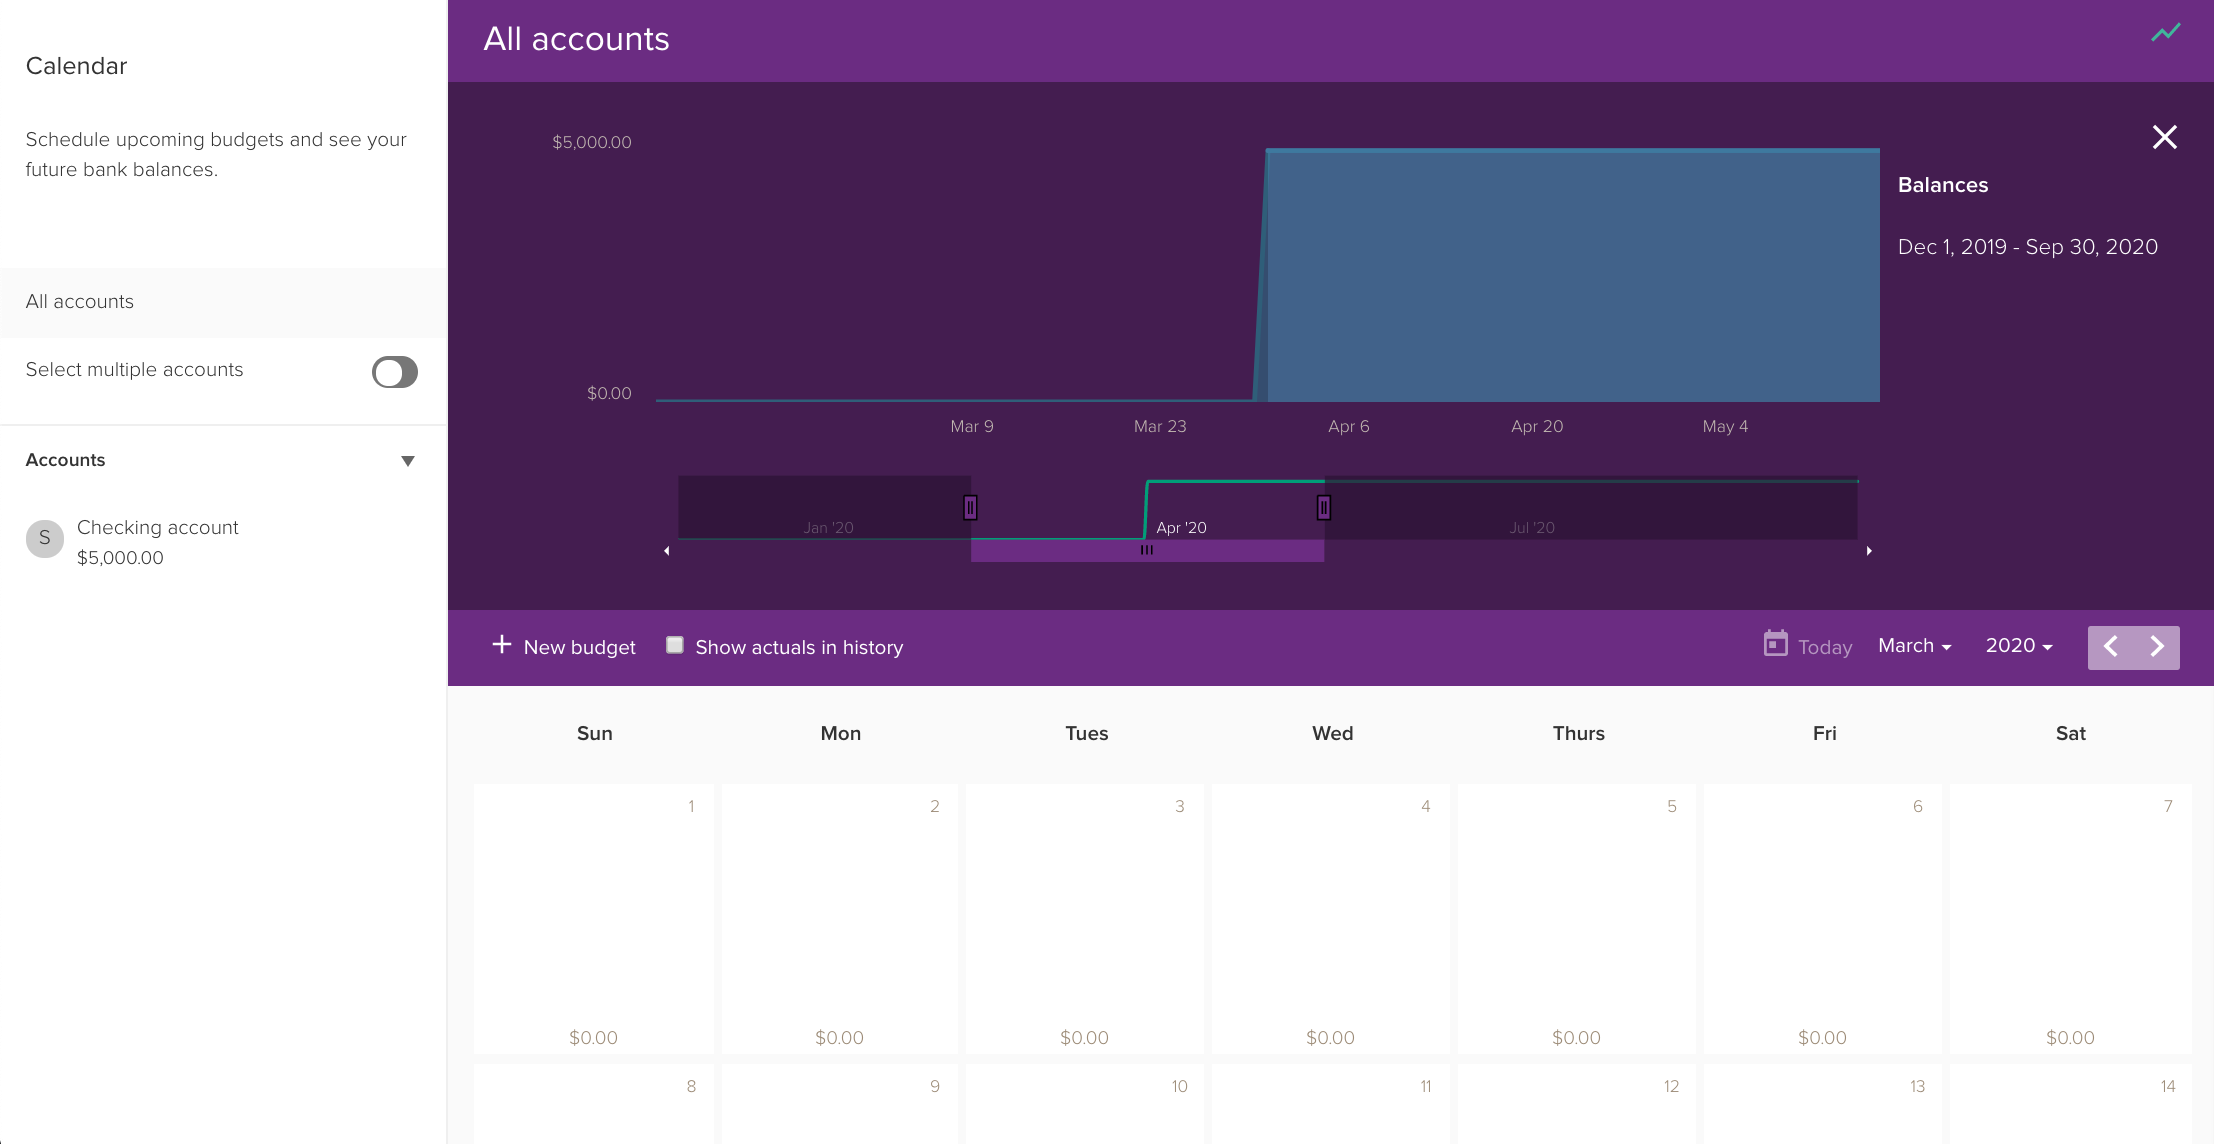
- Head to Forecast > Calendar. You’ll see that your account balance is displayed on the current date. At the moment, this will all be looking pretty flat and repetitive, which is expected. Up next we’ll add budgets to balance that out.
Step 2. Add your income to your calendar
Your next step is to add your earnings. You can specify whether your salary payments repeat, or if they arrive as a lump sum. If you have multiple income streams it’s best to create separate budgets for each. For example ‘Salary’ for repeating income and ‘Freelance payment’ for once off funds. Use the calendar to plot out all your incoming money for the next 6 months.
 Click on the instructions to change the picture.
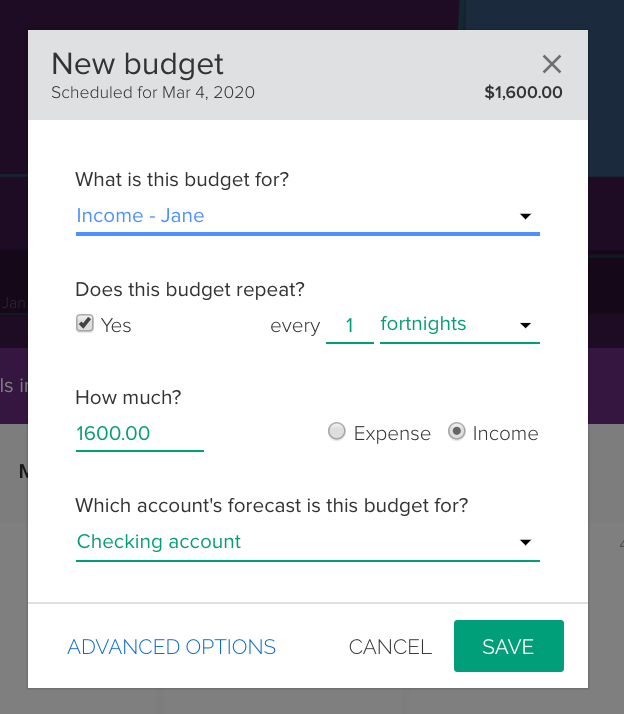
- On the Calendar, click on the date you will next receive income. Add a separate budget for each stream of income you have.
- Create a budget category for your main income, e.g. 'Salary' with your chosen repeat options. Enter your amount and click the ‘Income’ option. Click ‘Save’.
- Click ‘Continue’ in the "Well done!" message that appears.
-
If you need to create more income budgets, repeat step
a.
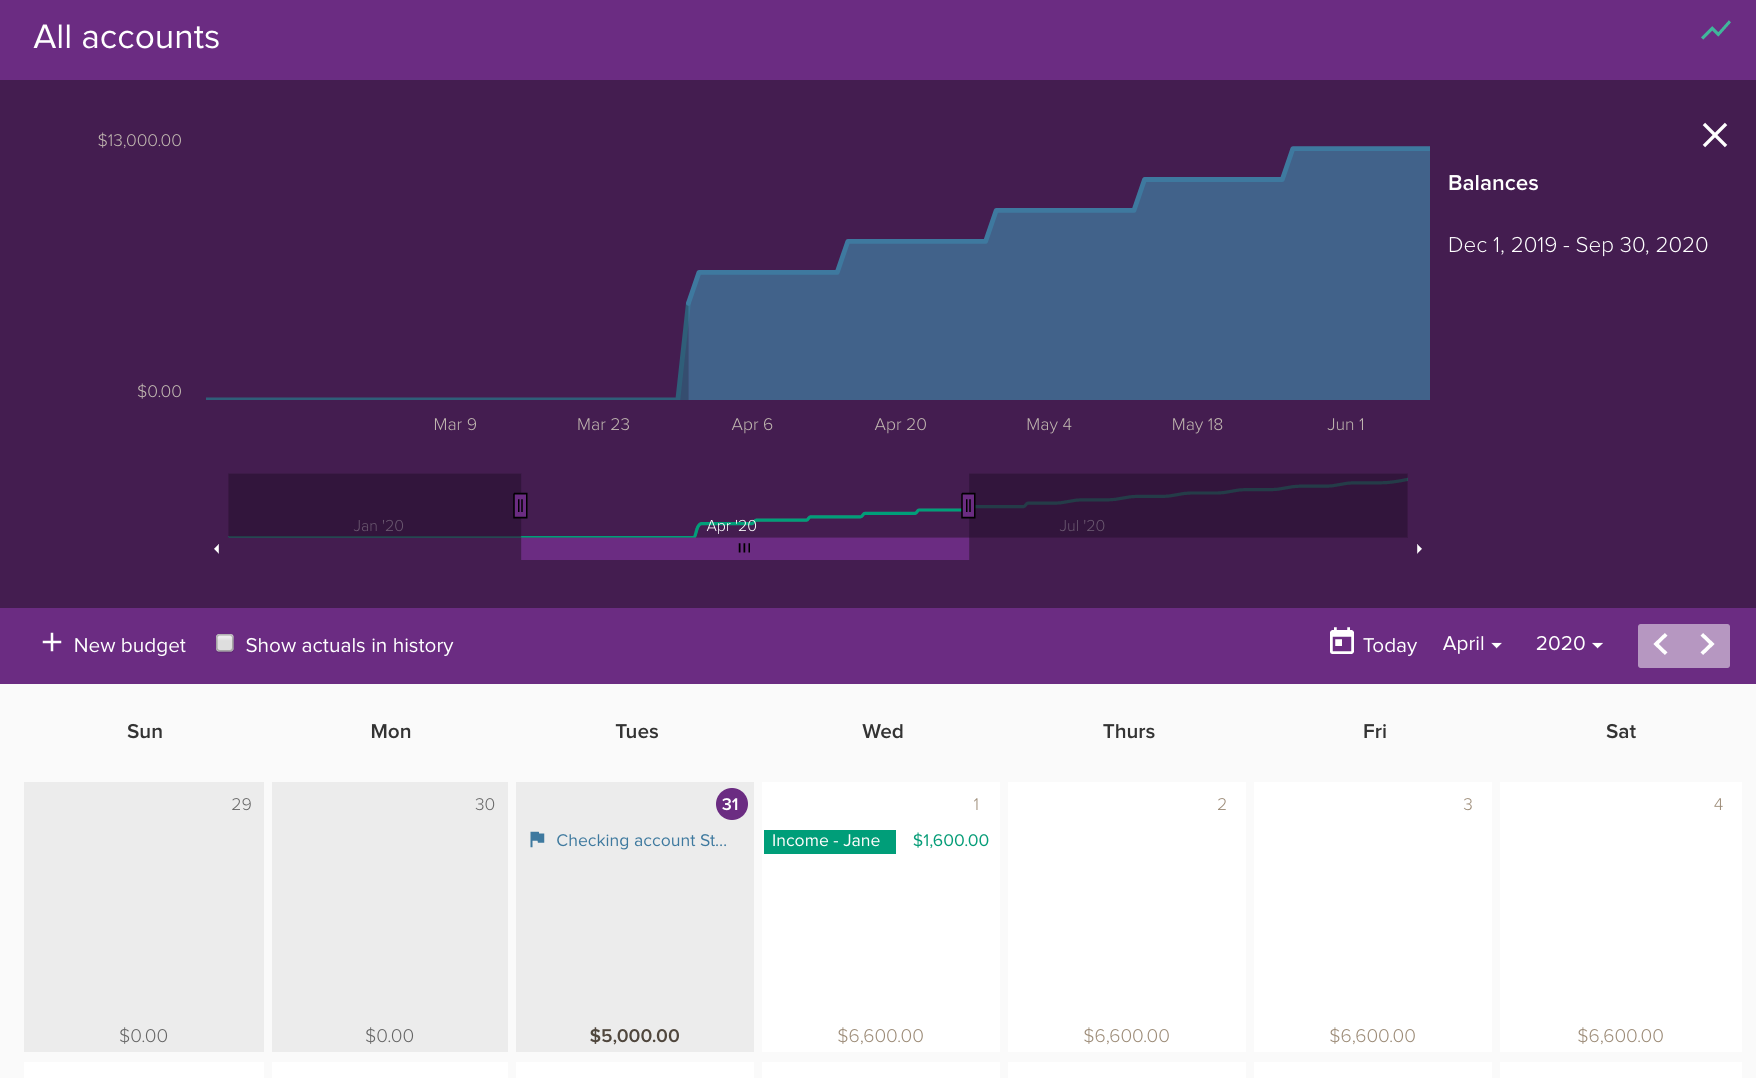
Otherwise, check out the Calendar and forecast graph to see how adding the budget has affected your forecast balances.
Step 3. Add your expenses to your calendar
Take a moment to check out the forecast graph above the Calendar. You’ll see how adding your earnings has changed the shape of your future. In this next step you’re going to balance that out by adding budgets for your expenses.
 Click on the instructions to change the picture.
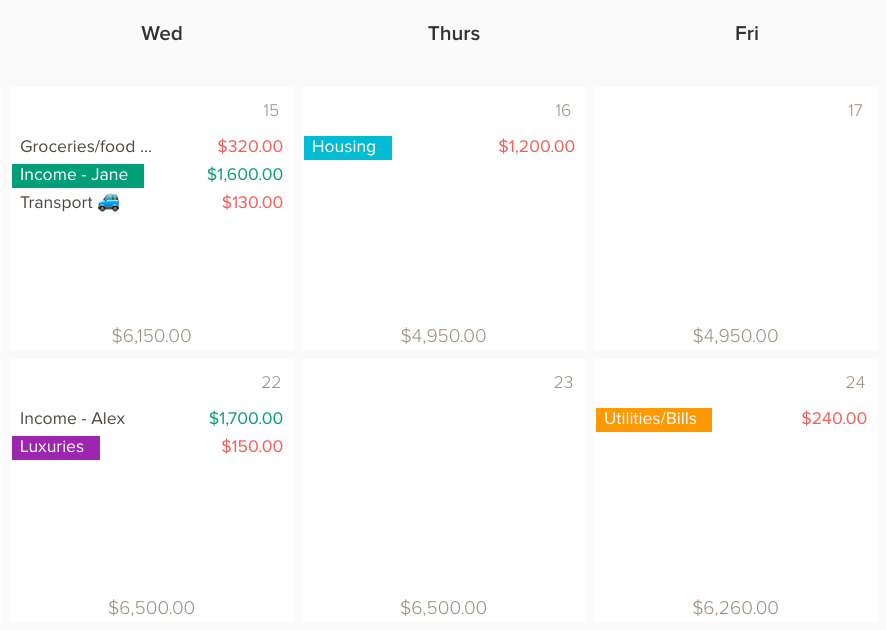
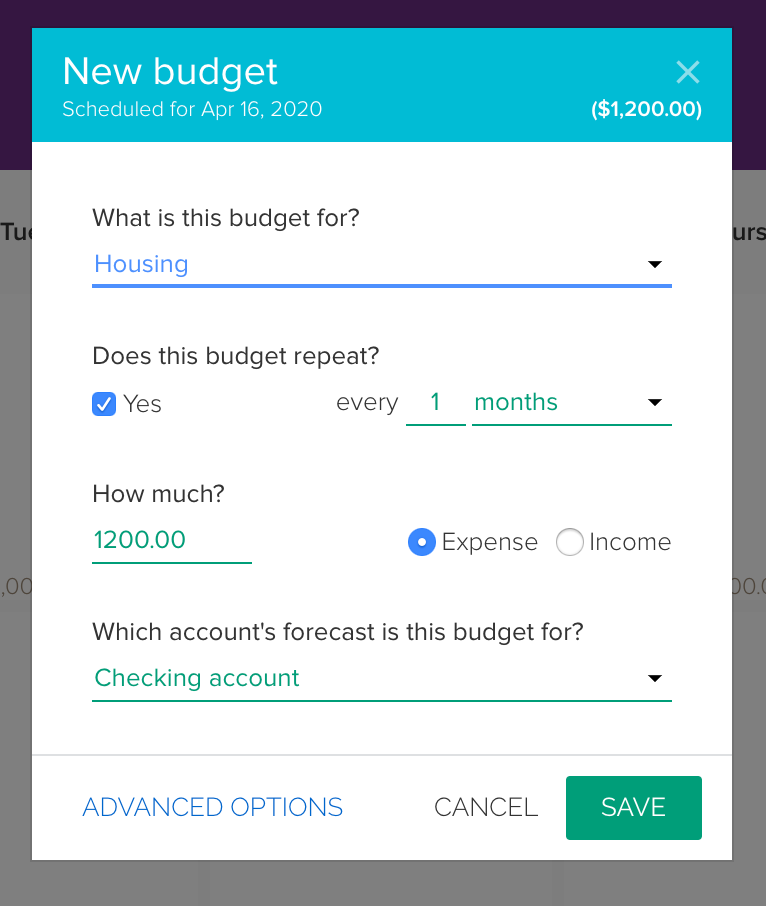
- On the Calendar, click on the date your housing payment is due and add an expense budget. Remember to select the appropriate repeat period and choose the ‘Expense’ option.
- Now add a few more budgets to cover the rest of your expenses. If you’re unsure of what to add, simply begin with your fixed bills/utilities. Then add an estimate of your food/groceries and transport costs. Finally, think about your entertainment/other luxuries. Stick to a few simple categories. We recommend no more than six.
- Now check out the Calendar to see how your future might look like. Making changes to your budgets is simple. You can edit a budget or simply delete a budget from the Calendar and start over.
Now you can see it, the future!
Congratulations! You've created a forecast. Now let's see where your money is actually going. All you need to do is group your spending. We call these expense categories and this will reveal where you can make a real impact to your future.