Get to know your spending

- local_offerPlan PocketSmith Free
- buildTask type Moderate
- listSteps 5
- timelapseTime required 15-30 minutes
- favoriteGrab a... Muffin or brioche
Can you say, hand-on-heart, that you know exactly where every cent you've spent has gone? It's true, most of us can't, because we don't keep tabs on every single transaction we make. However, having a clear picture of where your money goes is key to getting your budgets accurate. Here's where we can help.
PocketSmith will show where your money is going - all you need to do is group your spending. We call these expense categories and, together with some data from your bank, you’ll see your spending right in front of you. Meaning you can accurately compare your actual spending to your budgets and see how much money will be in your account for the next six months.
Step 1. Get your transactions from your bank
Your bank account holds a wealth of details about where your money is going. We can use that information to help so let’s share it with your PocketSmith account.
- Start by heading over to your online banking. Each online banking website will look different, however, most should provide an option to export your transactions.
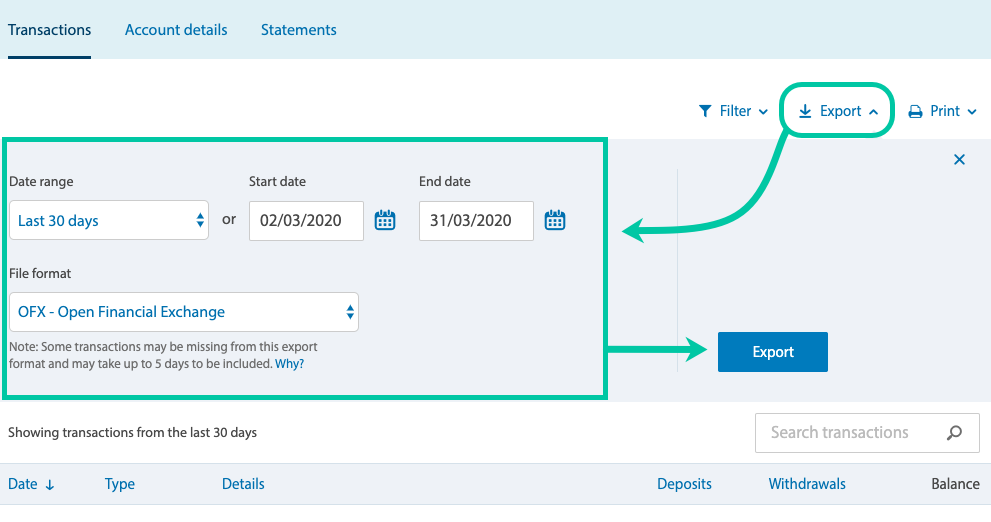
- Download the last three months of your history in any of these file types: OFX (recommended), QFX, QIF, or CSV.
- For more in-depth information on file types and exporting bank files, check out our handy guide to preparing your bank files & accepted file types.
Step 2. Add your transactions to PocketSmith
Let’s share that information with your PocketSmith account.
 Click on the instructions to change the picture.
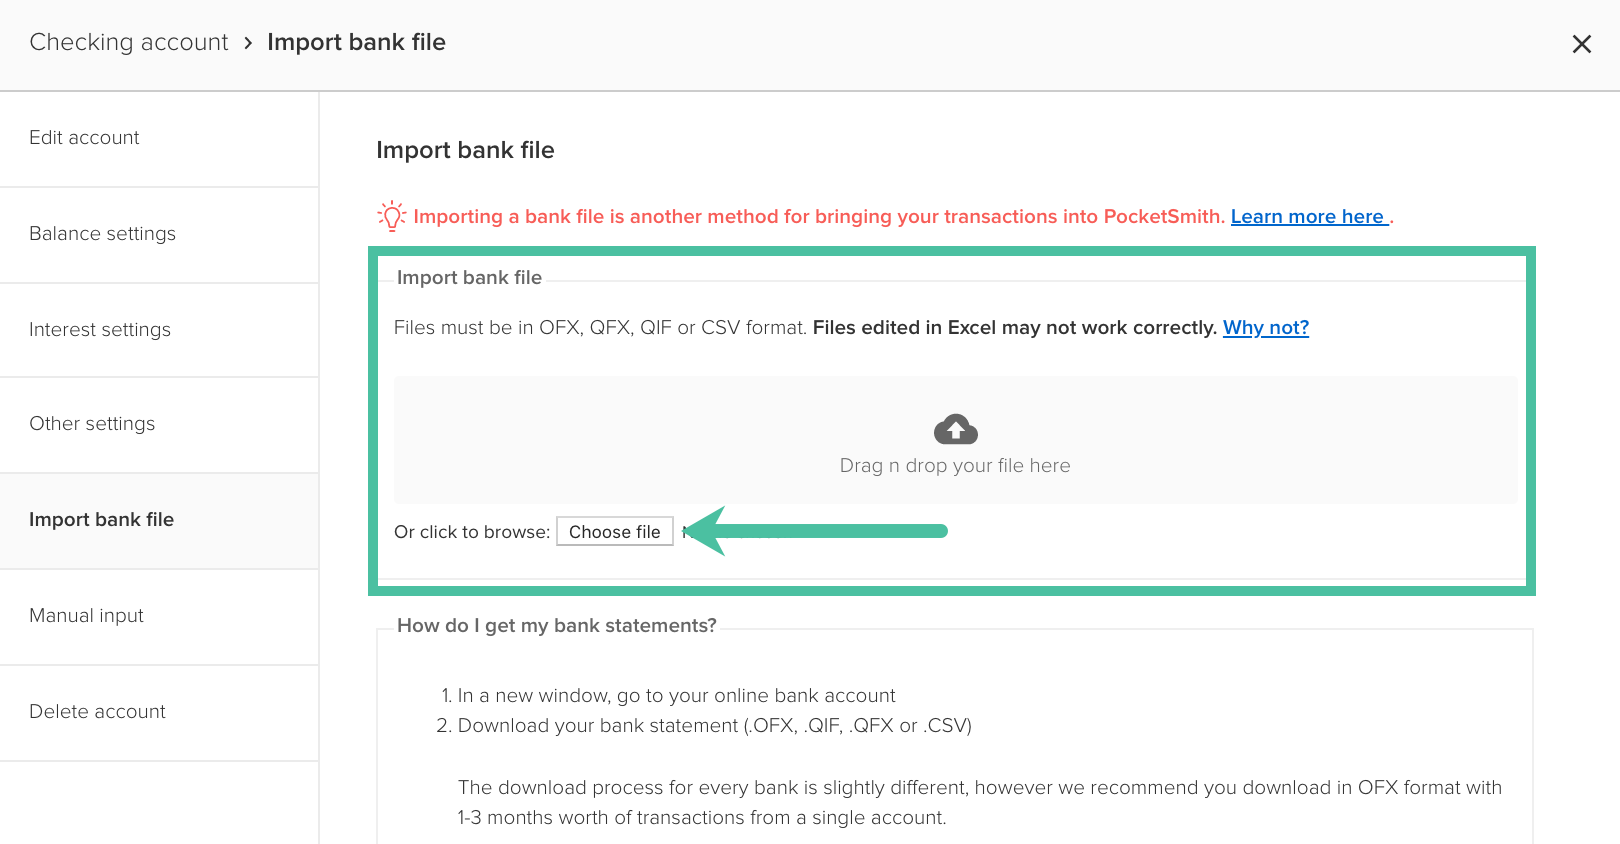
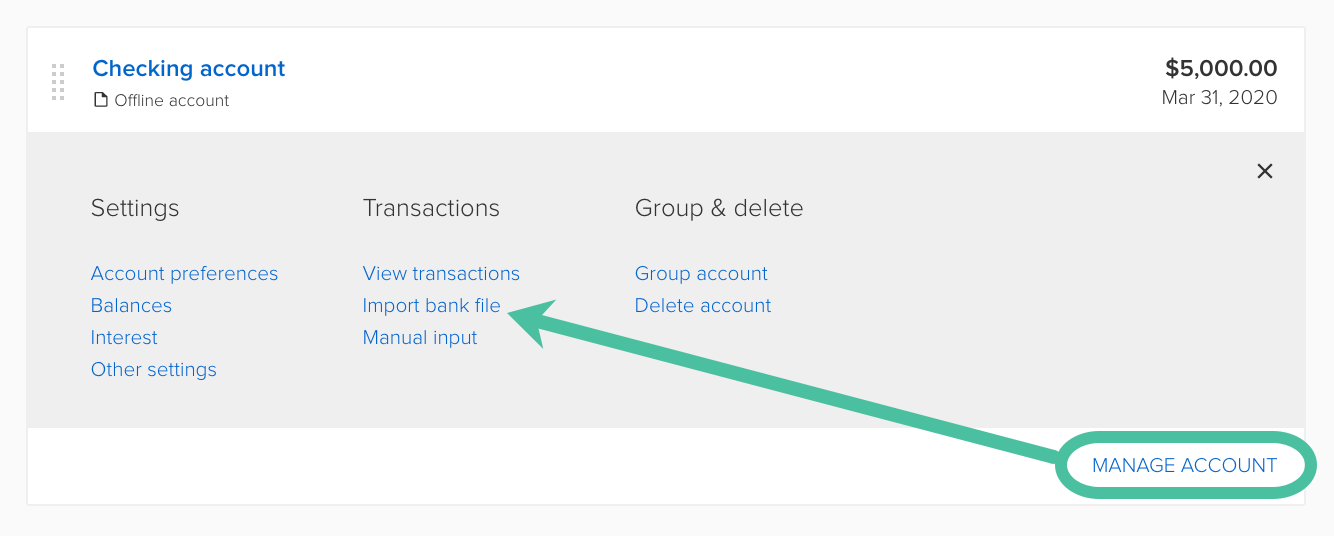
- To add your bank file, head over to Accounts > Account summary. Under your preferred account click on ‘Manage account’. You’ll see a range of options, in the middle column choose ‘Import bank file’.
- Add your bank file by dropping it in, or, clicking on ‘Choose file’ and selecting if from your computer. Once your file has been uploaded, click ‘OK’.
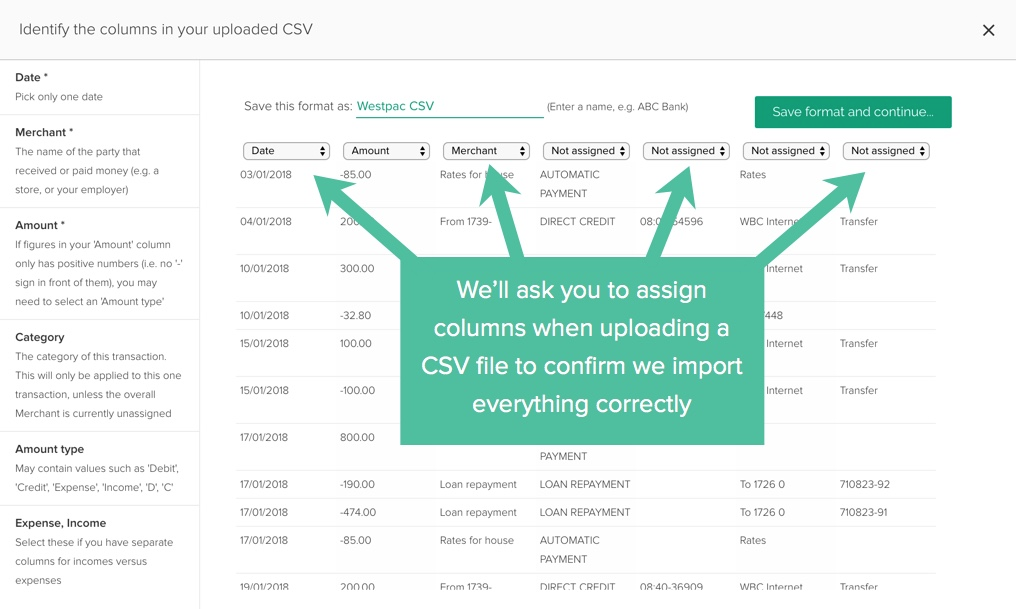
- If you’re using a CSV file, you’ll also need to tell PocketSmith which column has what information in it. Don’t worry, it’s easy and here’s a handy CSV file formats guide.
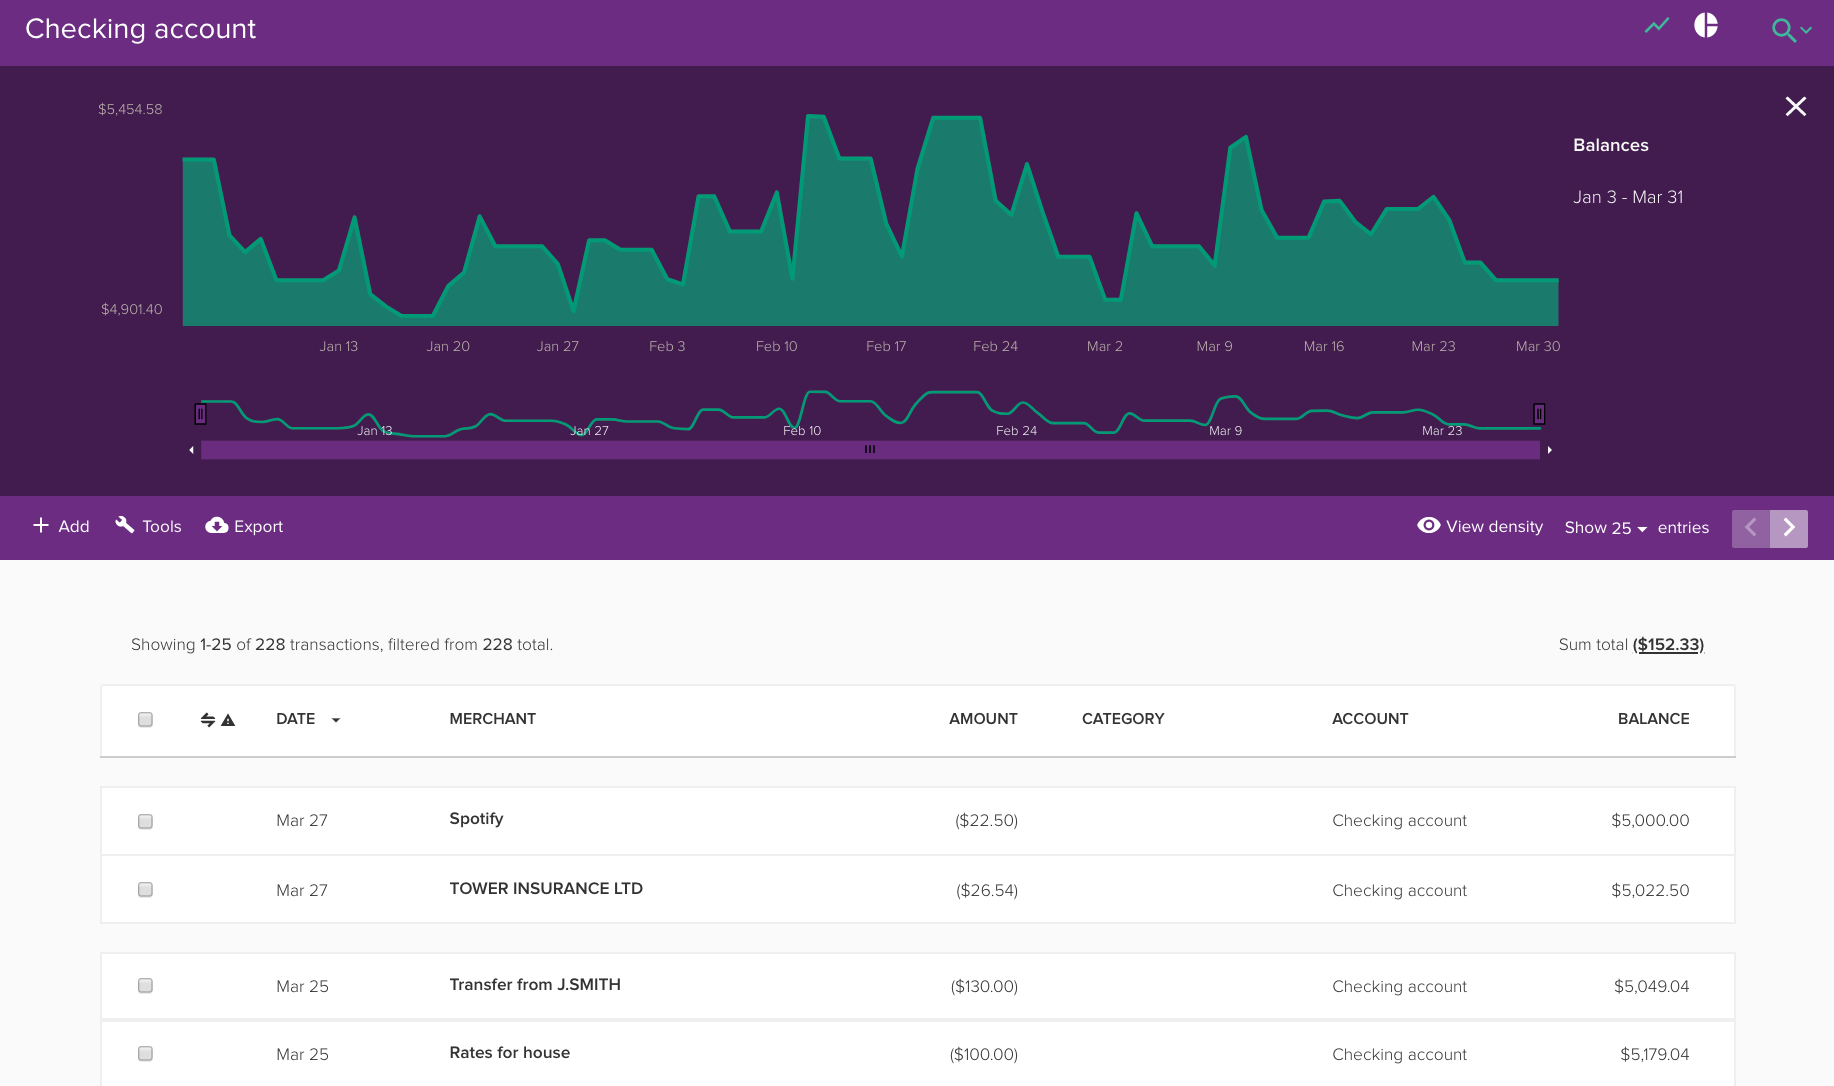
- Congratulations, your account is now populated. You can see a list of your transactions by heading over to Accounts > Transactions. You'll also find a handy graph of the balance history for this account.
Step 3. Group your spending
Now for the fun part. You’re going to group your spending into categories to see where your money goes. PocketSmith can help you find similar expenses with a simple click.
 Click on the instructions to change the picture.
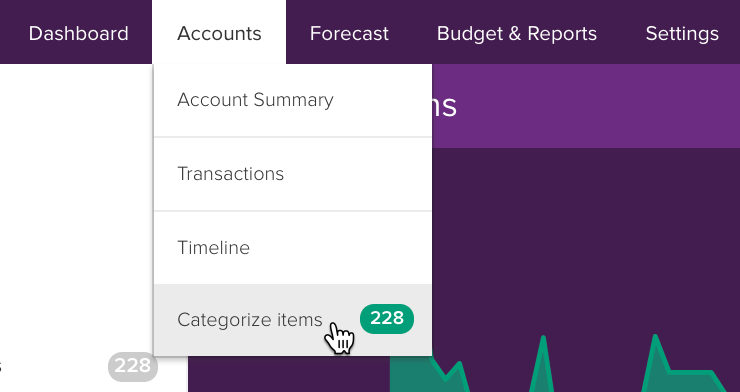
- Head over to Accounts > Categorize items. Before you click, you’ll notice the number of uncategorized items you have. Don’t worry if this number is big. With a few rules you’ll group most of them automatically.
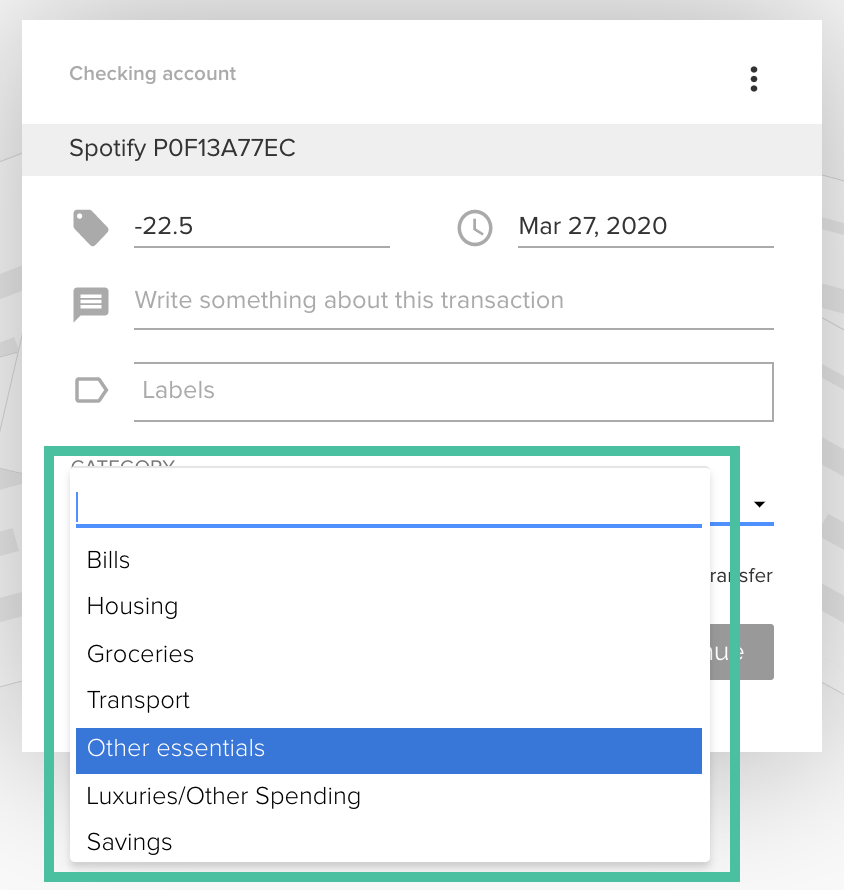
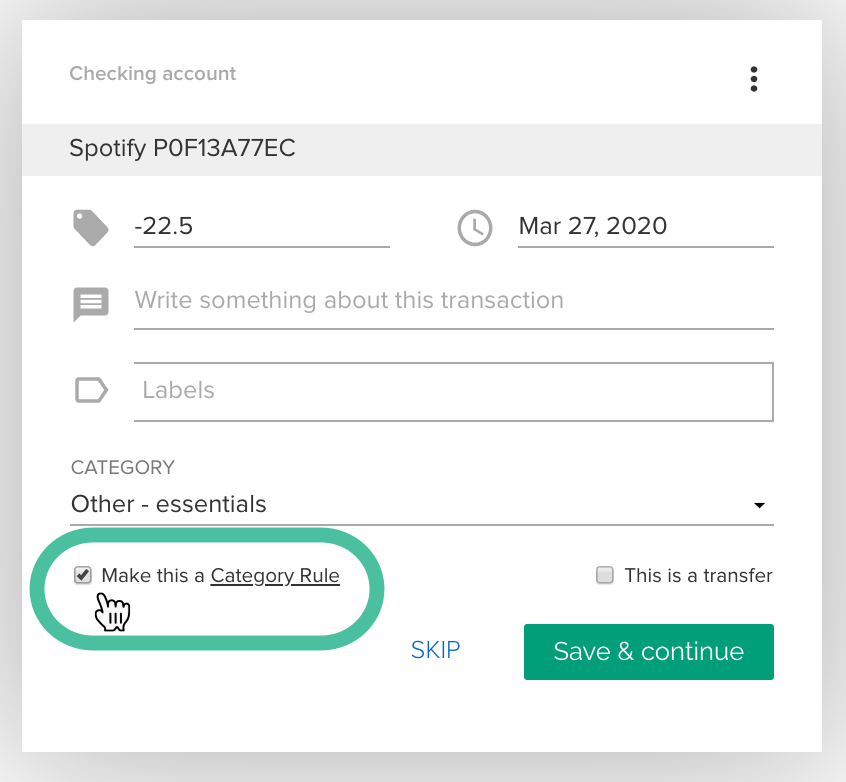
- Once on the page, you’ll find your transactions are each listed in a card with their details. Select the first one. Now group it by choosing an appropriate category in the Category drop-down list.
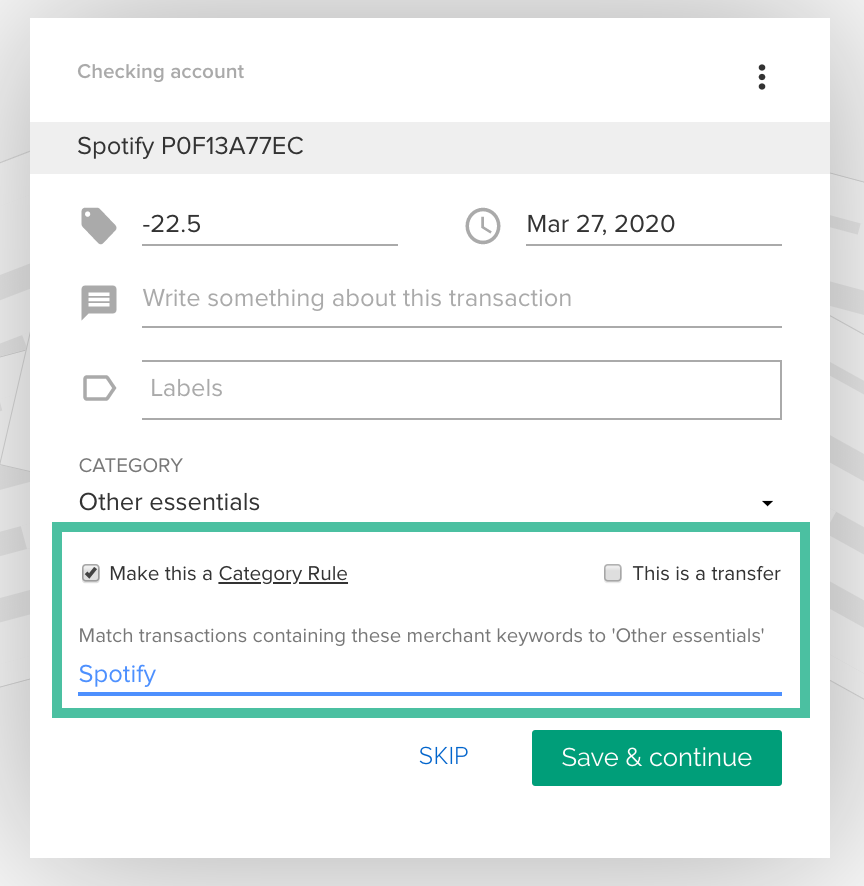
- Before you save, you can add all transactions from the same merchant to this category by selecting ‘Make this a category rule’. Every time PocketSmith sees a transaction from this source it will automatically be added to the category.
- In order for your rules to work correctly, you need to tidy up some of the transaction details. You’ll notice some of them have additional information. They’re timestamps or transaction numbers and can confuse your categories. For example, Spotify might have “Spotify P0F13A77EC”. Let’s change that to simply say “Spotify”. You’ll only need to do this once for each merchant and PocketSmith repeats it.
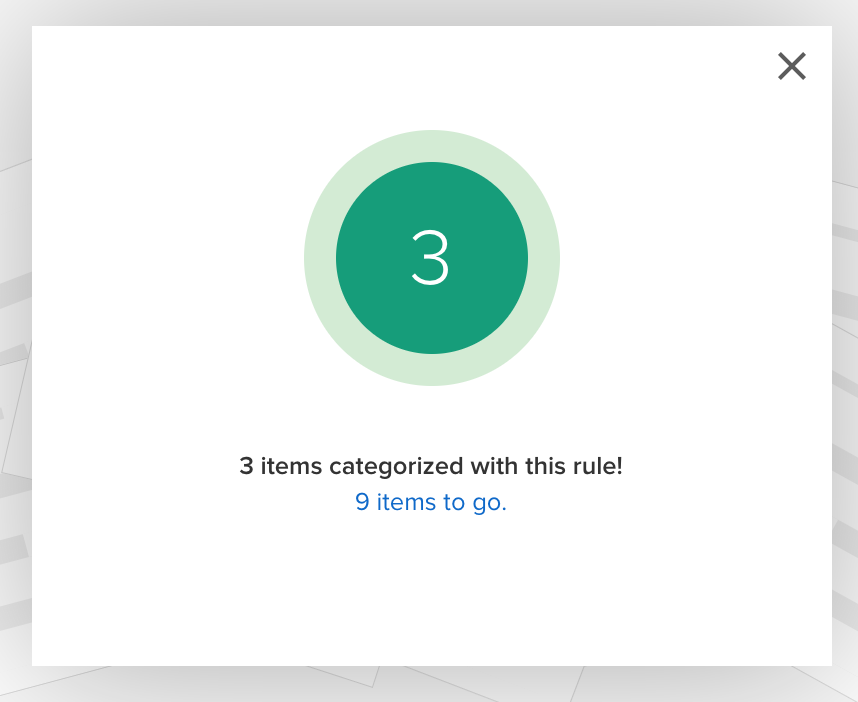
- ‘Click Save & continue’. If you created a category rule, any matching transactions will also have been categorized - ta-da! Continue categorizing until you’re all done.
Step 4. Review your spending
With your information categorized, you can now go explore your spending. PocketSmith makes it easy with visual dashboards and reports. Let’s take a closer look.
 Click on the instructions to change the picture.
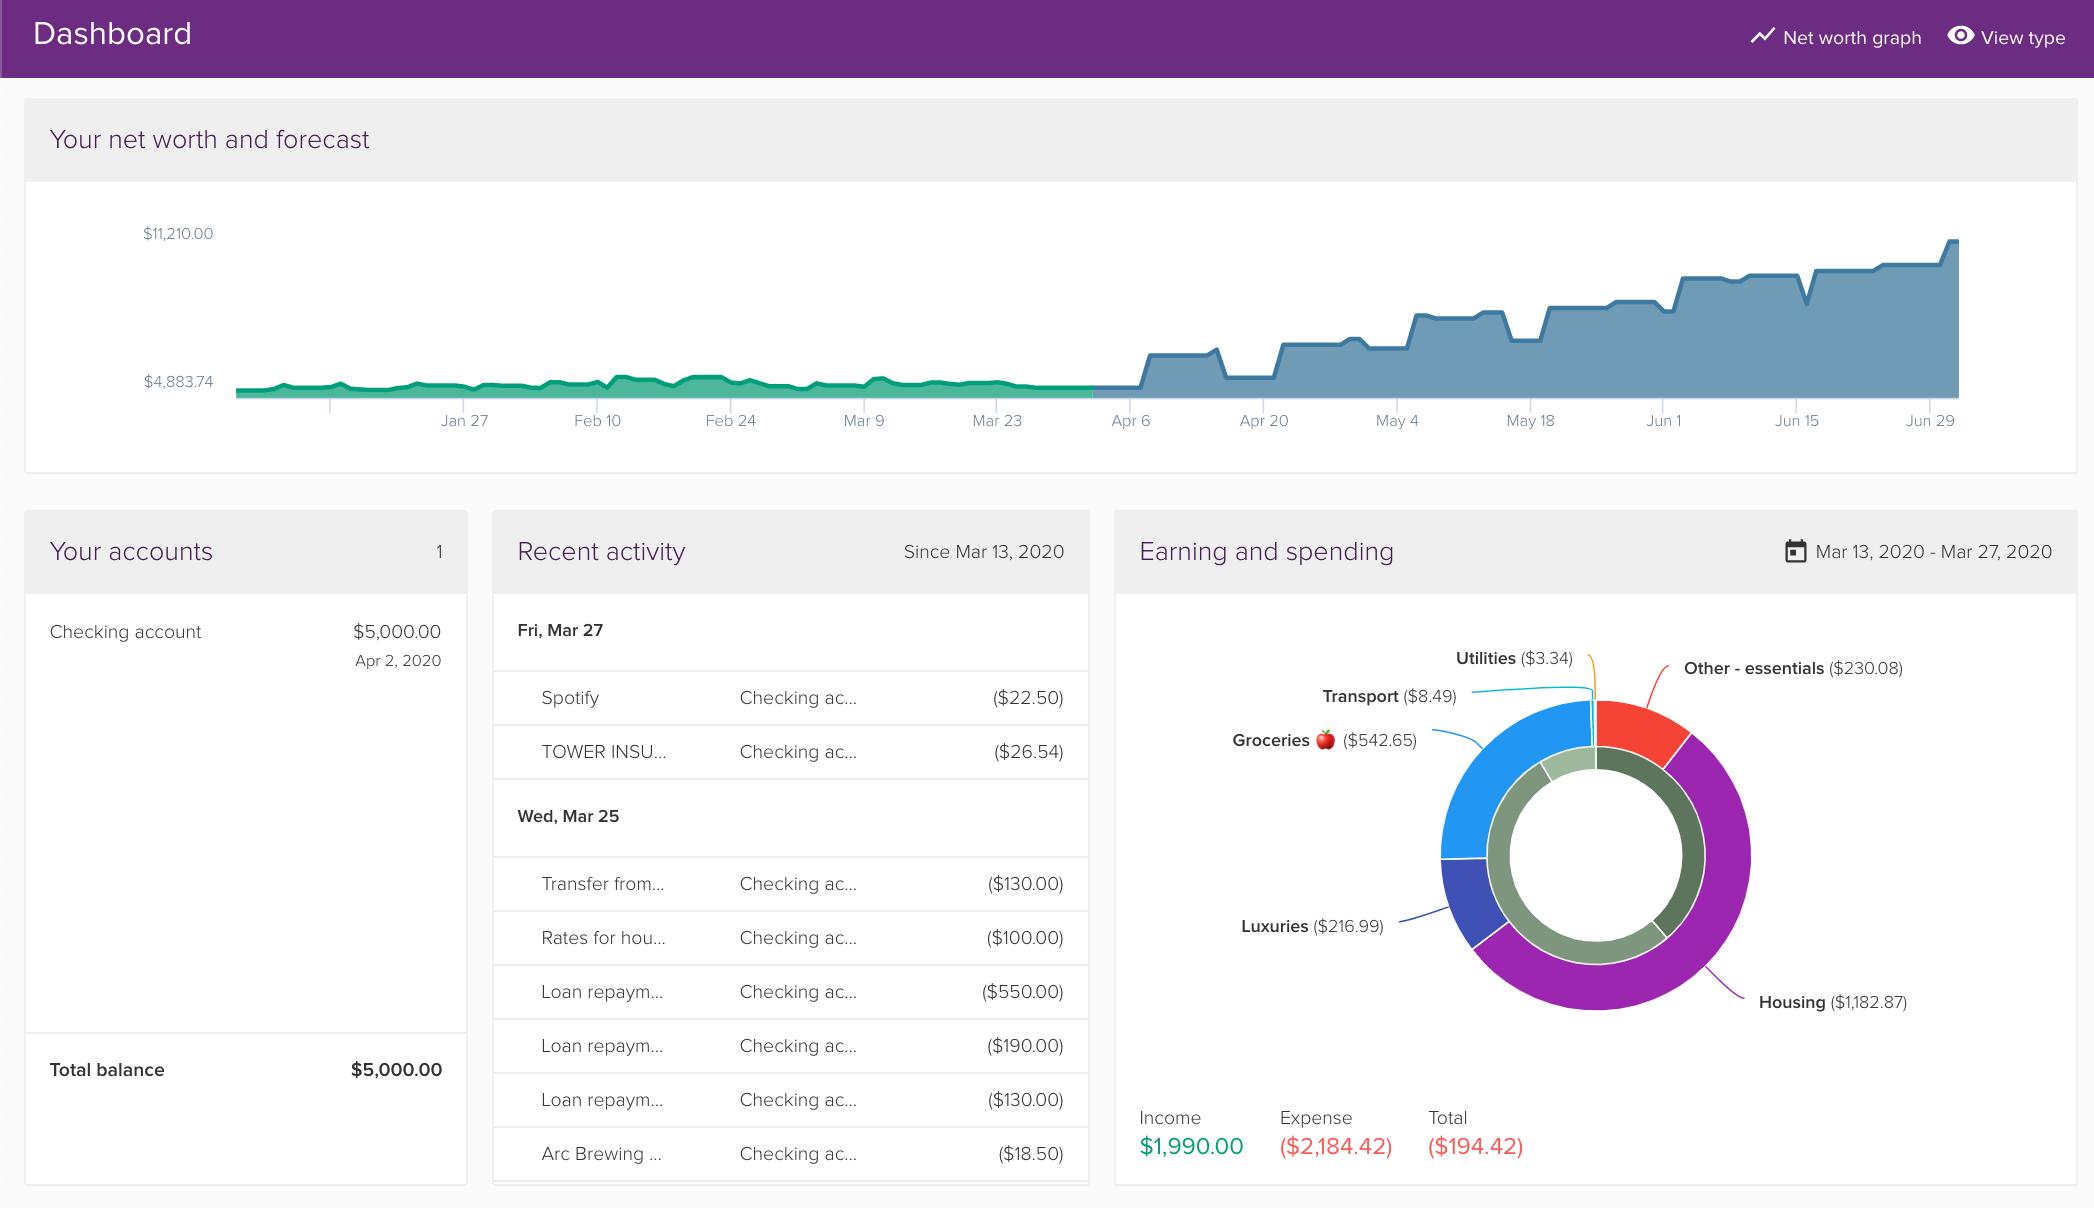
- Your Dashboard gives you a great overview of your money, accounts, earning and spending all in easy-to-view graphs and charts.
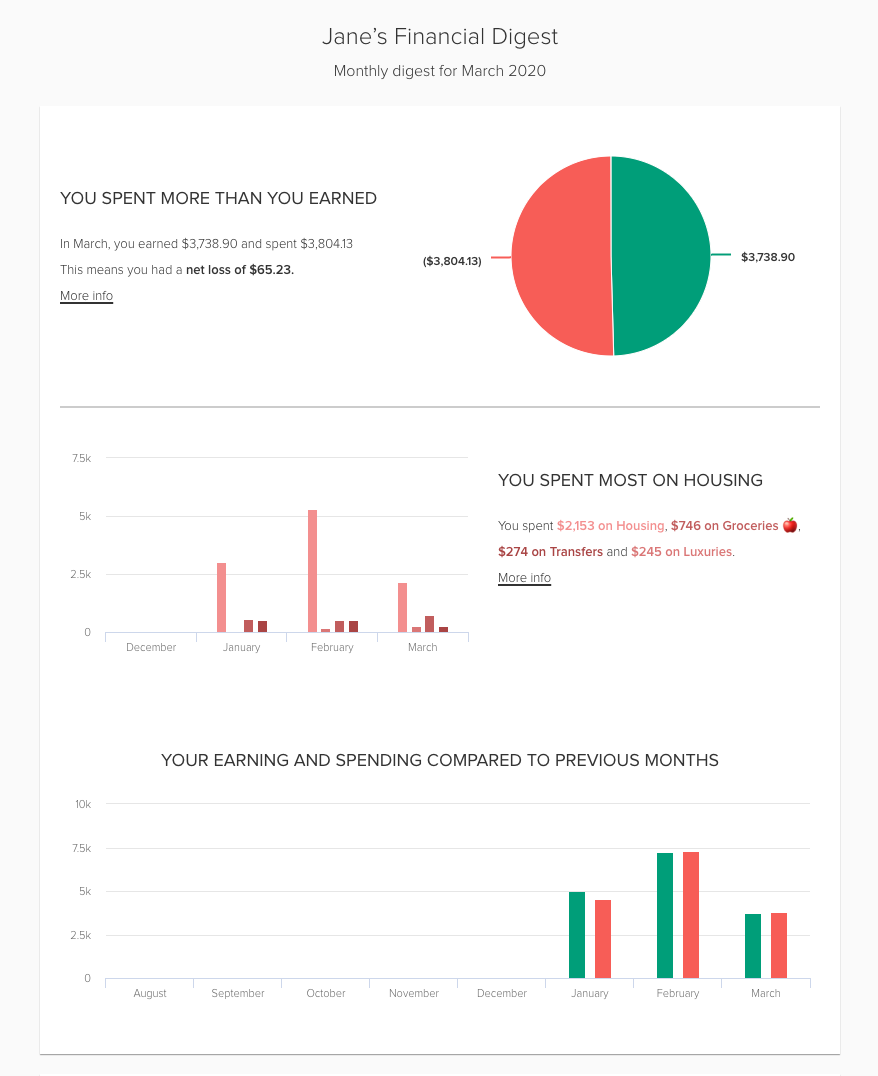
- Head over to Budget & reports > Digest to see little insights into your earning and spending over time. You can find details such as what you spent most on.
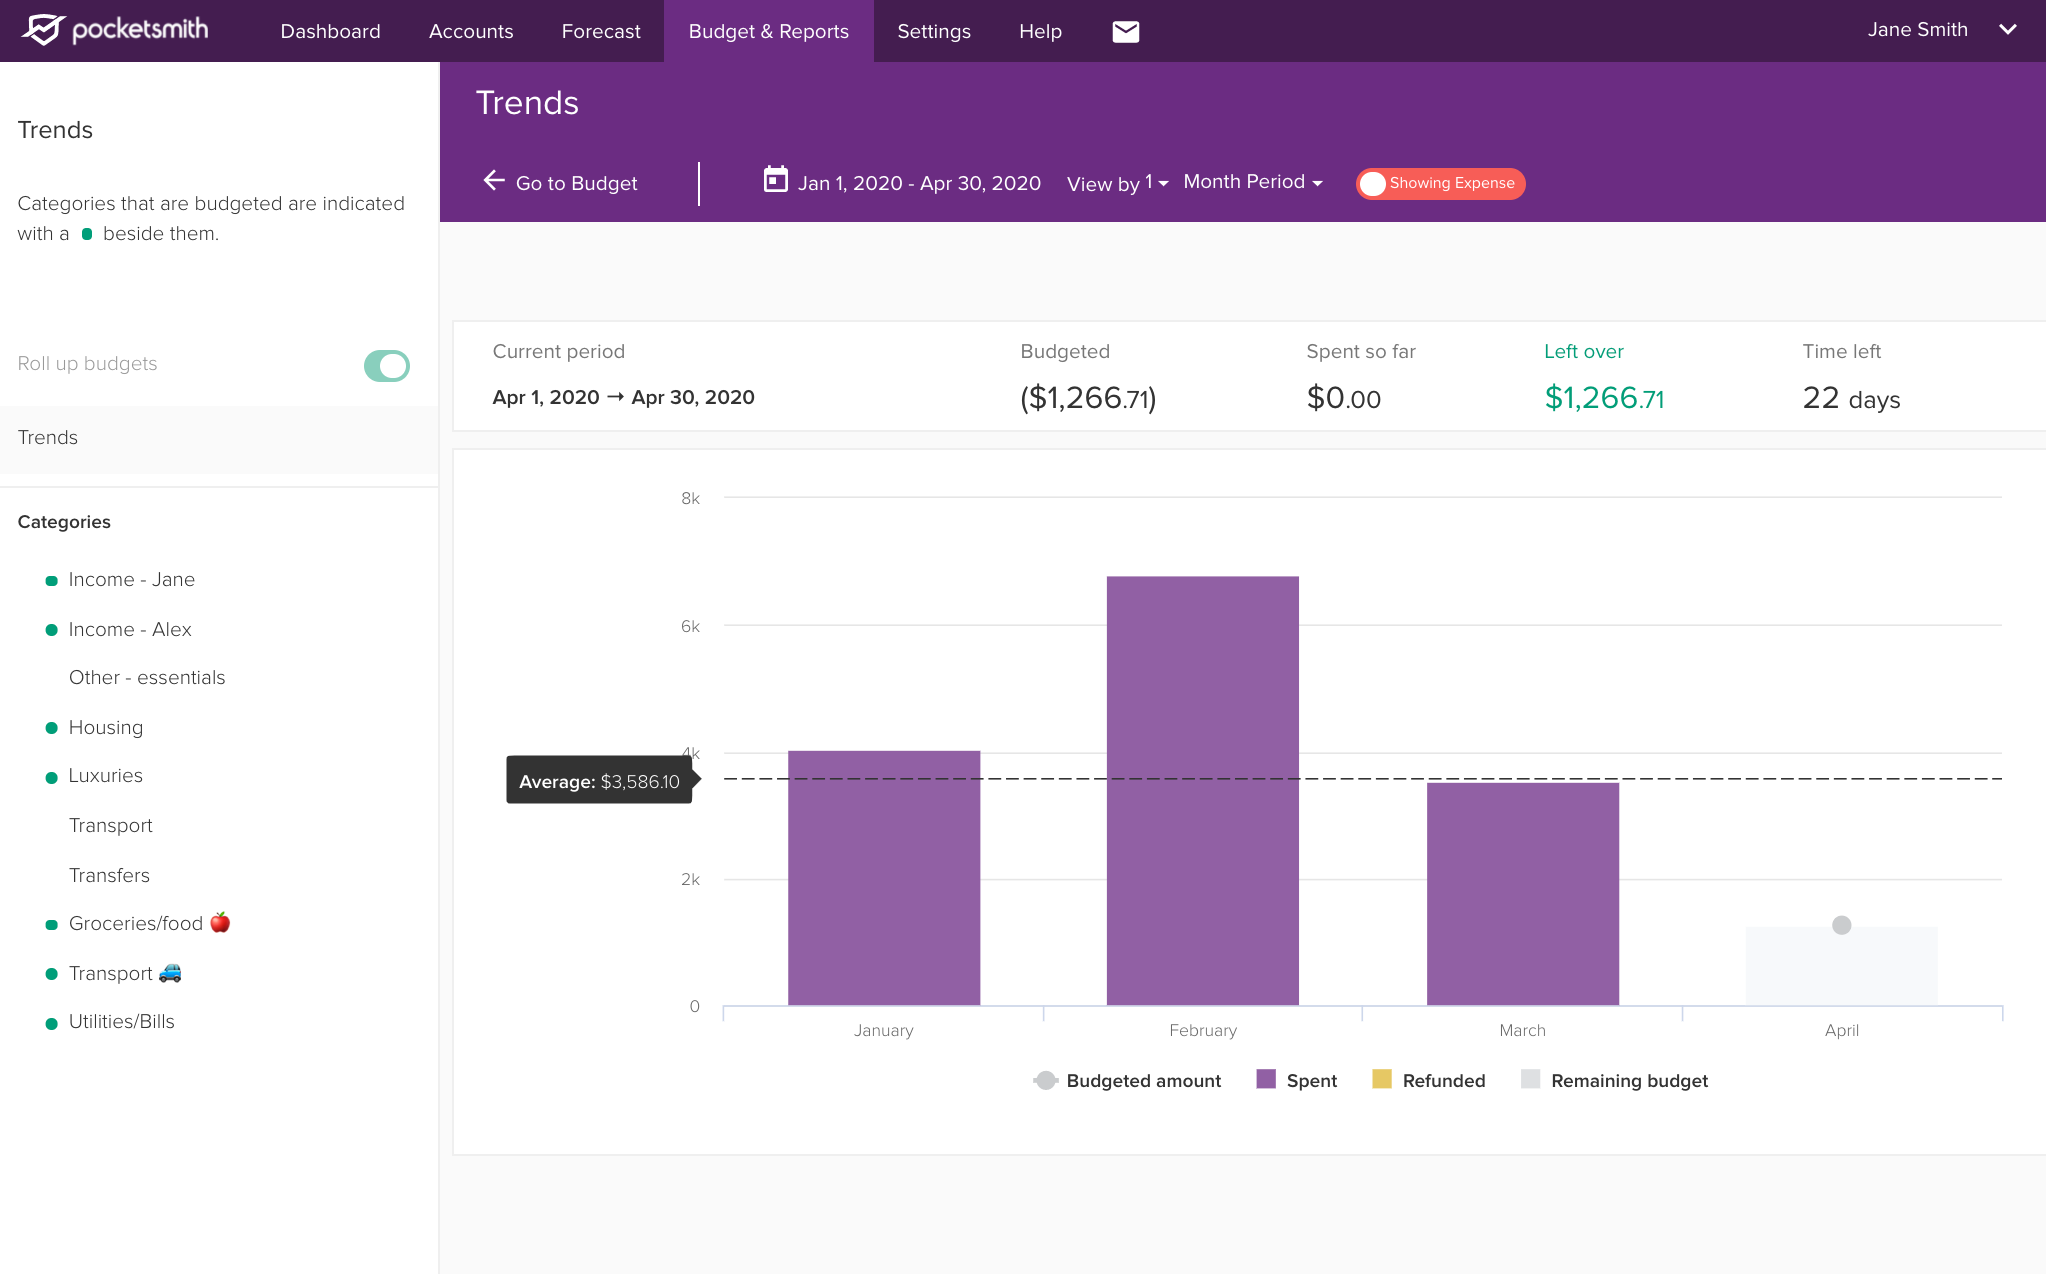
- Use Budget & reports > Trends to really dig into the history of your habits.
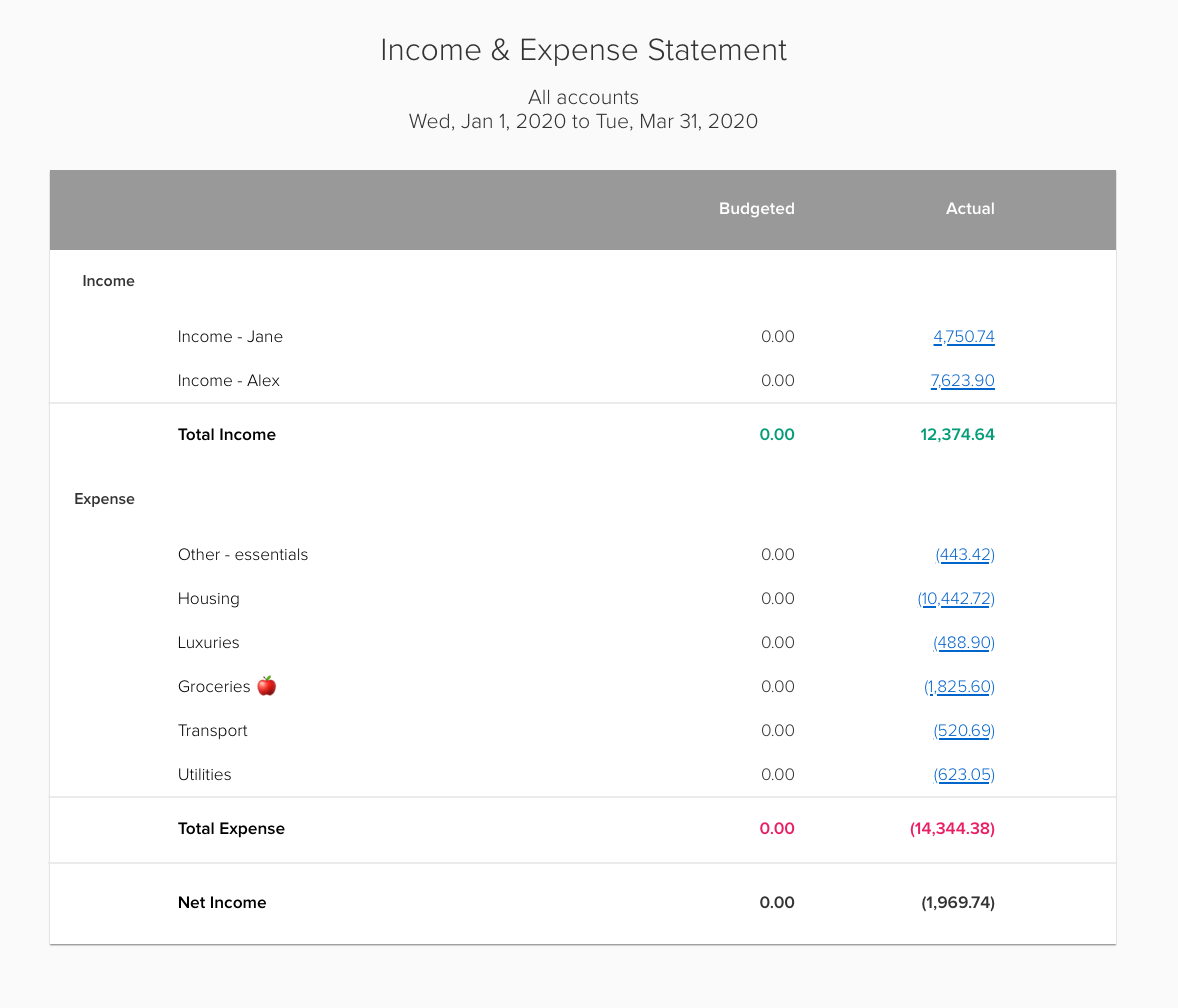
- Try the Income and Expense Statement under Budget & reports > Income & expense for a breakdown on your ins and outs by category.
Step 5. Check back in next week
You’ll need to set a reminder to check back and update your transactions. So you can check in on how your actual spending compares with your budgets. If you’d prefer to automatically add your transactions, then please take a look at our pricing plans.
 Click on the instructions to change the picture.
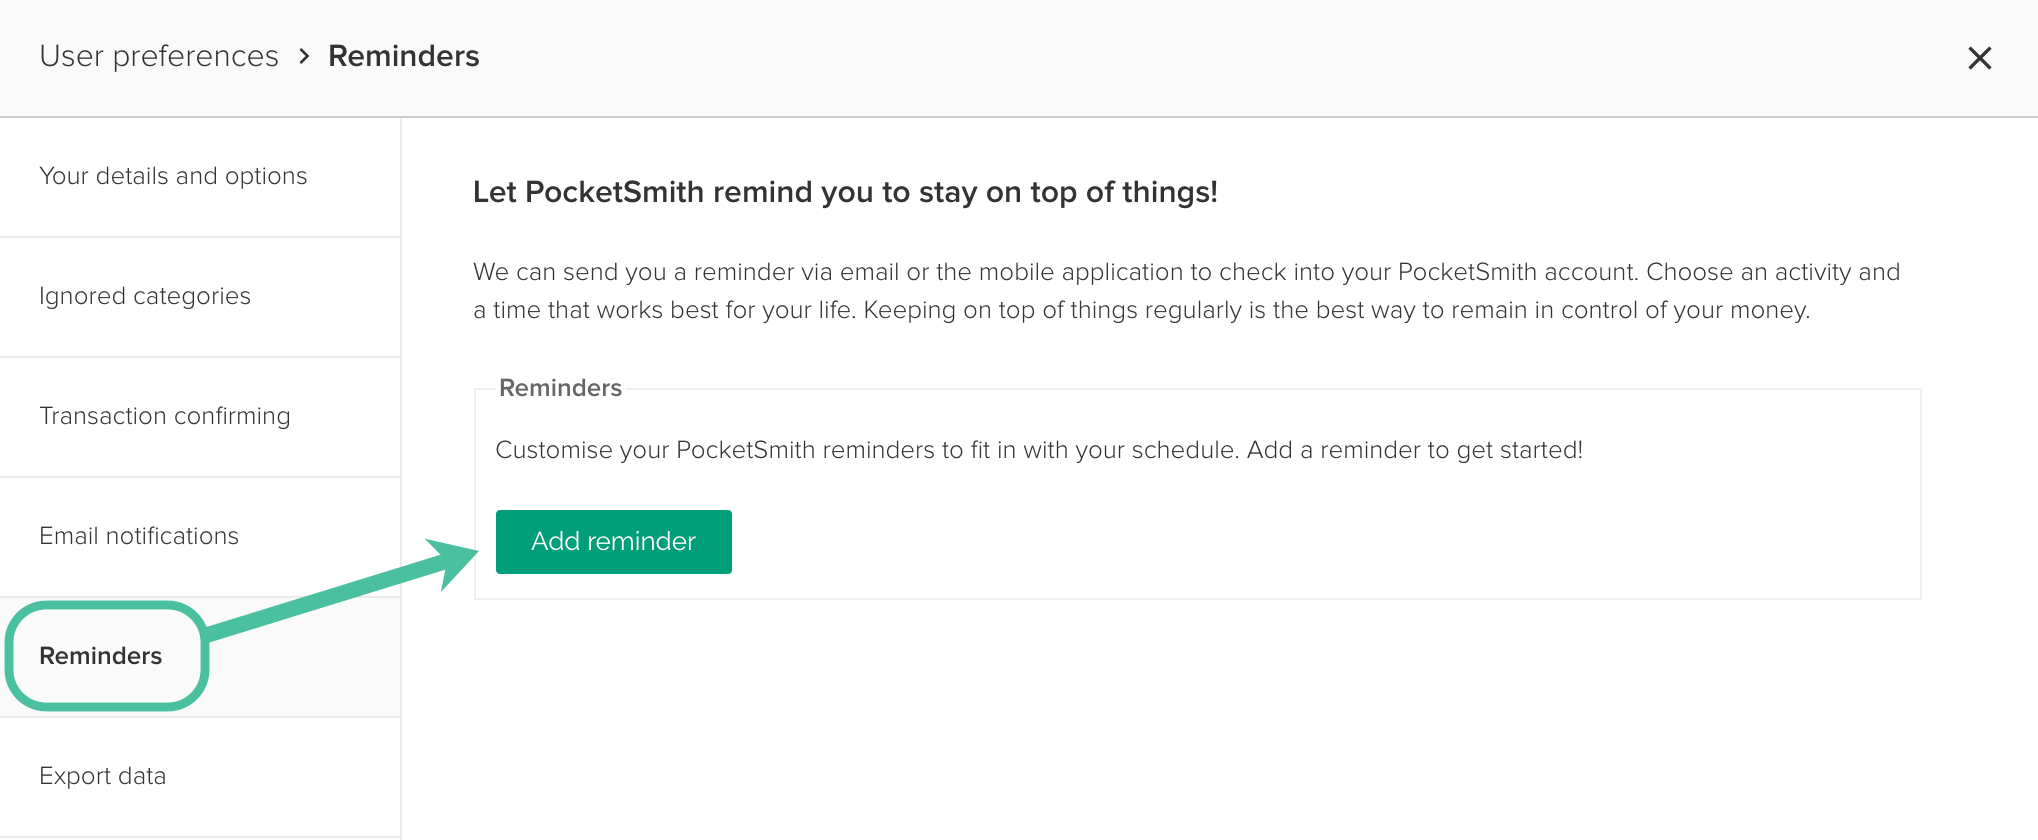
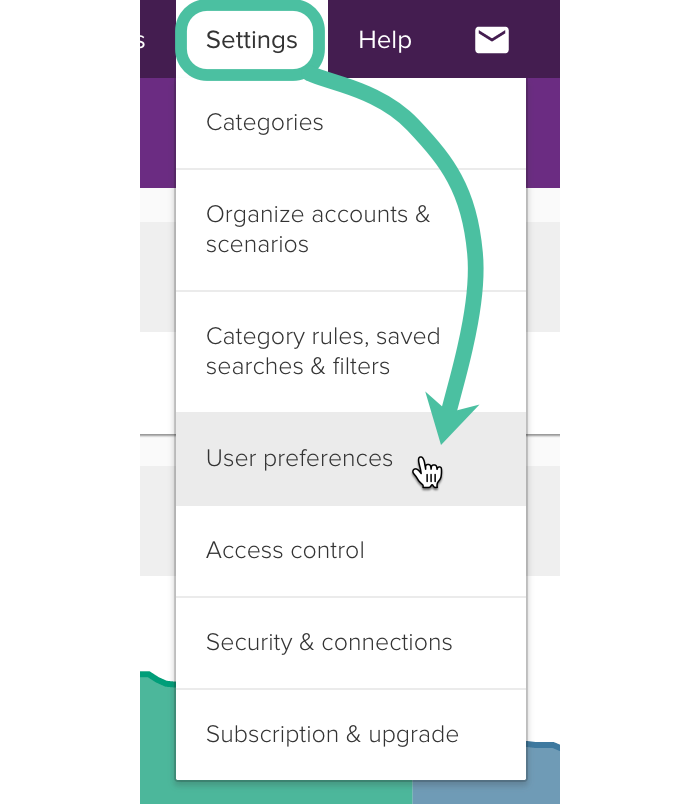
- To add a reminder, head to Settings > User preferences.
- Select ‘Reminders’ in the sidebar, then click ‘Add reminder’.
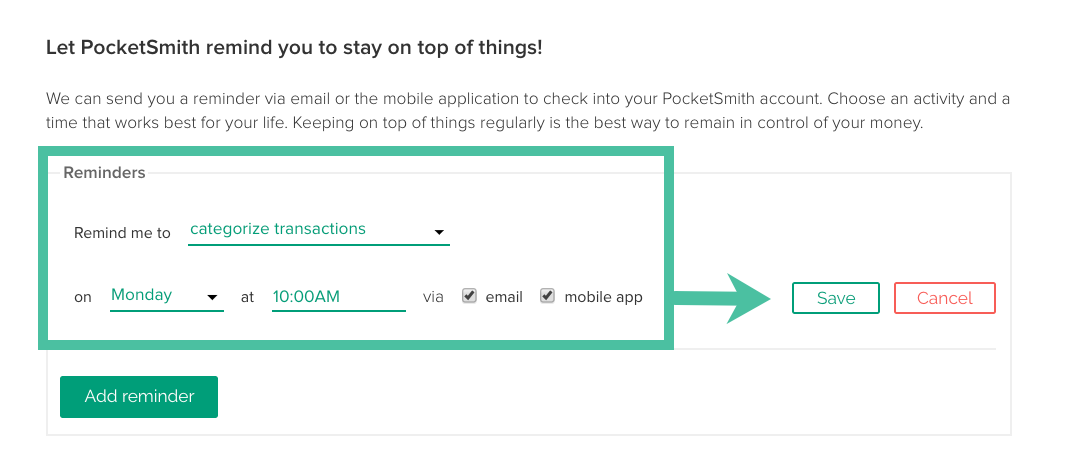
- Select the type of reminder you’d like to schedule. Then select your preferred day, time, and method of delivery for your reminder. Click ‘Save’ to confirm
- If you want to get reminder notifications on your mobile device, you will first need to enable notifications from within the PocketSmith mobile app. For more on setting up reminders see Scheduling Reminders in PocketSmith.
Now you’re in the know!
By the time you’ve got this far through our guide you’ll have a good handle on your spending. Have you found anything that you’d like to change? Perhaps you’d like to spend less on something and more on something else. In our next guide you can make small or large changes to your habits and see what your balance will look like over the next six months.